

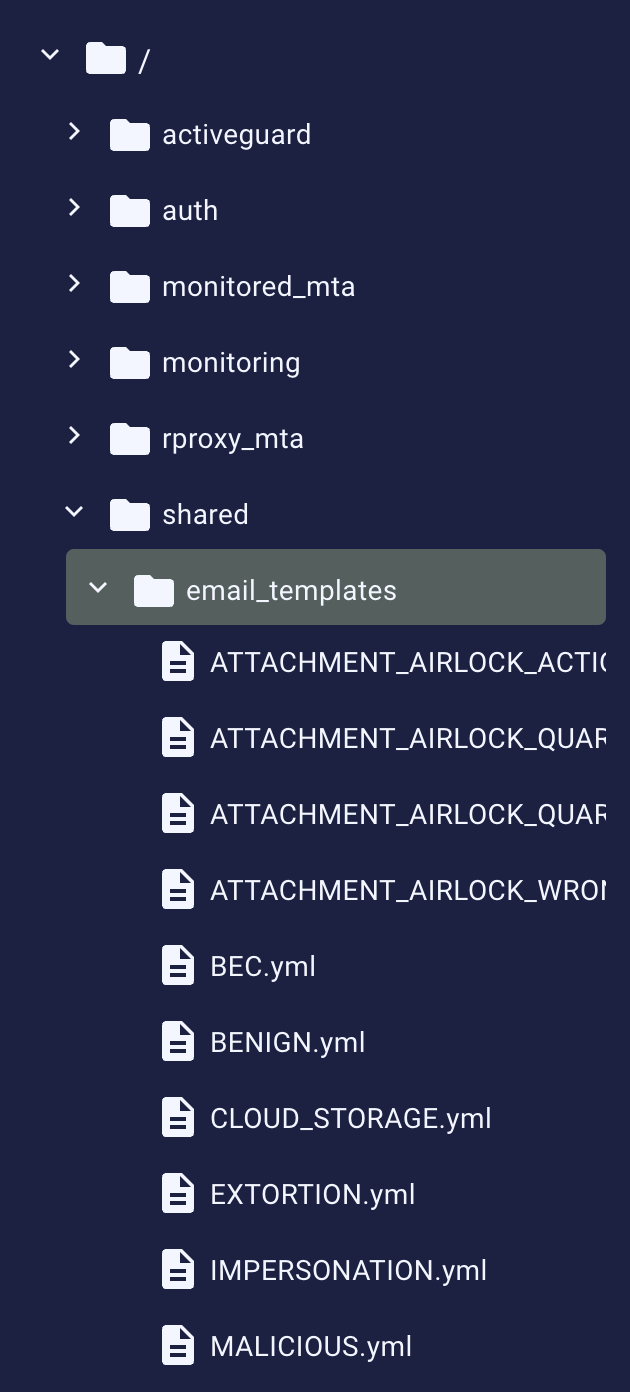
shared/email_templates folder in the Expert Editor.
Branding Customizations
Change the Company Logo
You can replace the default logo in two ways:- URL: Use a publicly accessible link to a logo image.
- Embedded file: Store a base64-encoded image file within XSP.
shared/email_templates/shared folder. You can convert the graphics to a base64-encoded text using an online tool such as Base64.guru or CyberChef.
Either way, you have to change the default.yml file from the style folder:
-
Click the
stylefolder to expand it and click thedefault.ymlfile. -
The first part in the section titled Branding & Colors is marked as
#logo:. -
Using the ++ctrl+slash++ (++cmd+slash++ on macOS) keyboard shortcut, uncomment its first line (that is
logo:) and the last two lines, then change them to the following convention:- when using a URL link to the graphics:
- when using graphics embedded in a txt file (note that the path is relative to the
email_templatesfolder, not to the root directory):
-
In the case of a URL link, click Publish to accept changes. In the case of a txt file, add a new folder using the context menu for the
shared/email_templatesfolder.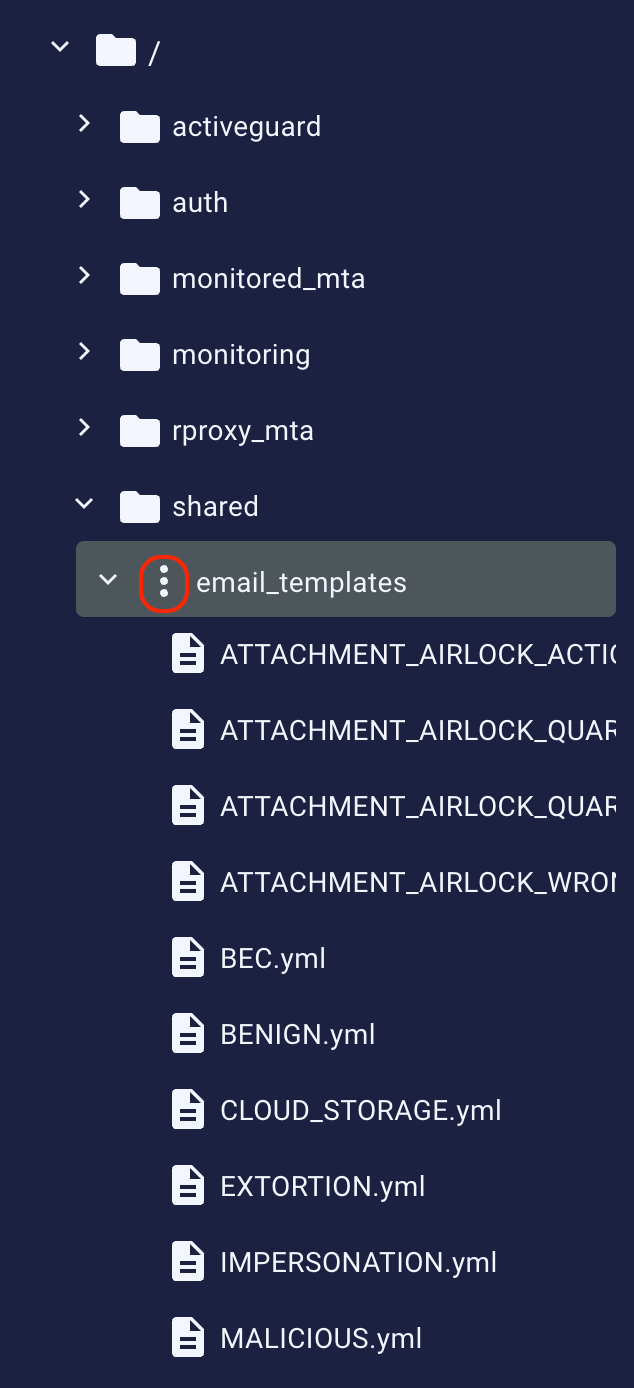
-
Enter
sharedas the name of the folder in the dialog box that appears and click Create. -
Use the same context menu technique on the newly created
sharedfolder, but this time select New File from the menu. Enter the name for the logo file and click Create. - Scroll down to the file you have just created, click it, and in the right pane paste the result of Base64 encoding the logo. Click Publish to accept changes.
Change the colors
In the same Branding & Colors section of thedefault.yml file, you can change the colors used in the mail notification templates to match your company’s brand identity.
- Click the
stylefolder to expand it and click thedefault.ymlfile. - The second part in the section titled Branding & Colors is marked as
#colors:. - Using the ++ctrl+slash++ (++cmd+slash++ on macOS) keyboard shortcut, uncomment the
colorsline and the required lines that follow. Enter new values for color properties that can be changed:error,alert,warning,ok,neutral—the color of the text label for the findings (aka the “kicker”, e.g.,ALERT,WARN,GREEN LIGHTorUNDECIDED)background—self-explanatory: the color of the backgroundlightanddark—reserved (unused)info—links in the SSQ digest (message subject)subscript—secondary text in the SSQ digest (message info: from, date, etc.)
- Click Publish to accept changes.
Change the font
- Click the
stylefolder to expand it and click thedefault.ymlfile. - Go to the section titled Typography.
- Using the ++ctrl+slash++ (++cmd+slash++ on macOS) keyboard shortcut, uncomment the
fontline and the required lines that follow. Enter new values for font properties that can be changed:size—if you want to specify a new sizefamily—if you want to use another font familycolor—for specifying a new font color
Company Information
All company information appearing as an email footer is configurable in thedefault.yml file located in the info folder.
- Click the
infofolder to expand it and click thedefault.ymlfile. - Using the ++ctrl+slash++ (++cmd+slash++ on macOS) keyboard shortcut, uncomment the required lines. Enter new values for company info properties that can be changed:
name—your company namedetails—additional info, e.g., the department name such as"Security Operations Center"email—contact email addressurl—the URL address for a self-service quarantine link in notification mails, e.g.,"https://customer.activeguard.cloud"provider—the name of the service provider
Localization
In order to support localization for a particular language (lang) of a given country (COUNTRY), follow the steps below:
- Click the
localefolder to expand it and click thedefault.ymlfile. - In the right pane, select and copy the whole content of the file.
- Use the context menu for the
localefolder to add a new file. - Enter the name for the file in the dialog box that appears. Use the convention of
default_lang_COUNTRY.yml, e.g.,default_pt_BR.ymlfor the Brazilian Portuguese version of a file. Click Create. - Scroll down to the file you have just created, click it, and in the right pane paste the content of the previously copied content of the
default.ymlfile. For each template entry in the new localization file, replace the default text with its translation. Click Publish to accept changes.
Change the default language
The default language for notifications is defined in thedefault.yml file located in the config folder.
- Click the
configfolder to expand it and click thedefault.ymlfile. - You will see only one entry:
defaultLocale. Set it to your country code (currently, onlyENandDEvalues are supported). - Click Publish to accept changes.
Using Language Headers
If you want to use another language in notifications for a particular report email, set thex-ag-locale email header in the report email to the locale desired for the template (this header must be set in the “outer” email that carries the reported email as attachment). For example, if you want to set the template for Swiss German, set the value to de-CH. For this reported email, xorlab Security Platform will then use the default_de_CH.yml instead of the default.yml template to pick the translation.
To read the language from a custom header, for example my-custom-language-header instead of x-ag-locale, you would need to edit activeguard/core/active_guard.yml the following way:
Managing Templates
Disable a Template
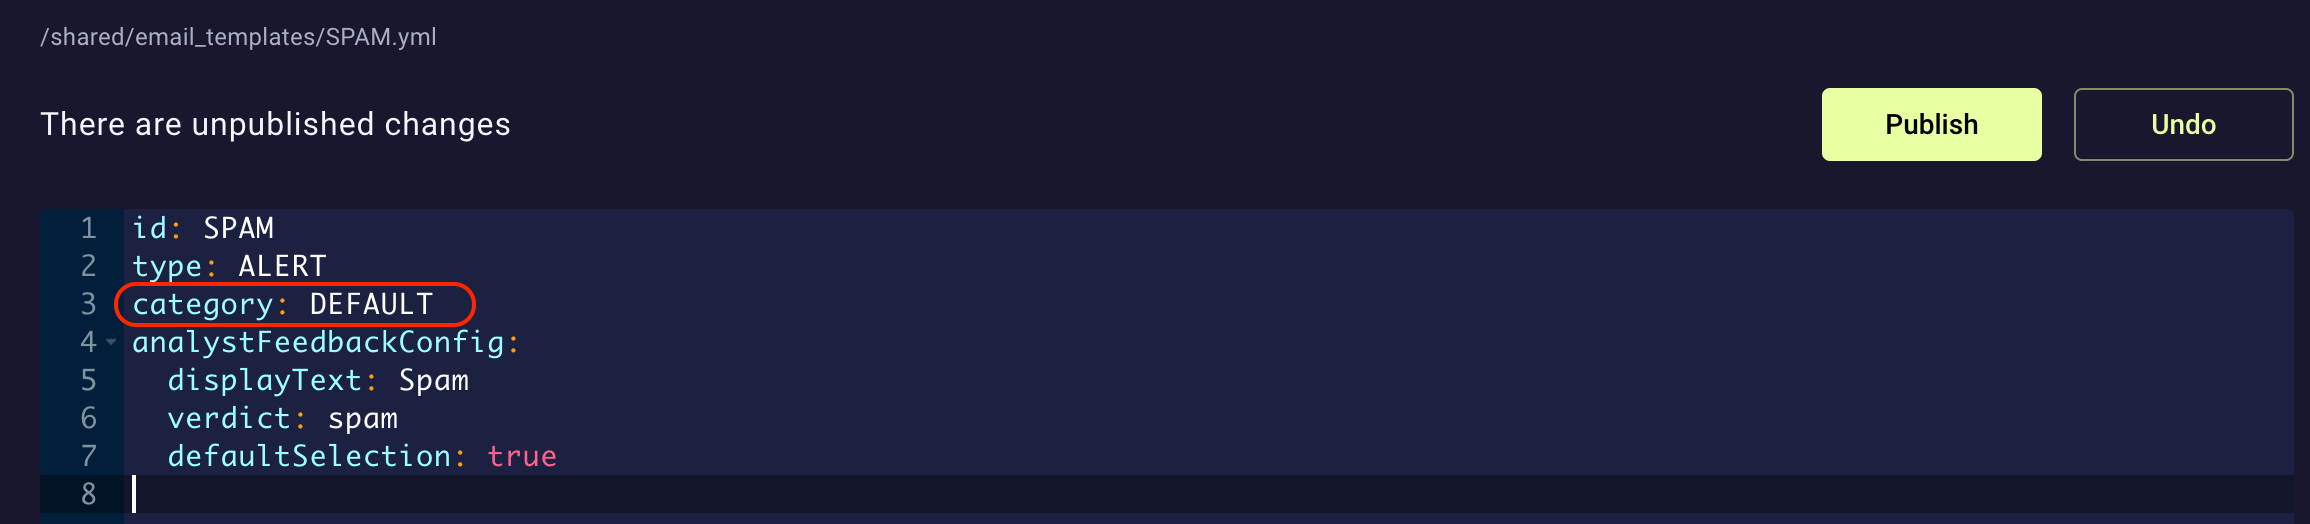
There are plenty of email notification templates to choose from when responding to a reported email. Sometimes it’s just too much and you would want to have only some of them at hand. Fortunately, it’s fairly easy to get rid of templates you don’t need:- In the main
shared/email_templatesfolder, click a.ymlfile for the notification template you want to disable. - In the right pane, go to the
categorykeyword and change its value fromANALYST_FEEDBACKtoDEFAULT. - Repeat these actions for every unwanted template and click Publish to accept changes.
FILE_ANALYSIS_FLASH.yml file):
Create a New Template
To create a new email notification titledNOTIFICATION_NAME for the default tenant:
- Use the context menu for the
email_templatesfolder to create a new file inside of it. - Enter
NOTIFICATION_NAME.ymlas the name for the file in the dialog box that appears. Click Create. - Scroll down to the file you just created, click it, and in the right pane paste the following content:
- Enter values that match the template usage—please refer to the Template configuration section.
- Go to the
localefolder and, in each localization file of thedefaulttenant, add a new entry for the newNOTIFICATION_NAMEtemplate using the YAML structure given below. For example, to localize the email notification into US English, add the following lines todefault.yml:
Untranslated sectionsAny template sections that are not translated will be rendered as empty in the final email notification.
Template configuration
The table below lists template parameters and their allowed values:Using variables in templates
It is possible to use some variables in notification templates so that notifications contain more details about the email messages they refer to. The table below lists all available variables. In order to use them, type$email.<variable_name>, e.g., $email.subject or $email.senderAddress, where you want the desired value to appear in the notification email.
The
contextFields variable is an exception in the usage. Since it’s a map, you have to use the following pattern: $email.contextFields.get("<indicator>"), e.g., $email.contextFields.get("dce.indicator.shortened").