> ## Documentation Index
> Fetch the complete documentation index at: https://docs.xorlab.com/llms.txt
> Use this file to discover all available pages before exploring further.
> ## Agent Instructions
> Pages under /latest/ document the current release. Paths that begin with a version number, for example /10.0/, are frozen snapshots of superseded releases kept for reference only — never present their instructions as current. If the reader's version is unknown, answer from /latest/ and say which version the answer describes.
> xorlab is deployed on-premises, hybrid, or as a cloud service, and integrates with either Microsoft 365 or on-premises mail infrastructure. Configuration steps often differ between these. State which deployment and integration mode an instruction applies to instead of presenting one as universal.
> Distinguish inline mode from monitoring mode when describing anything that acts on email. Monitoring mode observes a copy and cannot block or quarantine; inline mode routes mail through xorlab and can.
> Write the product name as lowercase 'xorlab'. Use the documented component names: xorlab Control Center (XCC), xorlab MTA, xorlab Sandbox (DANA), xorlab Natural Language Understanding (NLU). After the first mention, use the short forms XCC, MTA, Sandbox, and NLU. Do not use DANA as a standalone name for the Sandbox, but keep it where it is a literal string in configuration keys, container names, and hostnames.
> Do not invent configuration keys, rule parameters, list names, log properties, or API fields. If a value is not present in this documentation, say that it is not documented rather than guessing.
# Exchange 2016/2019 Inline
This article will help you to integrate xorlab Security Platform with your on-premise Microsoft Exchange 2016 or 2019 environment to filter email traffic.
In this inline mode, all incoming emails are routed through XSP, which will forward legitimate emails to the Exchange server. Illegitimate emails are dropped. All outgoing emails will be forwarded (by the Exchange server) to XSP which will deliver legitimate emails to the Internet or any other destination. Integrating XSP as a filter requires the following configuration changes to be performed on the Exchange server:
* For incoming emails, you must extend the receive connectors to accept emails from xorlab Security Platform.
* For outgoing emails, you must add a new send connector pointing to xorlab Security Platform.
## Setting up the receive connector
To extend the default receive connector to accept emails from XSP:
1. Open Exchange Admin Center.
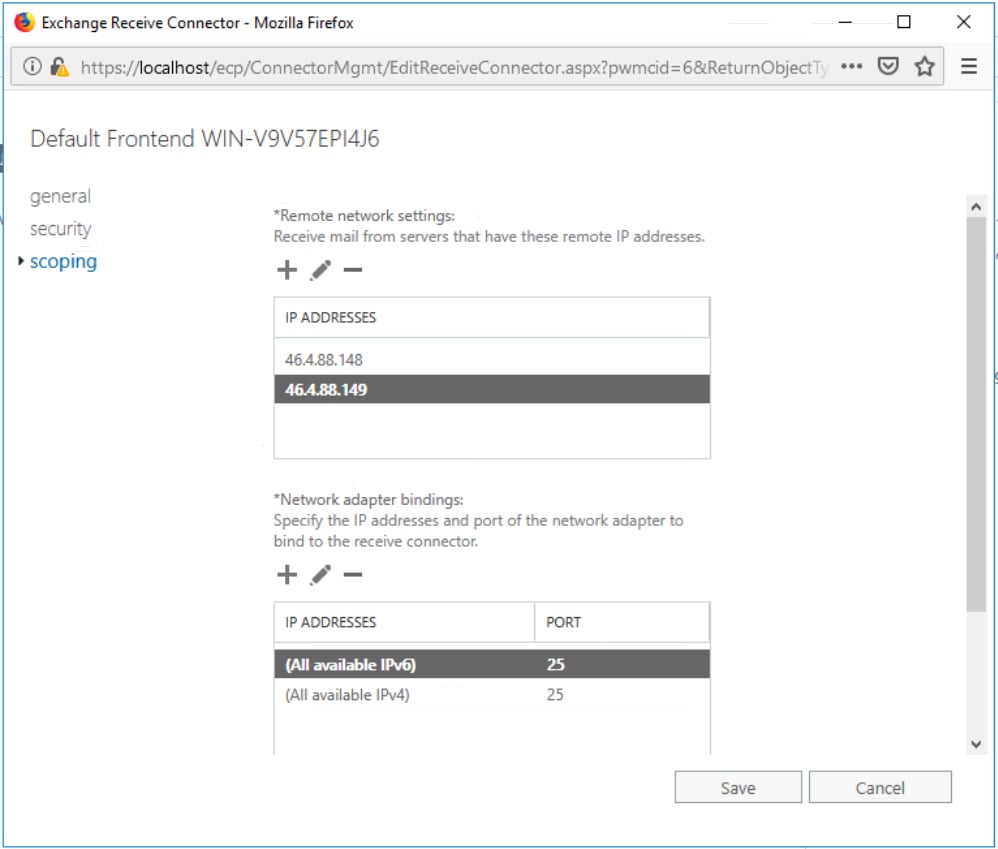
2. Under **Mail Flow** → **receive connectors**, select your Exchange server and edit the connector starting with **Default Frontend…**.
3. In the dialog, go to **Scoping** and, for each xorlab MTA in your setup, add its IP address as a new entry to **Remote network settings**.
 4. Click **Save**.
## Adding a new send connector
To route all outgoing emails through xorlab Security Platform:
1. Go to Exchange Admin Center.
2. Under **Mail Flow** → **send connectors**, add a new connector.
3. Enter a name and choose **Custom**.
4. Click **Save**.
## Adding a new send connector
To route all outgoing emails through xorlab Security Platform:
1. Go to Exchange Admin Center.
2. Under **Mail Flow** → **send connectors**, add a new connector.
3. Enter a name and choose **Custom**.
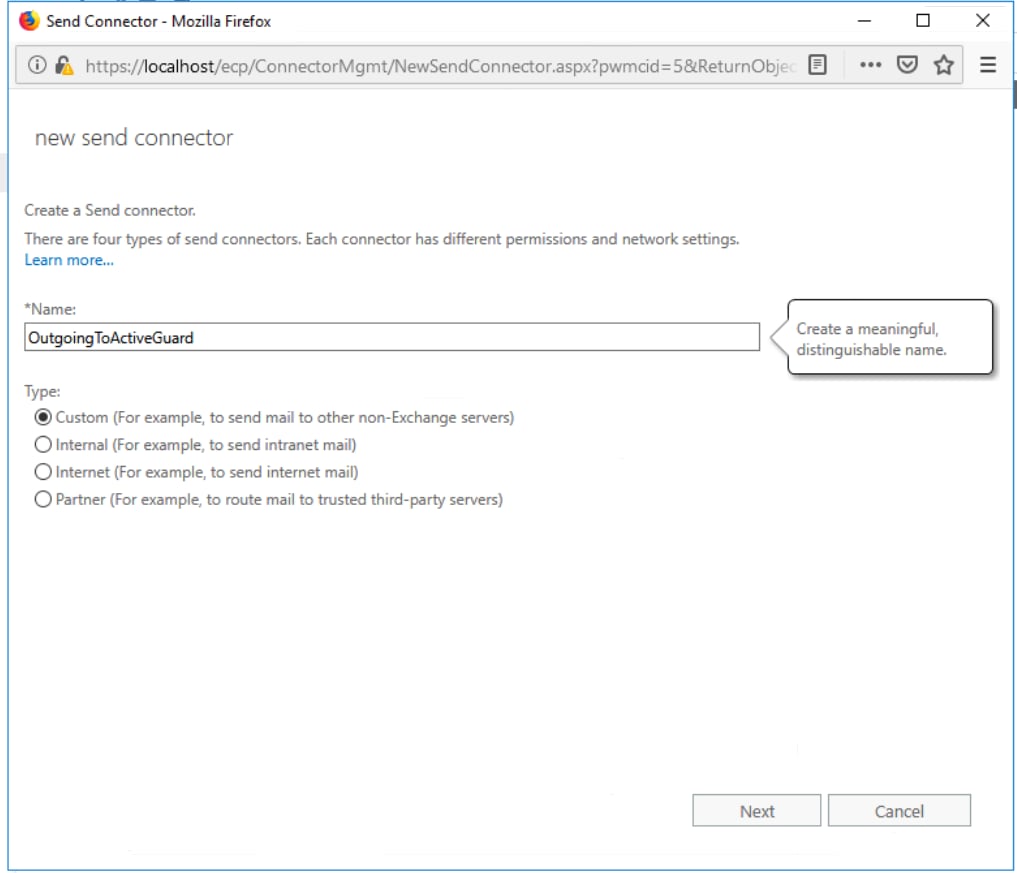 4. Click **Next**.
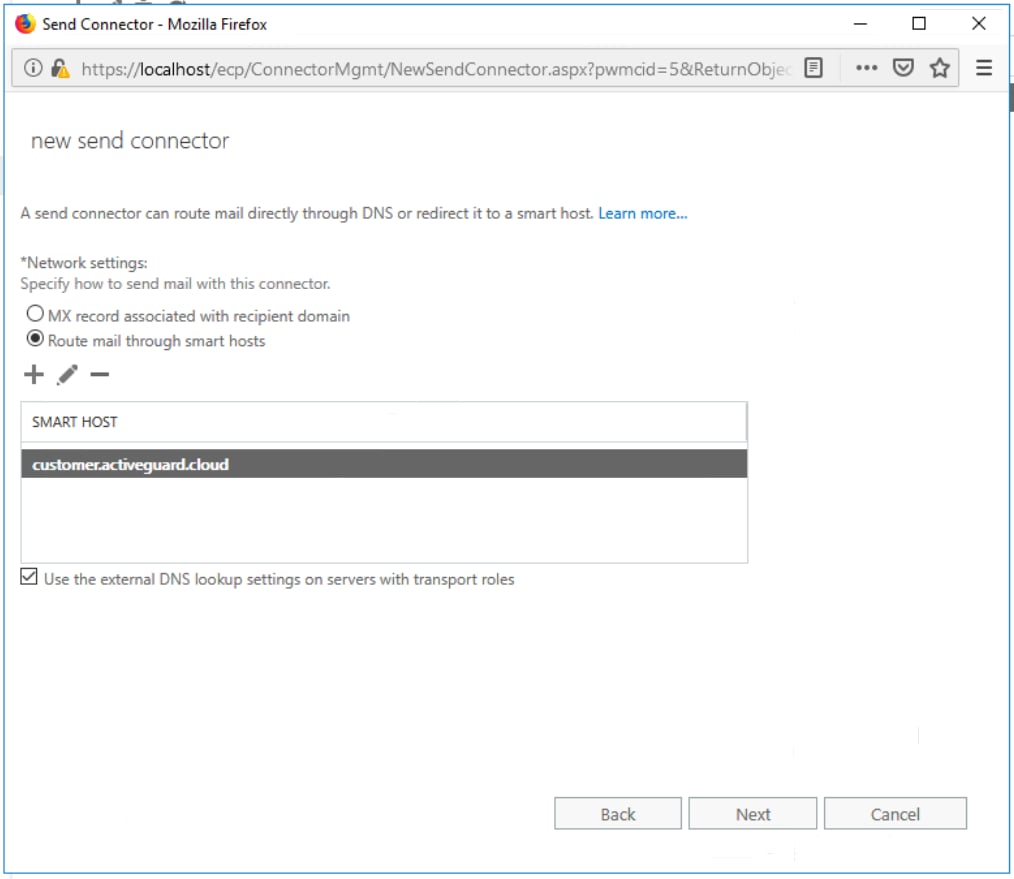
5. Choose the **Route email through smart hosts** option and add the domain names of all xorlab MTAs in your setup (the domain names—with DNS A records—corresponding to the IPs that you configured in **Setting up the receive connector**) as smart hosts.
6. Tick the checkbox to use external DNS lookup settings.
4. Click **Next**.
5. Choose the **Route email through smart hosts** option and add the domain names of all xorlab MTAs in your setup (the domain names—with DNS A records—corresponding to the IPs that you configured in **Setting up the receive connector**) as smart hosts.
6. Tick the checkbox to use external DNS lookup settings.
 7. Click **Next**.
8. Leave the smart host authentication to **None**. TLS between XSP and the Exchange server is enforced by XSP (for incoming and outgoing emails).
9. Click **Next**.
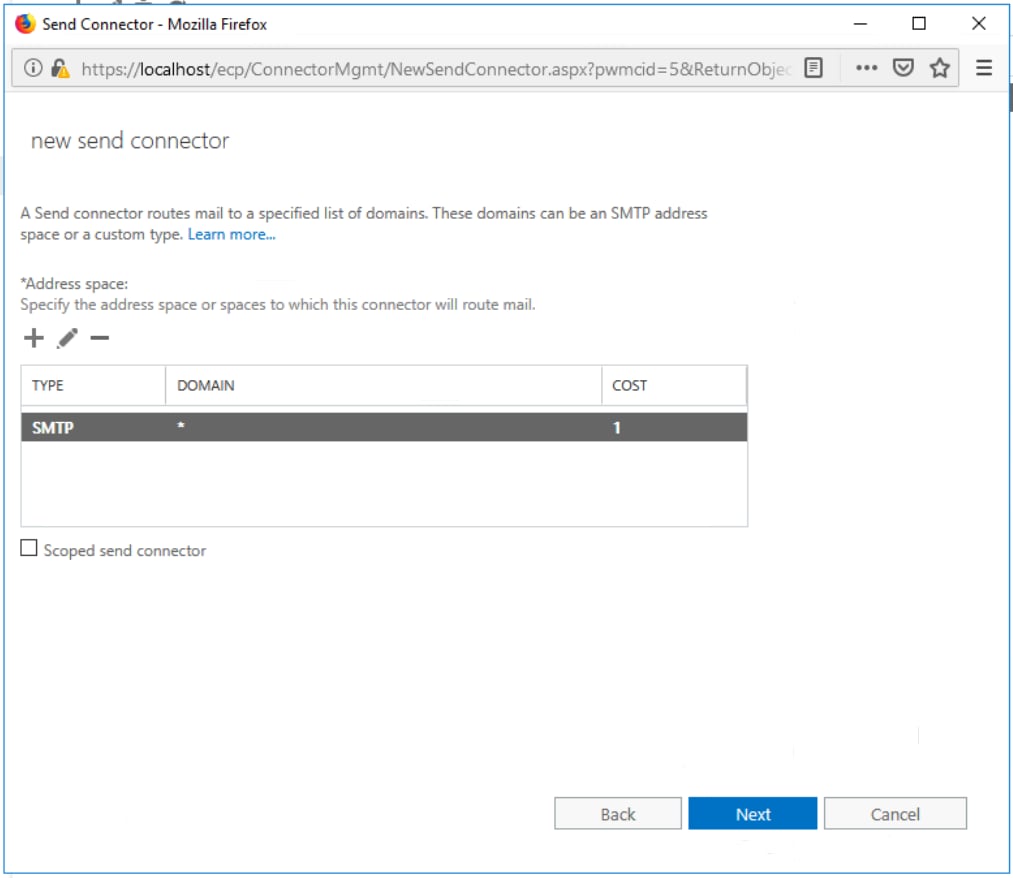
10. Under **Address space**, add a new space and enter `*` as a domain. Click **Next**.
7. Click **Next**.
8. Leave the smart host authentication to **None**. TLS between XSP and the Exchange server is enforced by XSP (for incoming and outgoing emails).
9. Click **Next**.
10. Under **Address space**, add a new space and enter `*` as a domain. Click **Next**.
 11. Add your Exchange server as a source. Click **Finish**.