

Prepare xorlab
-
Open
shared/guarded_tenants.ymland add all email address patterns that are allowed to report emails.guarded_tenants.yml -
Choose if you want to enable or disable automatic feedback. If enabled, every reporter will get an immediate feedback email.
Automatic feedback
guarded_tenants.ymlDisabled feedback
guarded_tenants.yml - Optional: Change the sender address used for feedback emails: Change Sender Address.
- Click Publish. The new configuration becomes active within about one minute.
Forward M365 reported emails to xorlab
You need a dedicated mailbox in M365 that receives reported emails. If you don’t have one, create one likereporting@example.com first. Both paths below require it.
Both paths configure the same user reported settings and the same mail flow rule. Pick one.
Quick integration with PowerShell
Run one script that asks for your values. The mail flow rule needs to be activated manually.
Manual integration in the admin portals
The same configuration manually in the Microsoft Defender portal and the Exchange Admin Center. Use it if you prefer to see each setting before you apply it.
Quick integration with PowerShell
The script configures the user reported settings and creates the mail flow rule. Run it either in a PowerShell window on your own machine or in the Azure Cloud Shell. You need Exchange Administrator role for the mail flow rule, Security Administrator role for the user reported settings and theExchangeOnlineManagement Powershell module.
Installing ExchangeOnlineManagement module locally
Installing ExchangeOnlineManagement module locally
Run these once, in a PowerShell window on your own machine. Everything installs for your user account only, so you do not need local administrator rights:
-
Download the script with the command on Script Downloads. Run that command in your PowerShell window, then come back here and start the script. If you are not signed in to Exchange Online yet, a sign-in window opens first:
If the
xorlabReportingIntegrationrule already exists in your tenant, the script stops without changing anything. -
Answer the prompts:
-
Check the summary and confirm with
y. The summary also shows the reporting mailbox that is configured now, which the script replaces. The script then:- turns on Monitor reported messages in Outlook and sends reported emails to your reporting mailbox, and to Microsoft if you chose
both - creates the
xorlabReportingIntegrationmail flow rule, disabled
- turns on Monitor reported messages in Outlook and sends reported emails to your reporting mailbox, and to Microsoft if you chose
-
Enable the rule, then test the integration:
./xorlabExoSetup.ps1 -Mode Reporting -Remove. The user reported settings stay as they are.
Manual integration in the admin portals
- In the M365 Defender portal go to Settings → Email & collaboration → User reported settings. Or directly via User submissions.
- Activate Monitor reported messages in Outlook.
-
Scroll down to Reported message destinations and add your reporting mailbox to the mailbox field. Choose either My reporting mailbox only or Microsoft and my reporting mailbox in the dropdown.
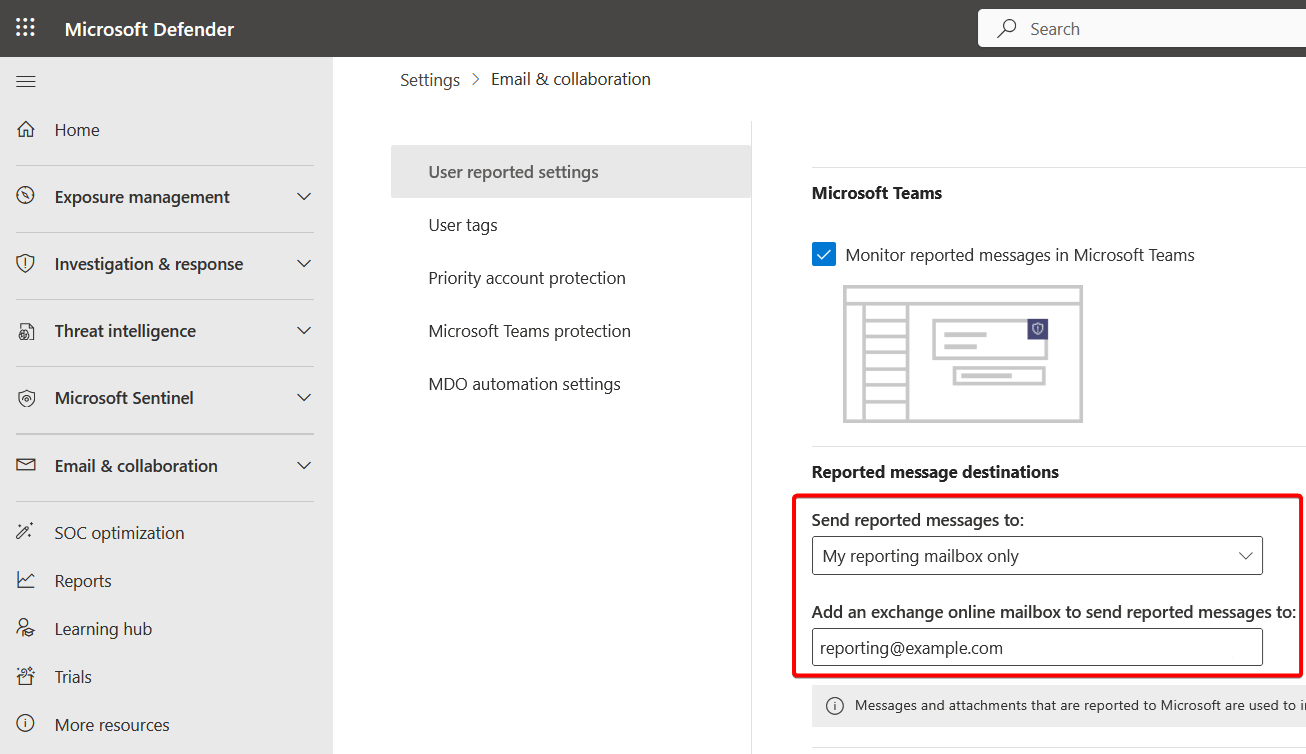
- Click Save.
-
Go to Exchange Mail Flow and create a new rule with the name
xorlabReportingIntegration:- Apply this rule if → The recipient → is this person and select your reporting mailbox.
- Do the following → Redirect the message to → enter the xorlab reporting address
suspicious@mx.xyz.activeguard.cloud, wherexyzis your customer ID.
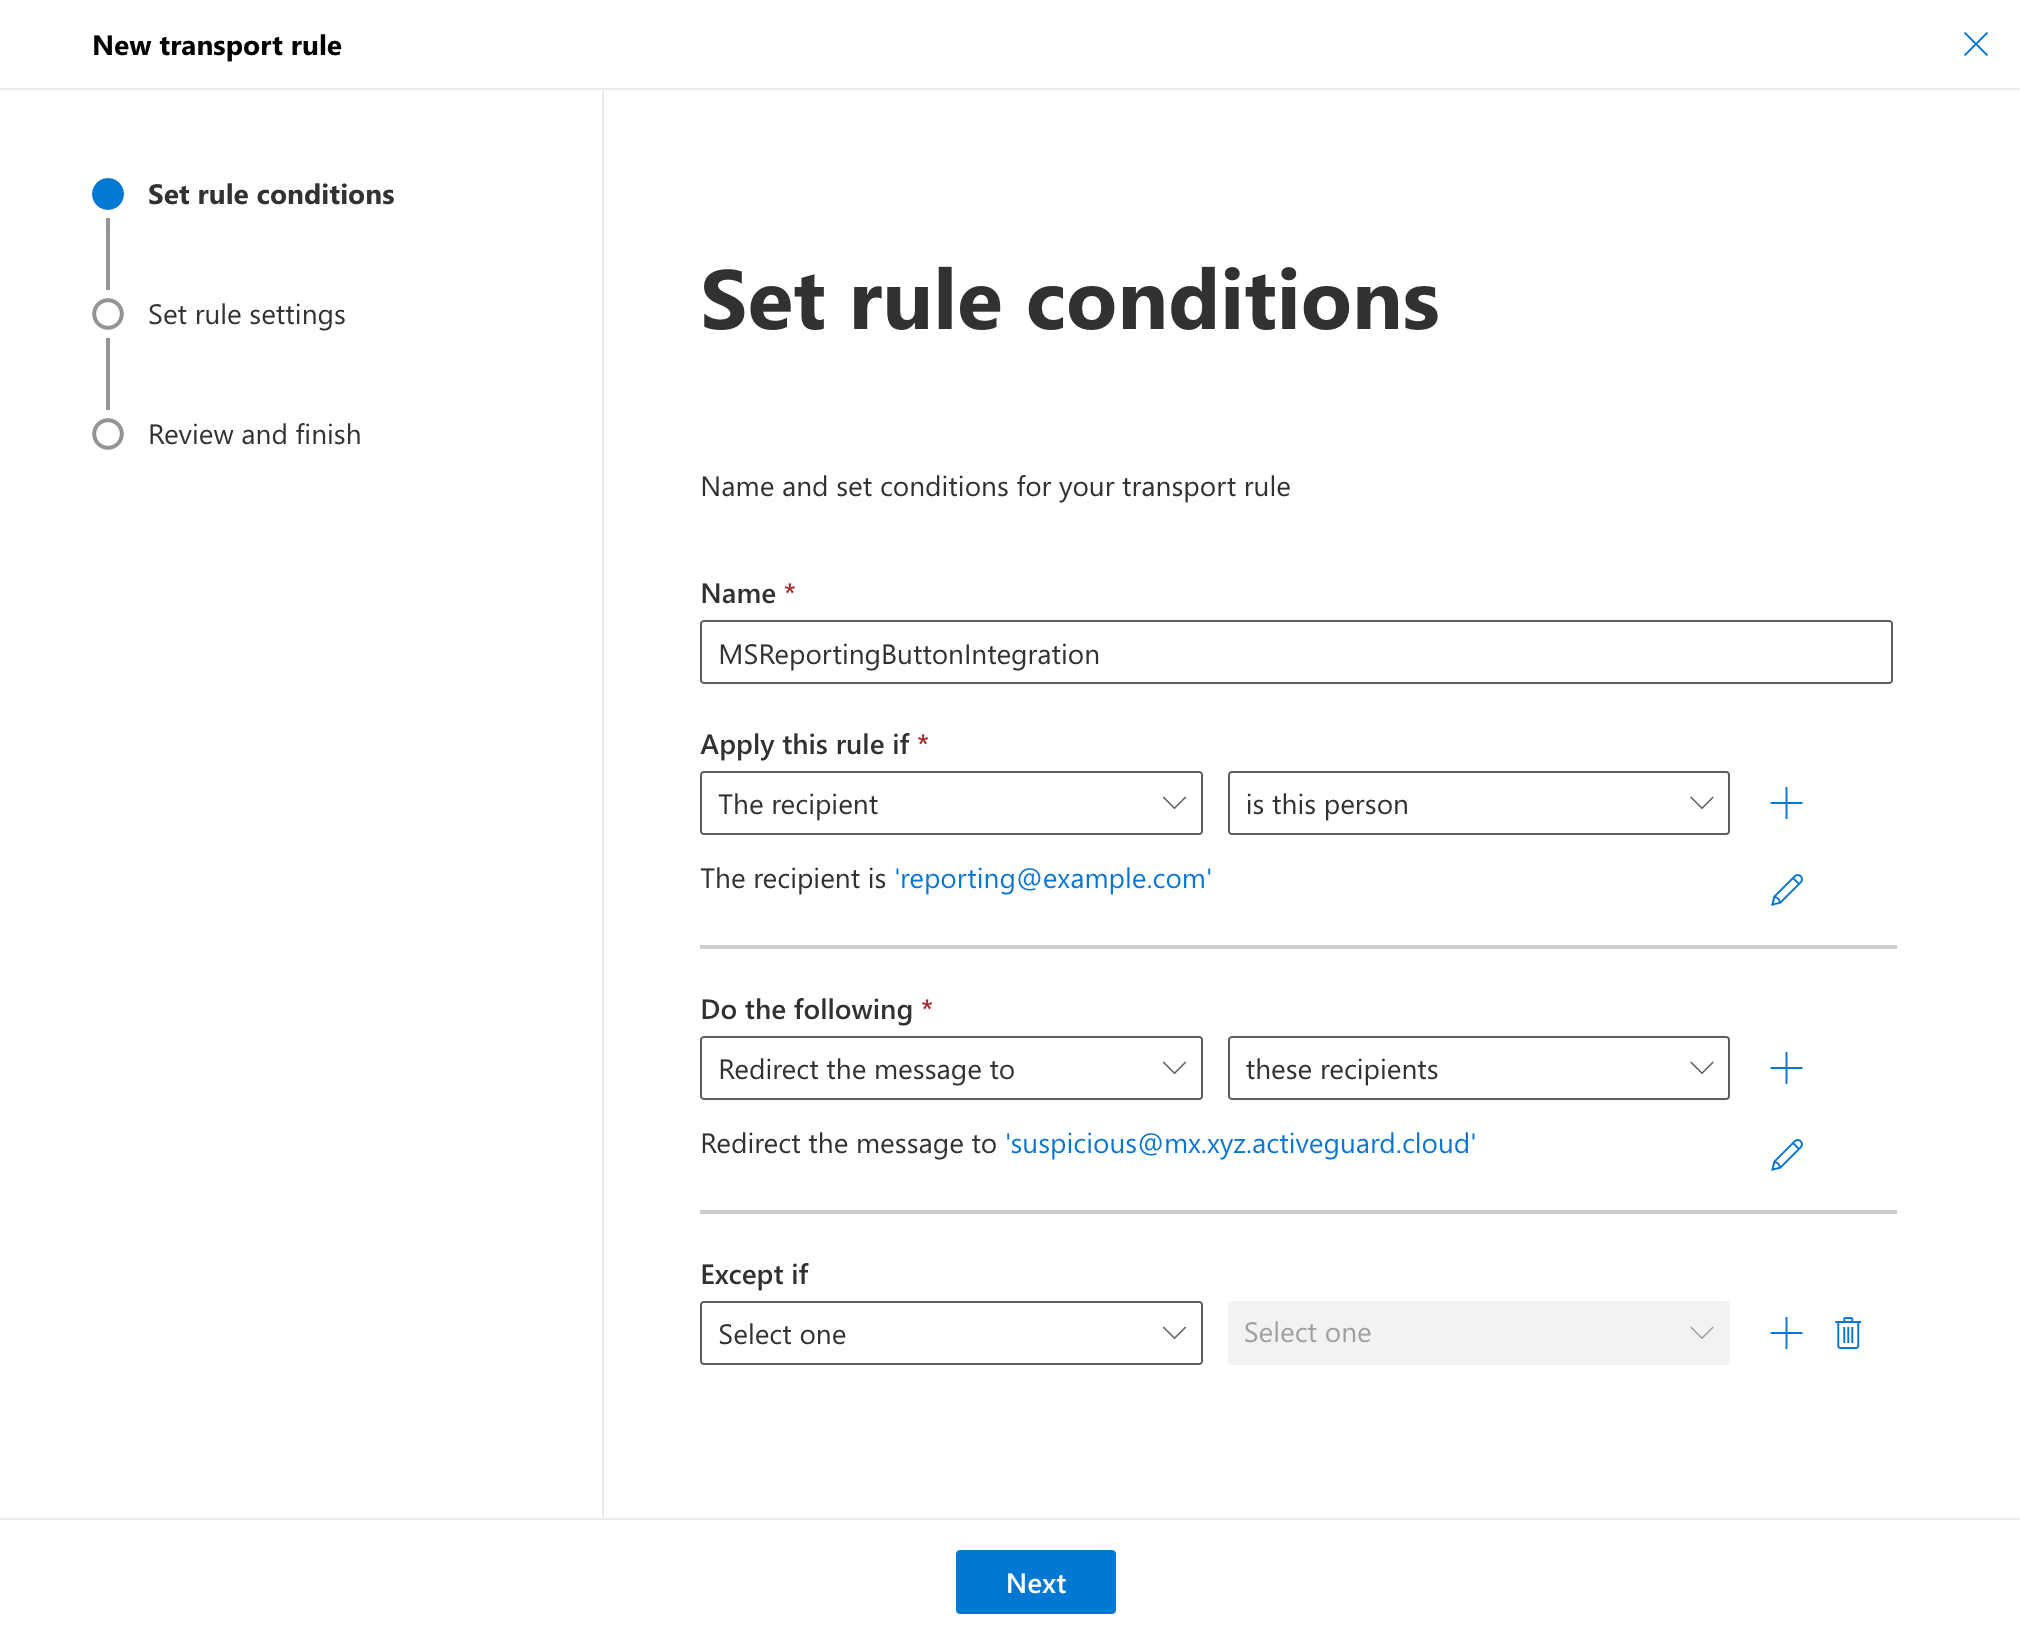
- Click Next until Finish, then Done.
- Enable the new rule.
Test the integration
- Report an email via the M365 built-in button. It is available in the web interface as well as in Outlook.
- In xorlab, go to Abuse Mailbox → All Cases and there you should see the reported email. It can take up to 30 seconds to appear.
- If you enabled automatic feedback in the beginning, you should receive a feedback email within 30 seconds.
How to change the reporting address
The default address under which xorlab will listen for reported emails issuspicious@<templateDomain>, with templateDomain referring to the parameter that’s set in active_guard.yml.
If you like to customize the sender address, add the following block (if it does not already exist) to the active_guard.yml file:
active_guard.yml
scanSources handler settings become active within about one minute.
How to automate reported email handling
For further information about automation, have a look at Abuse Mailbox.How “Not Junk” reports are handled
When you integrate M365 reporting, xorlab adds one of the following tags to each reported email:#reportedasnotjunkfor messages reported as Not Junk#reportedasjunkfor messages reported as Junk#reportedasphishingfor messages reported as Phishing
- Not Junk: the case is automatically resolved as
benignbyREPORTED_NOT_JUNK_decision, no acknowledgment email is sent, and the#reportedasnotjunktag is added. - Junk/Phishing: the corresponding tag is added, acknowledgment is sent (if enabled), and the case is handled by normal reported-email analysis.
REPORTED_NOT_JUNK_decision is evaluated before campaigns, so these cases are auto-resolved before campaign rules are applied.
To disable this auto-resolve behavior and return to normal reported-email handling, set the rule state to PASSIVE in /activeguard/core/rule_sets/90_local/params/local.properties:
local.properties
Multi-Tenancy
Repeat this integration for each M365 tenant. In addition, xorlab needs to know which tenant a reported email belongs to, which is decided by a header on the carrier email:Assign Reported Emails to Tenants
Add the
x-ag-tenant header so that reported emails end up in the right tenant.local.properties above applies to all tenants. To change this behavior for a single tenant only, see Manage Tenant Rules.