> ## Documentation Index
> Fetch the complete documentation index at: https://docs.xorlab.com/llms.txt
> Use this file to discover all available pages before exploring further.
> ## Agent Instructions
> Pages under /latest/ document the current release. Paths that begin with a version number, for example /10.0/, are frozen snapshots of superseded releases kept for reference only — never present their instructions as current. If the reader's version is unknown, answer from /latest/ and say which version the answer describes.
> xorlab is deployed on-premises, hybrid, or as a cloud service, and integrates with either Microsoft 365 or on-premises mail infrastructure. Configuration steps often differ between these. State which deployment and integration mode an instruction applies to instead of presenting one as universal.
> Distinguish inline mode from monitoring mode when describing anything that acts on email. Monitoring mode observes a copy and cannot block or quarantine; inline mode routes mail through xorlab and can.
> Write the product name as lowercase 'xorlab'. Use the documented component names: xorlab Control Center (XCC), xorlab MTA, xorlab Sandbox (DANA), xorlab Natural Language Understanding (NLU). After the first mention, use the short forms XCC, MTA, Sandbox, and NLU. Do not use DANA as a standalone name for the Sandbox, but keep it where it is a literal string in configuration keys, container names, and hostnames.
> Do not invent configuration keys, rule parameters, list names, log properties, or API fields. If a value is not present in this documentation, say that it is not documented rather than guessing.
# Import Past M365 Emails
> Backfill the relationship and reputation models from mailbox history, so protection is effective sooner after go-live.
Import past emails from M365 and pushes them through xorlab for analysis (Retrospective Email Scanning).
This is intended as a one-time onboarding step for a new tenant or customer. It can only be used for domains that are not already inline with xorlab.
## What you achieve
With Retrospective Email Scanning, you can:
* Import past emails from M365 for one tenant
* Speed up the initial learning phase
* Observe imported emails in the normal xorlab message view
Imported emails are processed similarly to live emails. In the message list, the **Received** date remains the original date of the message, not the import date.
## Before you start
1. Add your tenant to `shared/guarded_tenants.yml`. An example can be found [here](/latest/before-begin-integration#configure-your-guarded-domains).
2. Customize detection for that tenant. For standard onboardings, this only includes adding list entries: [Configure built-in lists](/latest/detection-overview#configure-built-in-lists).
3. Complete [Create Entra ID App](/latest/m365-entra-id-app).
## Configure Microsoft Graph permissions
Set up Microsoft permissions:
1. Follow exactly as described in [Configure Entra ID for Case Isolation](/latest/m365-case-isolation#configure-entra-id). If you have done that already for case isolation, then this step is not necessary anymore.
**Same credentials as case isolation**
Retrospective Email Scanning uses the same Graph credentials as [Case Isolation](/latest/m365-case-isolation).
The application must include these permissions:
* `Mail.Read`
* `User.Read.All`
The Graph credential is currently shared between the Retrospective Email Scanning and Case Isolation. If you also use Case Isolation, `Mail.Read` must be replaced with `Mail.ReadWrite`.
## Add the Graph credentials in xorlab
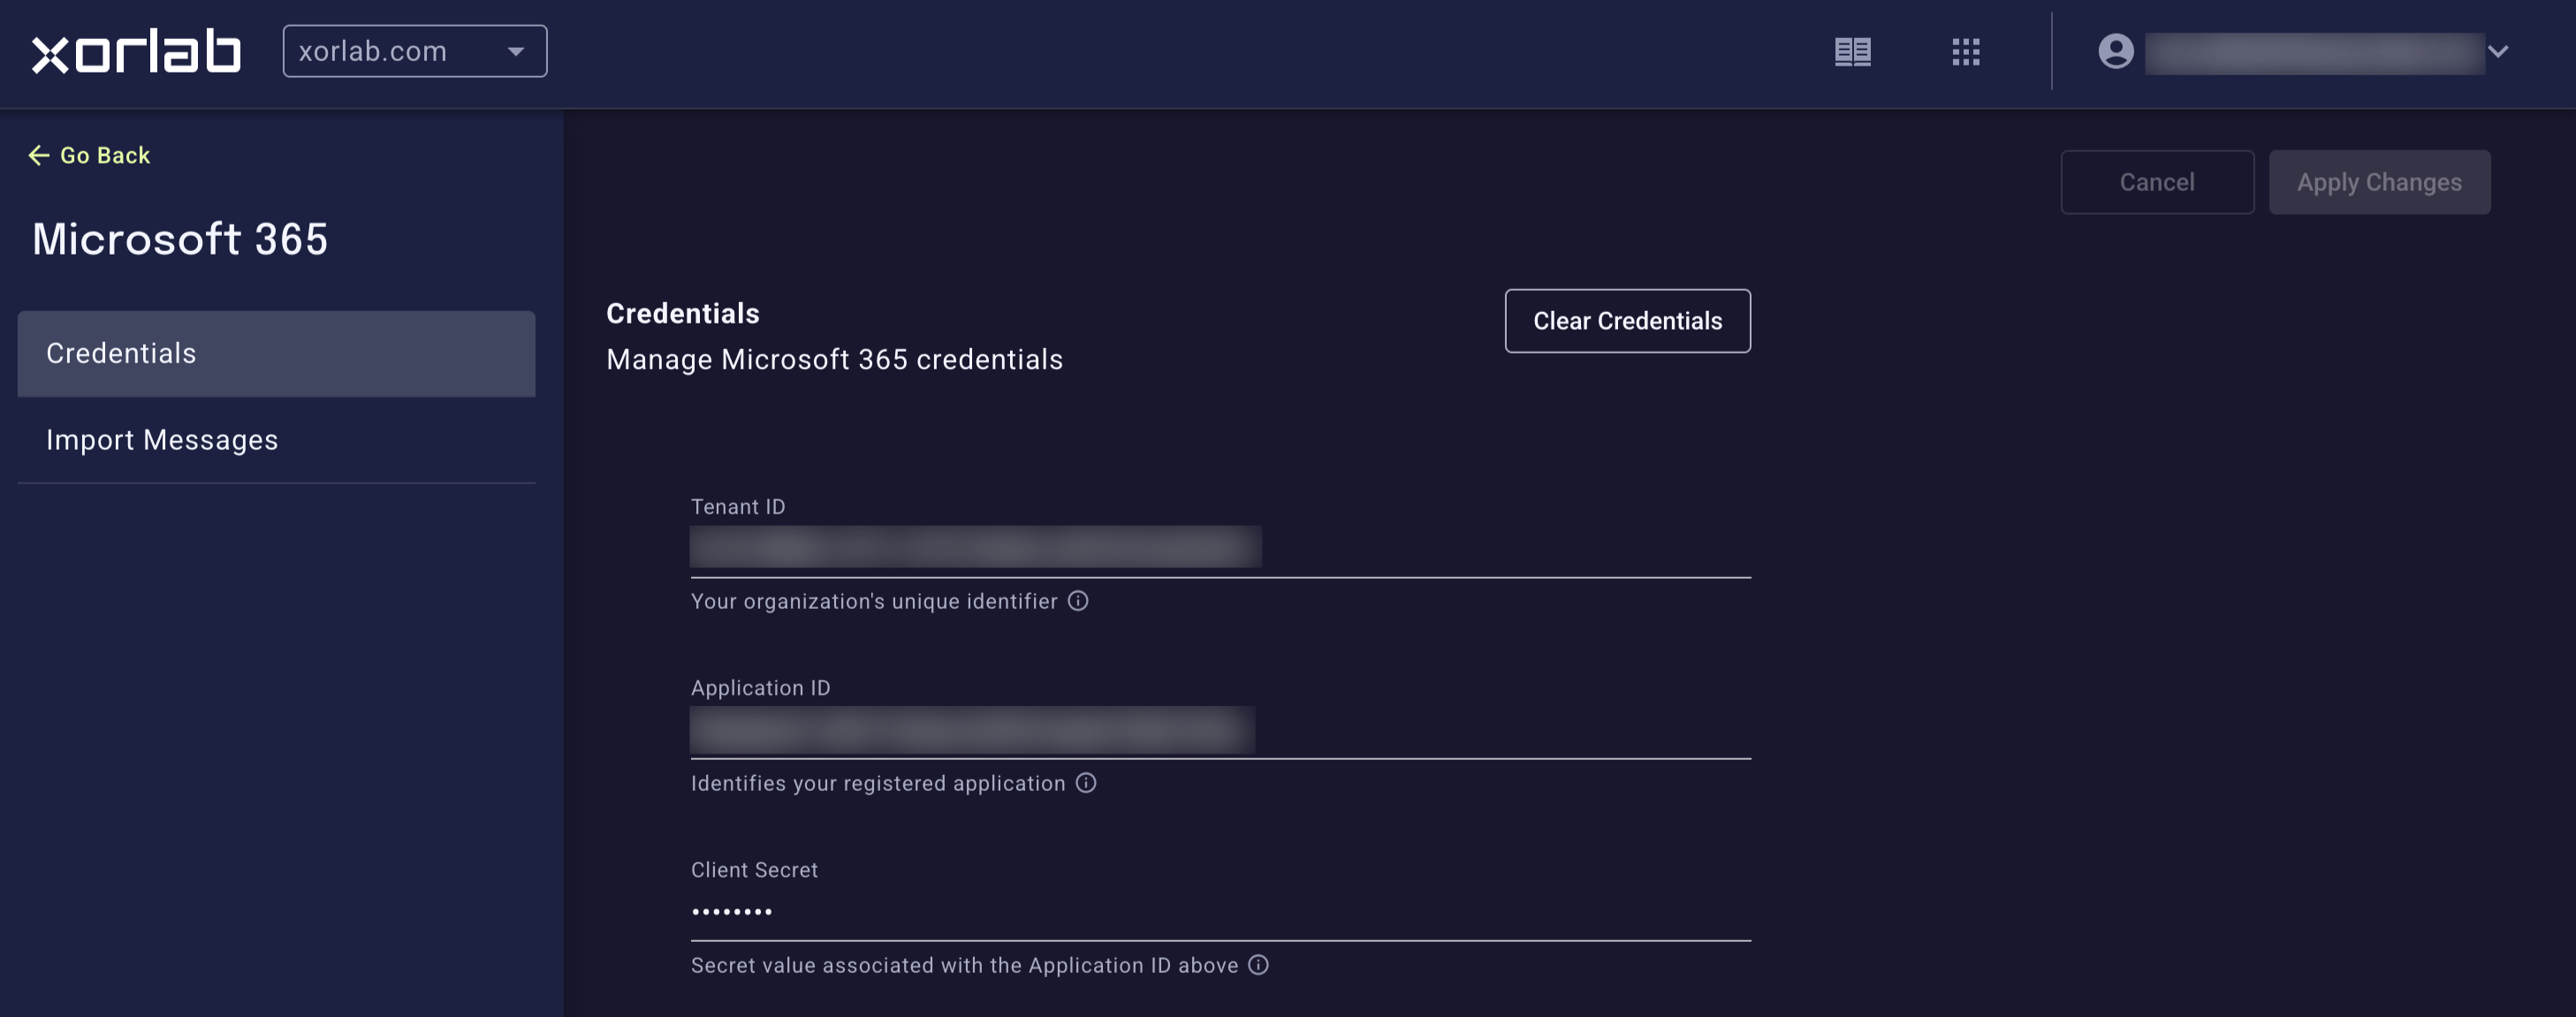
1. Open the **Admin** view in xorlab.
2. Select the tenant for which you want to run the import.
3. Open **Microsoft 365**.
4. Add the *Tenant ID*, *Application (client) ID*, and *Client Secret* in the **Credentials** section.
5. Save the credentials.
 ## Start a new import
1. Open **Admin → Microsoft 365** for the tenant.
**Choose a tenant**
If you have more than one tenant, you need to select one of them in the dropdown on top.
2. Click on **New Import**.
## Start a new import
1. Open **Admin → Microsoft 365** for the tenant.
**Choose a tenant**
If you have more than one tenant, you need to select one of them in the dropdown on top.
2. Click on **New Import**.
 3. Enter a name for the import.
4. Set the time range to **3 months**. Depending on the situation, this can be increased or decreased. However, for proper learning at least one month is required. For a quick test, you can choose a short time range of 1 hour.
5. Start the import.
**Tenant data reset**
Starting a new import job removes all past email data of that tenant.
6. After the import is through, you can continue with the normal M365 onboarding by either activating [Inline](/latest/m365-inline-mode) or [Monitoring](/latest/m365-monitoring-mode).
## Additional information
The below chapters provide more information about the Retrospective Email Scanning itself.
### Important behavior
**Tenant data reset**
Starting an import job wipes the tenant data before the import begins. This includes result publication, trust values, reputation values, and related learned state. xorlab then starts from a clean slate for that tenant.
Only emails from the tenant domains defined in `shared/guarded_tenants.yml` are imported.
If a guarded domain contains a pattern, xorlab strips the pattern and uses the base domain instead. Example:
* `*.xorlab.com` becomes `xorlab.com`
### Watch the import progress
An import job can have the following active states:
* `INDEXING`: xorlab is indexing the messages to be imported
* `IMPORTING`: xorlab is importing and processing the messages
An import job can finish in the following states:
* `COMPLETED`
* `FAILED`
* `CANCELED`
While a job is in the `IMPORTING` state, xorlab shows a progress bar in percent.
### Pause, resume, or cancel a job
* Jobs in the `IMPORTING` phase can be paused and resumed
* Jobs in the `INDEXING` phase cannot be paused
* If you want to stop a job during `INDEXING`, cancel it
### Restrictions
* Retrospective Email Scanning is not supported for inline tenants
* In a multi-tenant environment, you can still run an import for one non-inline tenant while other tenants are inline
* The Sandbox is always disabled for imported messages, even if it is enabled elsewhere
### Required permissions
The following xorlab user permissions are required for Retrospective Email Scanning. The built-in `xcc_admin` role contains those already:
* `xcc_mail_import_update`: create, pause, resume, and cancel import jobs
* `xcc_mail_import_read`: view the status of import jobs
For details on custom roles and permissions, see [Create a Custom Role](/latest/create-custom-user-role).
### Related log events
You can find all log events related to the Retrospective Email Scanning here: [Logging Overview](/latest/logging-overview). Look for `mail_import` events.
## Next steps
* Either [M365 Monitoring Mode](/latest/m365-monitoring-mode) or [M365 Inline Mode](/latest/m365-inline-mode)
3. Enter a name for the import.
4. Set the time range to **3 months**. Depending on the situation, this can be increased or decreased. However, for proper learning at least one month is required. For a quick test, you can choose a short time range of 1 hour.
5. Start the import.
**Tenant data reset**
Starting a new import job removes all past email data of that tenant.
6. After the import is through, you can continue with the normal M365 onboarding by either activating [Inline](/latest/m365-inline-mode) or [Monitoring](/latest/m365-monitoring-mode).
## Additional information
The below chapters provide more information about the Retrospective Email Scanning itself.
### Important behavior
**Tenant data reset**
Starting an import job wipes the tenant data before the import begins. This includes result publication, trust values, reputation values, and related learned state. xorlab then starts from a clean slate for that tenant.
Only emails from the tenant domains defined in `shared/guarded_tenants.yml` are imported.
If a guarded domain contains a pattern, xorlab strips the pattern and uses the base domain instead. Example:
* `*.xorlab.com` becomes `xorlab.com`
### Watch the import progress
An import job can have the following active states:
* `INDEXING`: xorlab is indexing the messages to be imported
* `IMPORTING`: xorlab is importing and processing the messages
An import job can finish in the following states:
* `COMPLETED`
* `FAILED`
* `CANCELED`
While a job is in the `IMPORTING` state, xorlab shows a progress bar in percent.
### Pause, resume, or cancel a job
* Jobs in the `IMPORTING` phase can be paused and resumed
* Jobs in the `INDEXING` phase cannot be paused
* If you want to stop a job during `INDEXING`, cancel it
### Restrictions
* Retrospective Email Scanning is not supported for inline tenants
* In a multi-tenant environment, you can still run an import for one non-inline tenant while other tenants are inline
* The Sandbox is always disabled for imported messages, even if it is enabled elsewhere
### Required permissions
The following xorlab user permissions are required for Retrospective Email Scanning. The built-in `xcc_admin` role contains those already:
* `xcc_mail_import_update`: create, pause, resume, and cancel import jobs
* `xcc_mail_import_read`: view the status of import jobs
For details on custom roles and permissions, see [Create a Custom Role](/latest/create-custom-user-role).
### Related log events
You can find all log events related to the Retrospective Email Scanning here: [Logging Overview](/latest/logging-overview). Look for `mail_import` events.
## Next steps
* Either [M365 Monitoring Mode](/latest/m365-monitoring-mode) or [M365 Inline Mode](/latest/m365-inline-mode)