

- For incoming emails, you must extend the receive connectors to accept emails from xorlab Security Platform.
- For outgoing emails, you must add a new send connector pointing to xorlab Security Platform.
Setting up the receive connector
To extend the default receive connector to accept emails from xorlab:- Open Exchange Admin Center.
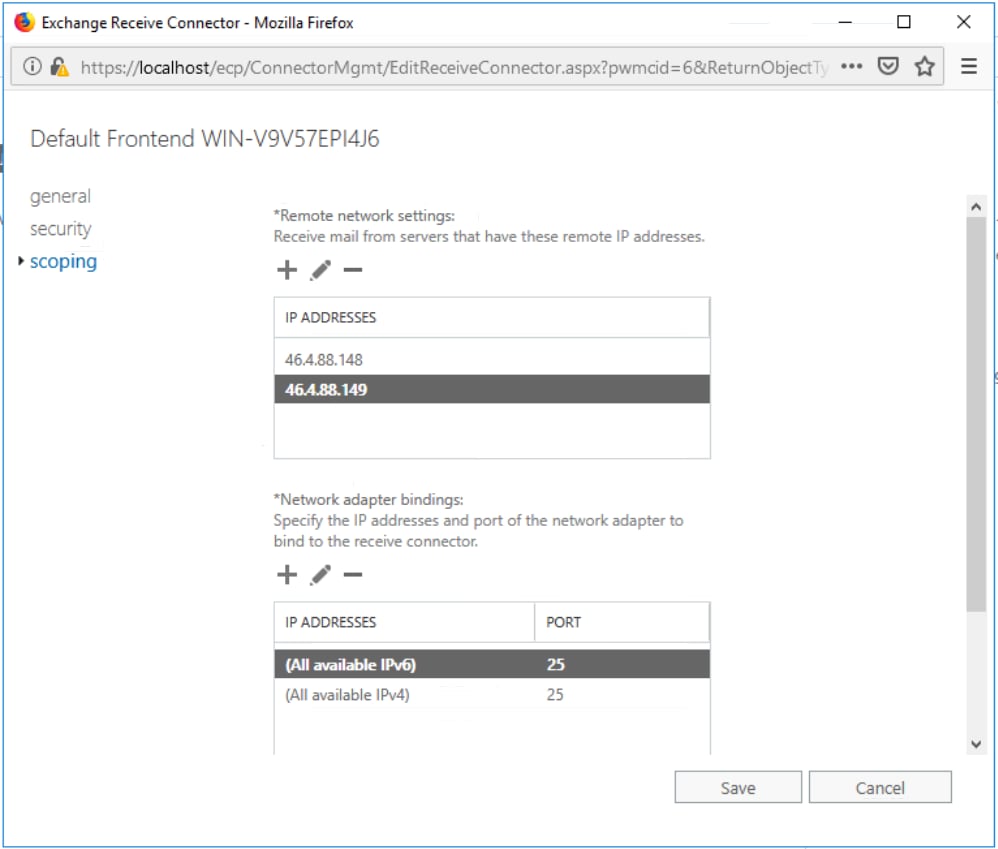
- Under Mail Flow → receive connectors, select your Exchange server and edit the connector starting with Default Frontend….
-
In the dialog, go to Scoping and, for each xorlab MTA in your setup, add its IP address as a new entry to Remote network settings.
- Click Save.
Adding a new send connector
To route all outgoing emails through xorlab Security Platform:- Go to Exchange Admin Center.
- Under Mail Flow → send connectors, add a new connector.
-
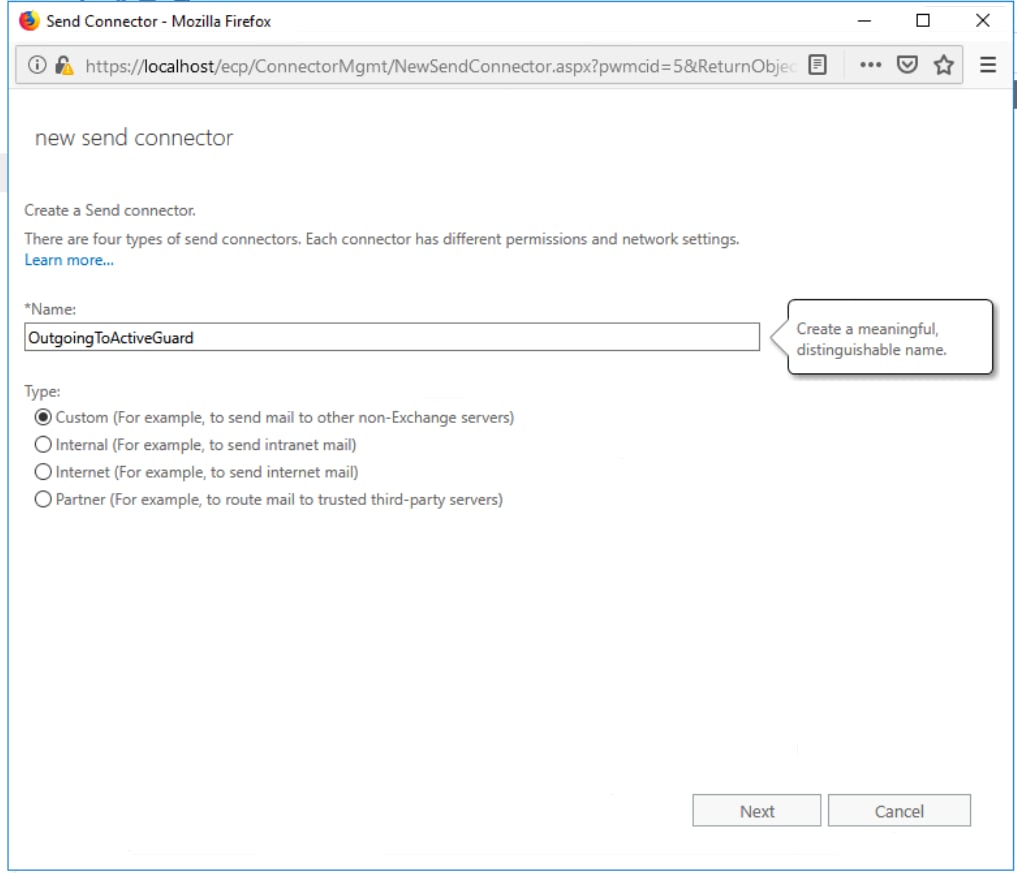
Enter a name and choose Custom.
- Click Next.
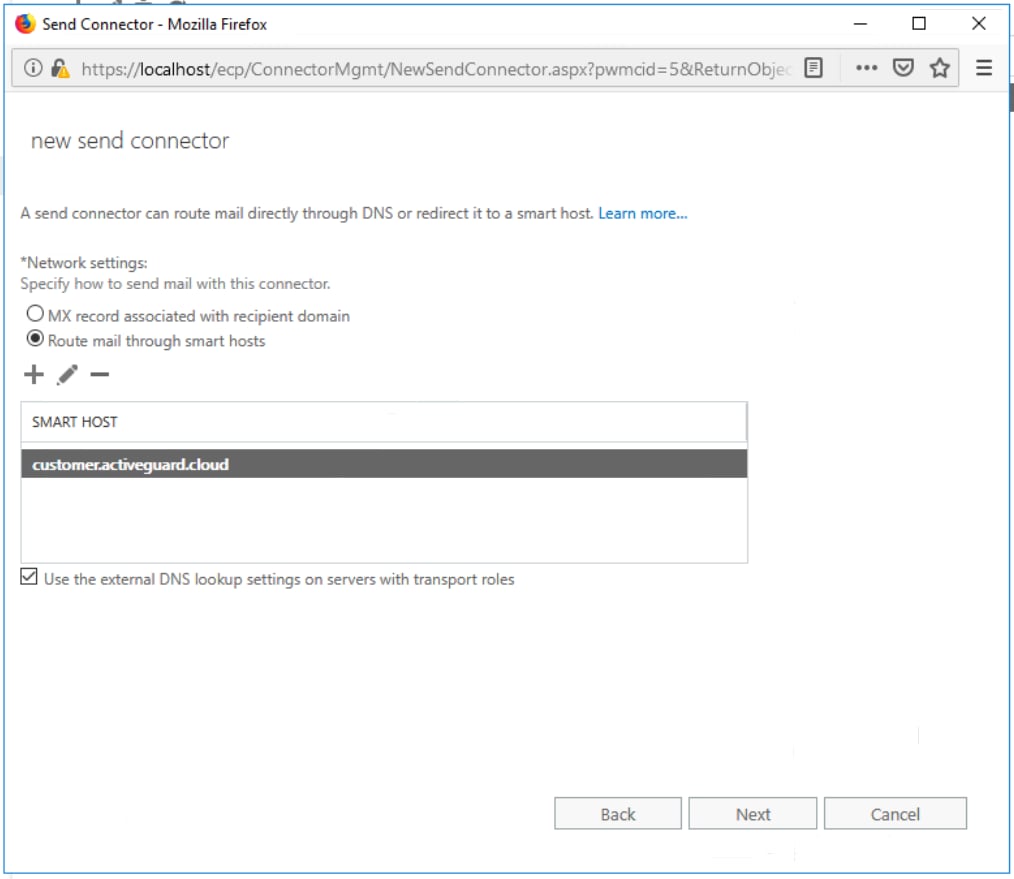
- Choose the Route email through smart hosts option and add the domain names of all xorlab MTAs in your setup (the domain names—with DNS A records—corresponding to the IPs that you configured in Setting up the receive connector) as smart hosts.
-
Tick the checkbox to use external DNS lookup settings.
- Click Next.
- Leave the smart host authentication to None. TLS between xorlab and the Exchange server is enforced by xorlab (for incoming and outgoing emails).
- Click Next.
-
Under Address space, add a new space and enter
*as a domain. Click Next.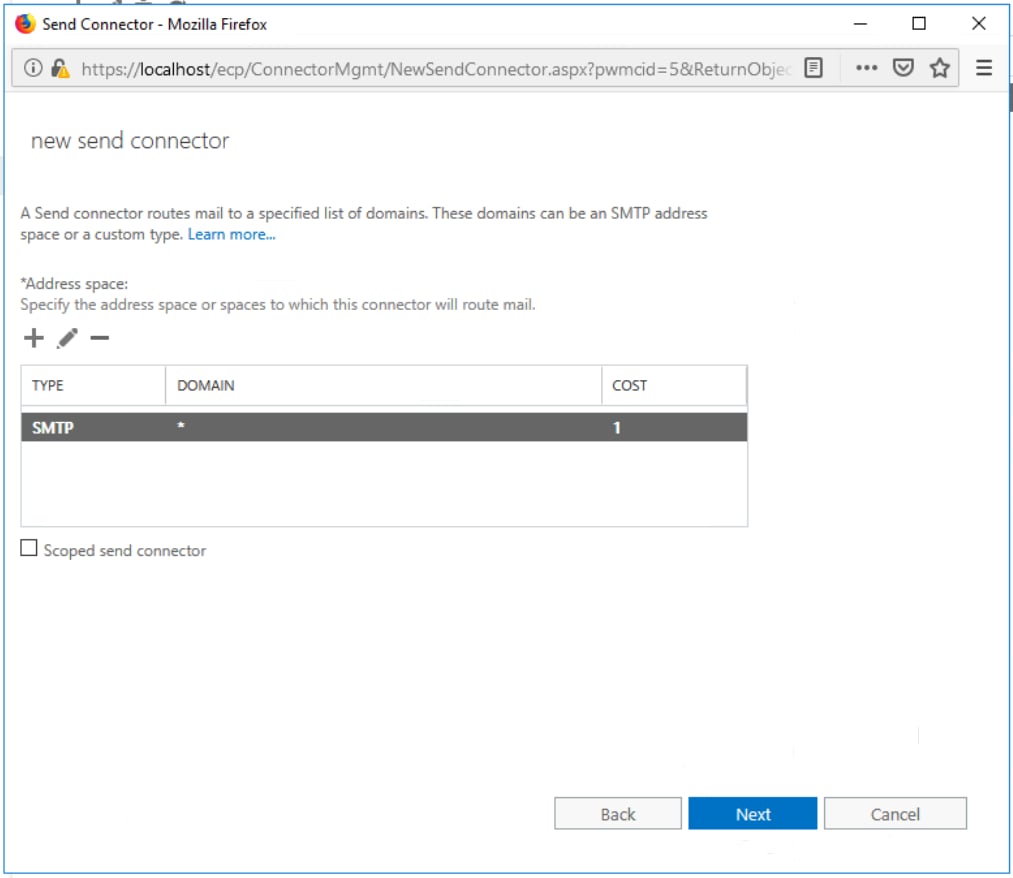
- Add your Exchange server as a source. Click Finish.