> ## Documentation Index
> Fetch the complete documentation index at: https://docs.xorlab.com/llms.txt
> Use this file to discover all available pages before exploring further.
> ## Agent Instructions
> Pages under /latest/ document the current release. Paths that begin with a version number, for example /10.0/, are frozen snapshots of superseded releases kept for reference only — never present their instructions as current. If the reader's version is unknown, answer from /latest/ and say which version the answer describes.
> xorlab is deployed on-premises, hybrid, or as a cloud service, and integrates with either Microsoft 365 or on-premises mail infrastructure. Configuration steps often differ between these. State which deployment and integration mode an instruction applies to instead of presenting one as universal.
> Distinguish inline mode from monitoring mode when describing anything that acts on email. Monitoring mode observes a copy and cannot block or quarantine; inline mode routes mail through xorlab and can.
> Write the product name as lowercase 'xorlab'. Use the documented component names: xorlab Control Center (XCC), xorlab MTA, xorlab Sandbox (DANA), xorlab Natural Language Understanding (NLU). After the first mention, use the short forms XCC, MTA, Sandbox, and NLU. Do not use DANA as a standalone name for the Sandbox, but keep it where it is a literal string in configuration keys, container names, and hostnames.
> Do not invent configuration keys, rule parameters, list names, log properties, or API fields. If a value is not present in this documentation, say that it is not documented rather than guessing.
# Quick Walkthrough
> A hands-on tour of the most important xorlab features. Read the core concepts first.
If you prefer to watch a video instead, have a look at [Video Tutorials ](/latest/video-tutorials).
We recommend to have read the [Core Concepts](/latest/concepts-overview) before starting with the walkthrough here.
In 15 minutes, you will cover the basics of using xorlab:
* How to search for emails
* Create your first campaign
* Using the similarity search
* Give feedback to a reported email
## Search an email
The search is very powerful and one of the key tools in xorlab. The full search syntax can be found under [Search](/latest/search).
1. Open the **Messages** menu on the left.
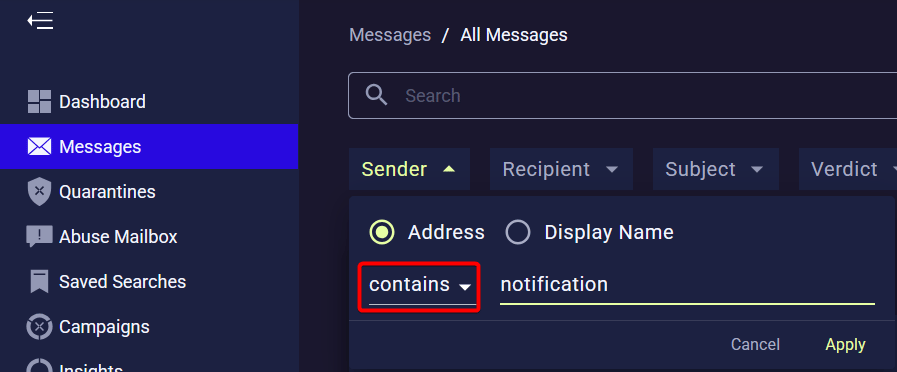
2. Search for all sender addresses that contain the word `notification`: Open the **Sender** filter, switch the dropdown to **contains** and add `notification`. If you don't get any results, you can choose any other word.
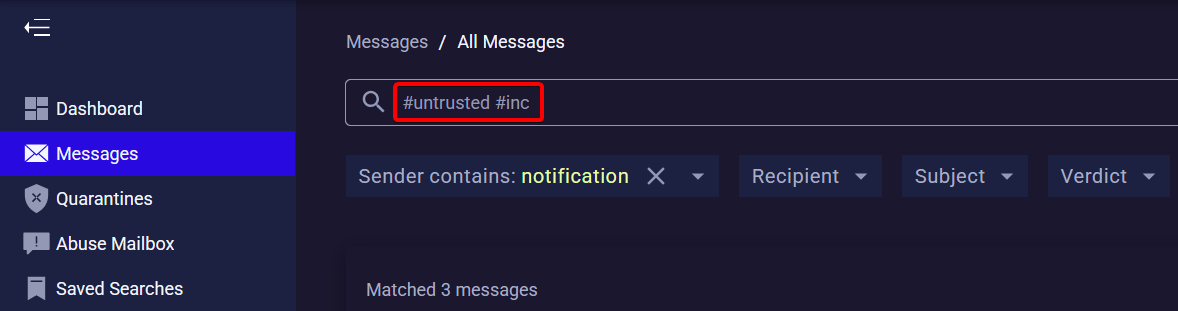
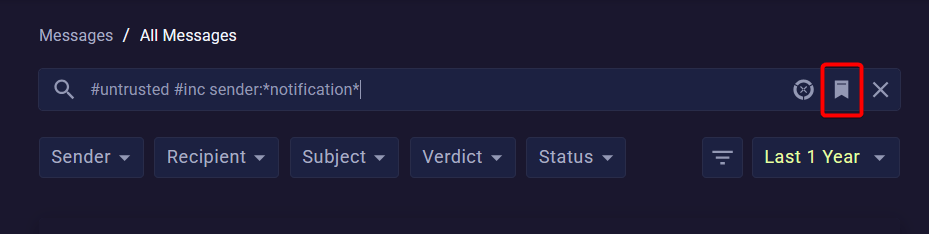
 3. Refine the search further by adding some [Tags](/latest/tags) to only match incoming emails from untrusted senders: `#untrusted #inc`. You can add as many tags as you want. By default, they are ANDed.
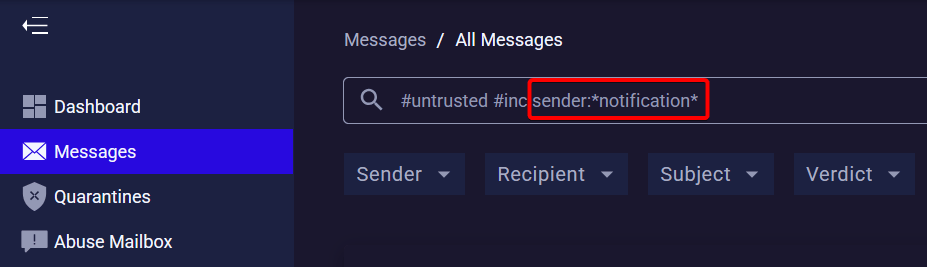
 4. All filters can be replaced by text search. The following gives the same results as above:
 5. You can further play around using for example:
* `(topic:invoice OR topic:accountissue) #newsender`: Unknown senders that send emails about invoices or account issues
* `#untrusted #vbascript`: Emails from untrusted senders with VBA script
* `#partner #encryptedarchive`: Emails from partners that contain an encrypted archive
6. Save your search for later use with the button on the right side. You can find all your saved searches in the **Saved Searches** menu.
5. You can further play around using for example:
* `(topic:invoice OR topic:accountissue) #newsender`: Unknown senders that send emails about invoices or account issues
* `#untrusted #vbascript`: Emails from untrusted senders with VBA script
* `#partner #encryptedarchive`: Emails from partners that contain an encrypted archive
6. Save your search for later use with the button on the right side. You can find all your saved searches in the **Saved Searches** menu.
 ## Create a campaign
Campaigns allow you to define an action for all emails that match a search query. It is an easy tool to react to missed threats or false positives.
Campaigns work only forward-looking, and do not affect past emails. For an in-depth guide about Campaigns, check out [Using Campaigns](/latest/campaigns).
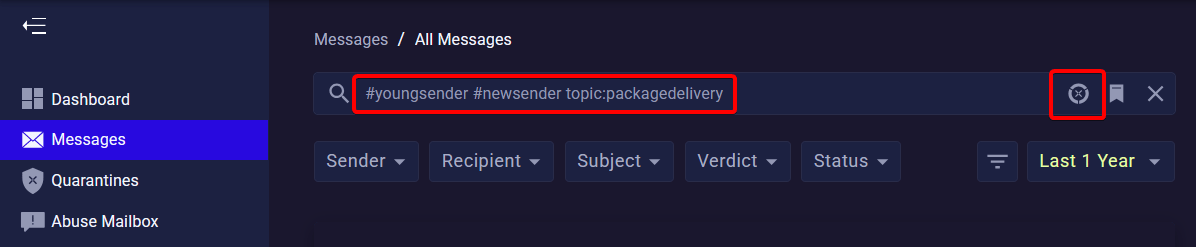
1. Create a new search query that will be the basis of the campaign: `#youngsender #newsender topic:packagedelivery`. This will find all emails from recently registered domains that talk about package delivery.
2. Click on the campaign button on the right side in the search.
## Create a campaign
Campaigns allow you to define an action for all emails that match a search query. It is an easy tool to react to missed threats or false positives.
Campaigns work only forward-looking, and do not affect past emails. For an in-depth guide about Campaigns, check out [Using Campaigns](/latest/campaigns).
1. Create a new search query that will be the basis of the campaign: `#youngsender #newsender topic:packagedelivery`. This will find all emails from recently registered domains that talk about package delivery.
2. Click on the campaign button on the right side in the search.
 3. Enter a descriptive campaign name.
4. Under **Message Action**, you can choose the action that should be applied to all emails that will match this search from now on. Choose **None** for now, in this way the campaign will be passive and not have any impact. The **Resolve Action** can also be left as **None** as it affects only [Reported Emails](/latest/abuse-mailbox).
3. Enter a descriptive campaign name.
4. Under **Message Action**, you can choose the action that should be applied to all emails that will match this search from now on. Choose **None** for now, in this way the campaign will be passive and not have any impact. The **Resolve Action** can also be left as **None** as it affects only [Reported Emails](/latest/abuse-mailbox).
 **Deliver**
Be careful when using the Deliver action. It will overwrite all built-in detection mechanisms. It is normally only used in a very narrow scope to address false positives.
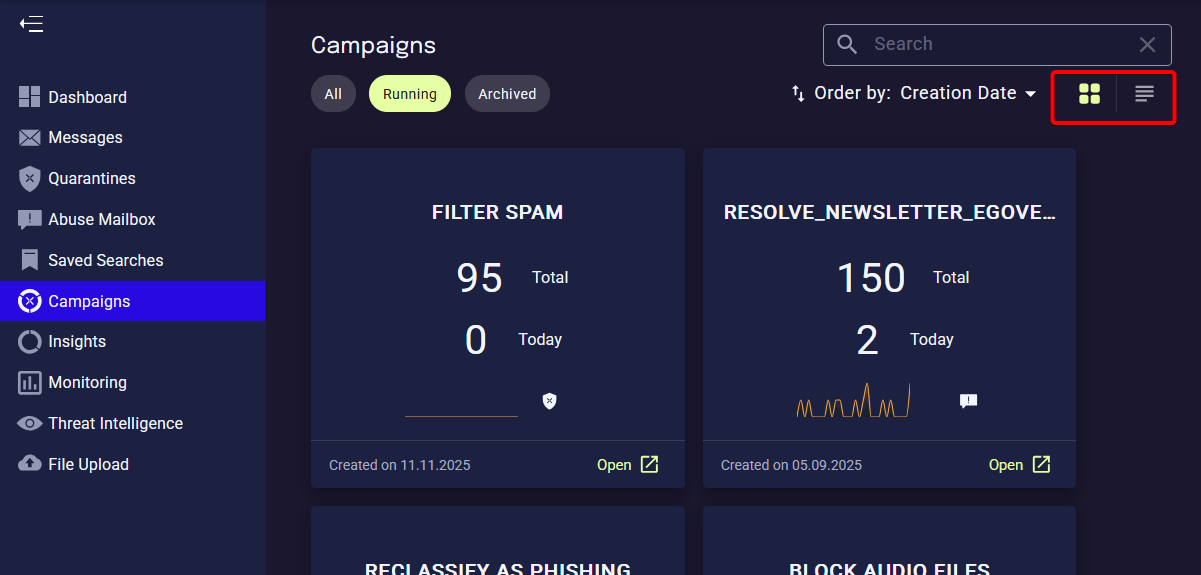
5. After saving, you can find your new campaign in the **Campaign** menu on the left. The switch in the upper right provides different views for convenience.
**Deliver**
Be careful when using the Deliver action. It will overwrite all built-in detection mechanisms. It is normally only used in a very narrow scope to address false positives.
5. After saving, you can find your new campaign in the **Campaign** menu on the left. The switch in the upper right provides different views for convenience.
 6. If you want to activate the campaign, you can set the **Message Action** any time later to **Quarantine**.
## Using the similarity search
The similarity search allows to group emails based on different parameters. For example, a phishing wave might use different sender addresses and subjects, but you can still group them based on content similarity.
1. In the **Messages** menu, click on any email in the list to open the [Detail View](/latest/understand-verdict).
2. Open the **SIMILAR** tab. This will show you all emails with a similar content. The first email highlighted in blue is the one that you opened in the detail view.
6. If you want to activate the campaign, you can set the **Message Action** any time later to **Quarantine**.
## Using the similarity search
The similarity search allows to group emails based on different parameters. For example, a phishing wave might use different sender addresses and subjects, but you can still group them based on content similarity.
1. In the **Messages** menu, click on any email in the list to open the [Detail View](/latest/understand-verdict).
2. Open the **SIMILAR** tab. This will show you all emails with a similar content. The first email highlighted in blue is the one that you opened in the detail view.
 **Content similarity**
The content similarity uses fuzzy hashing of the email body to group emails. It is robust such that one can change several words of an email and even re-arrange paragraphs and it will still group them together. The false positive rate is generally very low for emails with enough text (above 30-40 words).
3. If your email does not have any results based on content similarity, you can use one of the other built-in groupings like **Same Sender**. The number in brackets shows the amount of matches.
* When choosing another grouping, you need to disable the **Content similar** search, otherwise they will be ANDed.
**Content similarity**
The content similarity uses fuzzy hashing of the email body to group emails. It is robust such that one can change several words of an email and even re-arrange paragraphs and it will still group them together. The false positive rate is generally very low for emails with enough text (above 30-40 words).
3. If your email does not have any results based on content similarity, you can use one of the other built-in groupings like **Same Sender**. The number in brackets shows the amount of matches.
* When choosing another grouping, you need to disable the **Content similar** search, otherwise they will be ANDed.
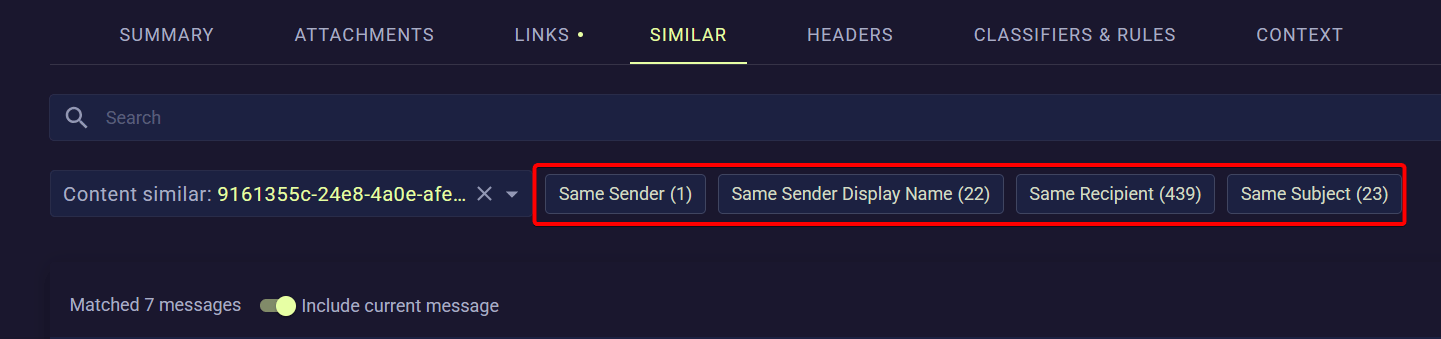 4. When you found a grouping that works for you, you can create again a saved search or even a campaign with the two icons on the right side in the search bar.
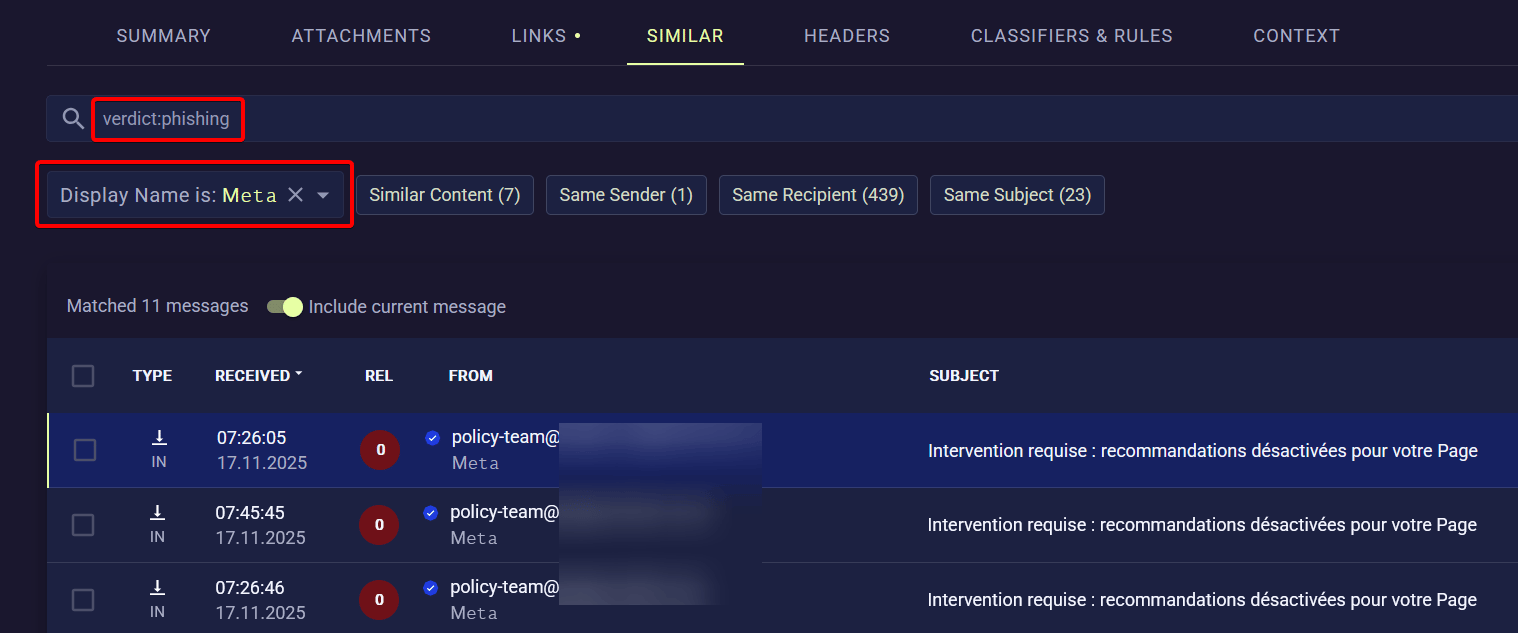
5. The search bar here supports the same searches as the default one in the **Messages** menu. For example, you can refine the built-in groupings with normal search queries. In this example we grouped the emails based on display name and restricted it via search `verdict:phishing` to only phishing emails.
4. When you found a grouping that works for you, you can create again a saved search or even a campaign with the two icons on the right side in the search bar.
5. The search bar here supports the same searches as the default one in the **Messages** menu. For example, you can refine the built-in groupings with normal search queries. In this example we grouped the emails based on display name and restricted it via search `verdict:phishing` to only phishing emails.
 ## Give feedback to a reported email
**Prerequisites**
* This chapter is only applicable if you use the [Abuse Mailbox](/latest/abuse-mailbox) feature of xorlab.
* You need at least one already reported email in xorlab.
Here we show how you find the user reported emails and give feedback to the reporter.
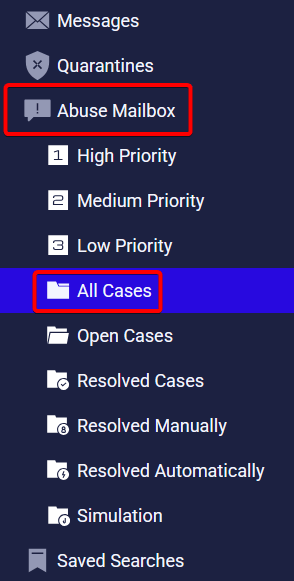
1. Open the **Abuse Mailbox** menu on the left and choose **All Cases**. This will show all reported emails xorlab received.
## Give feedback to a reported email
**Prerequisites**
* This chapter is only applicable if you use the [Abuse Mailbox](/latest/abuse-mailbox) feature of xorlab.
* You need at least one already reported email in xorlab.
Here we show how you find the user reported emails and give feedback to the reporter.
1. Open the **Abuse Mailbox** menu on the left and choose **All Cases**. This will show all reported emails xorlab received.
 2. The search bar on top works in the same way as the ones we've seen in the previous chapters. Optional: You can additionally use the `reporter:` keyword to search for specific internal reporters.
3. Click on an email where the **STATUS** on the right side is `OPEN`.
4. You will see the same detail view as before, but additionally you have **Resolve** buttons in the upper right. Click on **Resolve as Spam**.
2. The search bar on top works in the same way as the ones we've seen in the previous chapters. Optional: You can additionally use the `reporter:` keyword to search for specific internal reporters.
3. Click on an email where the **STATUS** on the right side is `OPEN`.
4. You will see the same detail view as before, but additionally you have **Resolve** buttons in the upper right. Click on **Resolve as Spam**.
 5. Under **Feedback Template** you can select what feedback the reporter should get. Keep it as *Spam*. Add a custom **Comment**, and click on **Resolve**.
 **Attaching the reported email**
When you select a benign verdict (shown as green in the search), xorlab will attach the reported email as EML to the feedack email. For malicious emails, this is not the case.
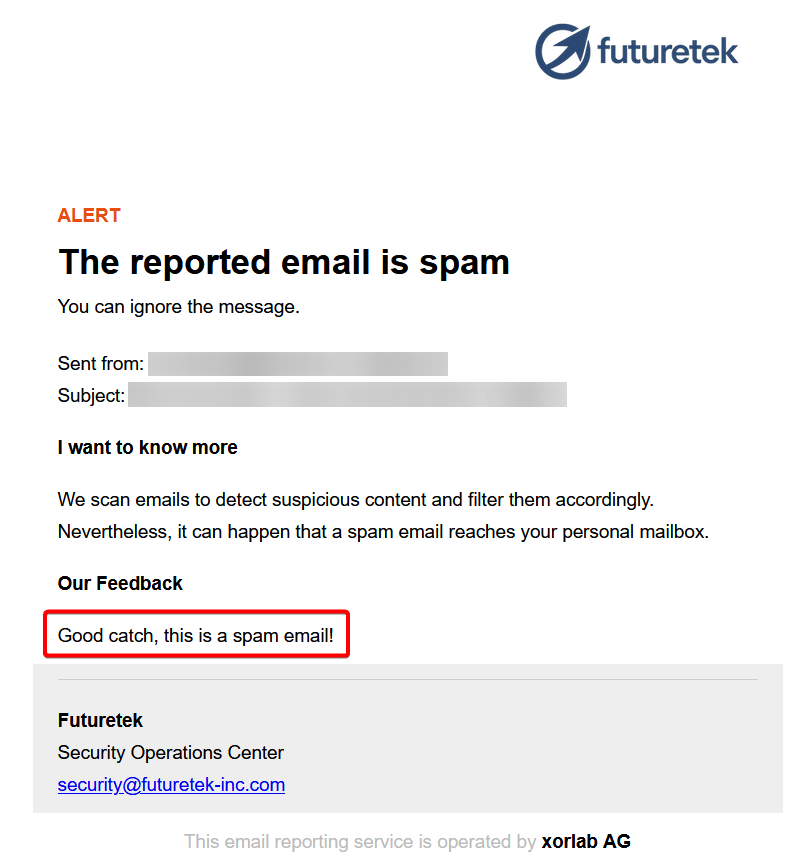
6. A few seconds later, the reporter will now get a feedback email like this. The comment is added in the lower half of the email:
**Attaching the reported email**
When you select a benign verdict (shown as green in the search), xorlab will attach the reported email as EML to the feedack email. For malicious emails, this is not the case.
6. A few seconds later, the reporter will now get a feedback email like this. The comment is added in the lower half of the email: