

- Creating your own SAML application in Entra ID.
- Mapping roles from xorlab to Entra ID users/groups for this application.
- Configuring xorlab to use the SAML app from Entra ID for authentication.
Azure requirementsSome of these actions require a proper Azure plan and/or user privileges, as described in the following chapter.
Creating a SAML app in AD
In order to configure an SSO application, you need one of the following AD user roles:- Global Administrator
- Cloud Application Administrator
- Application Administrator, or owner of the service principal.
-
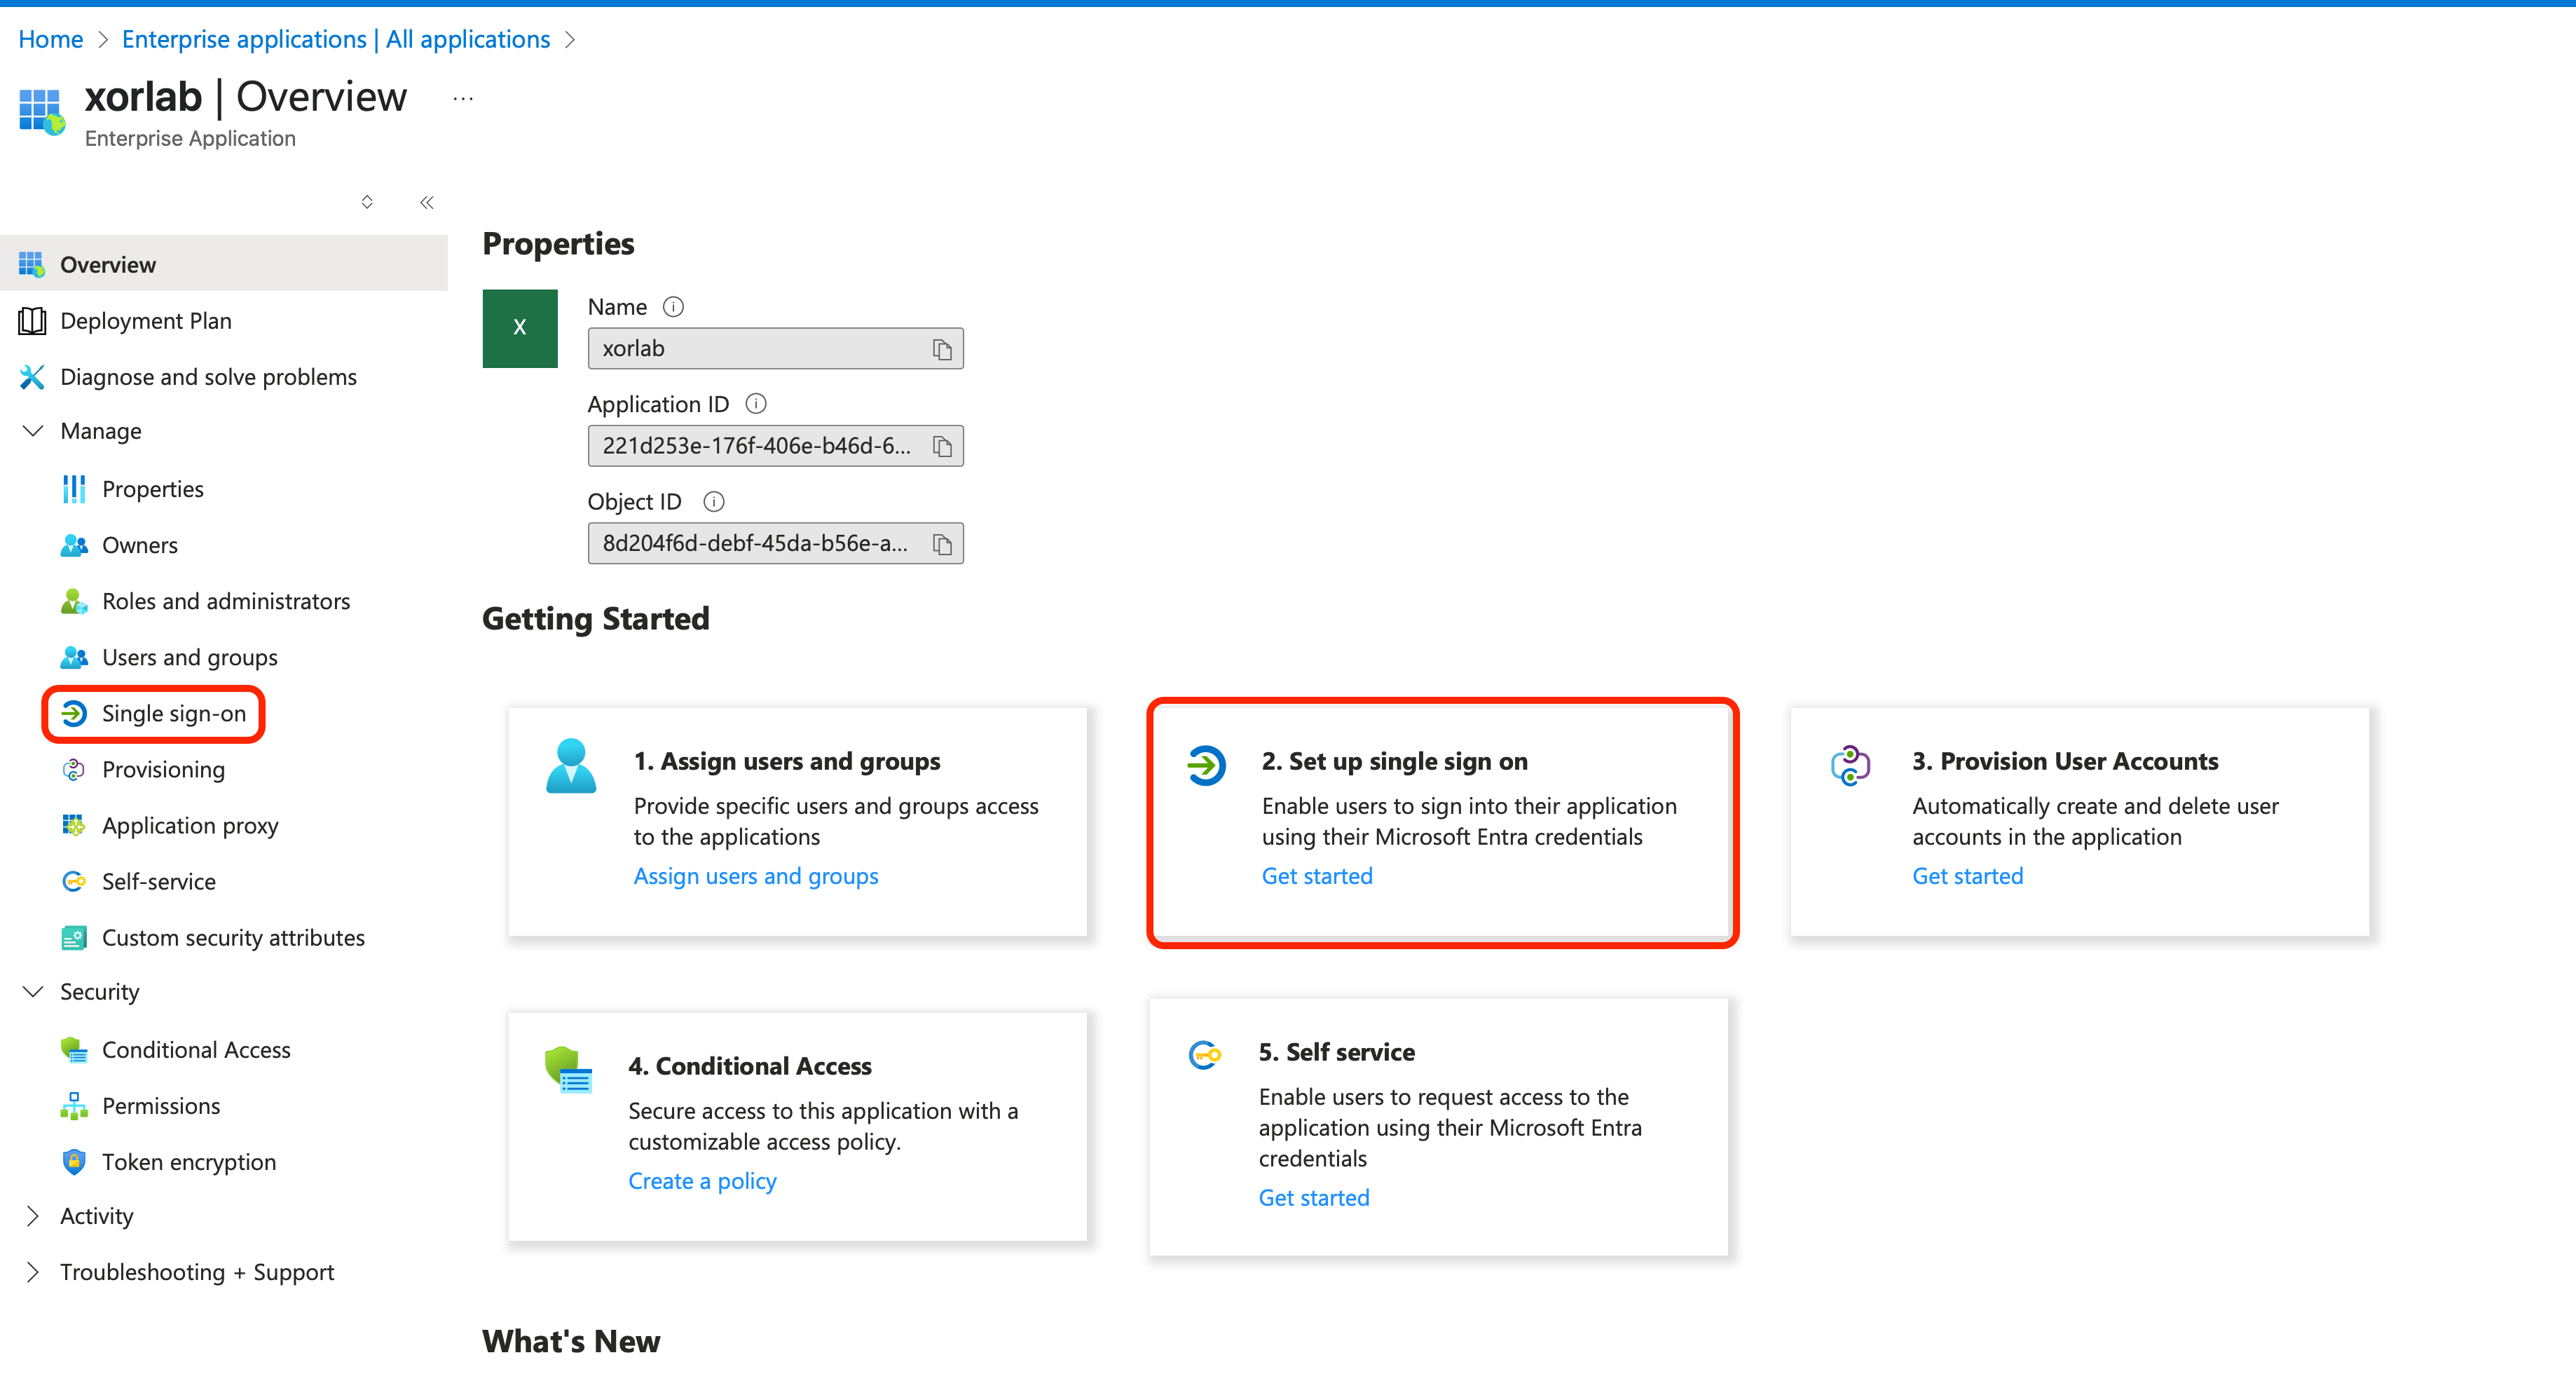
After creating a new enterprise application in Essential Setup for M365, go to the Overview page of this app, click Single sign-on in the left pane or Set up single sign-on tile in the center:
-
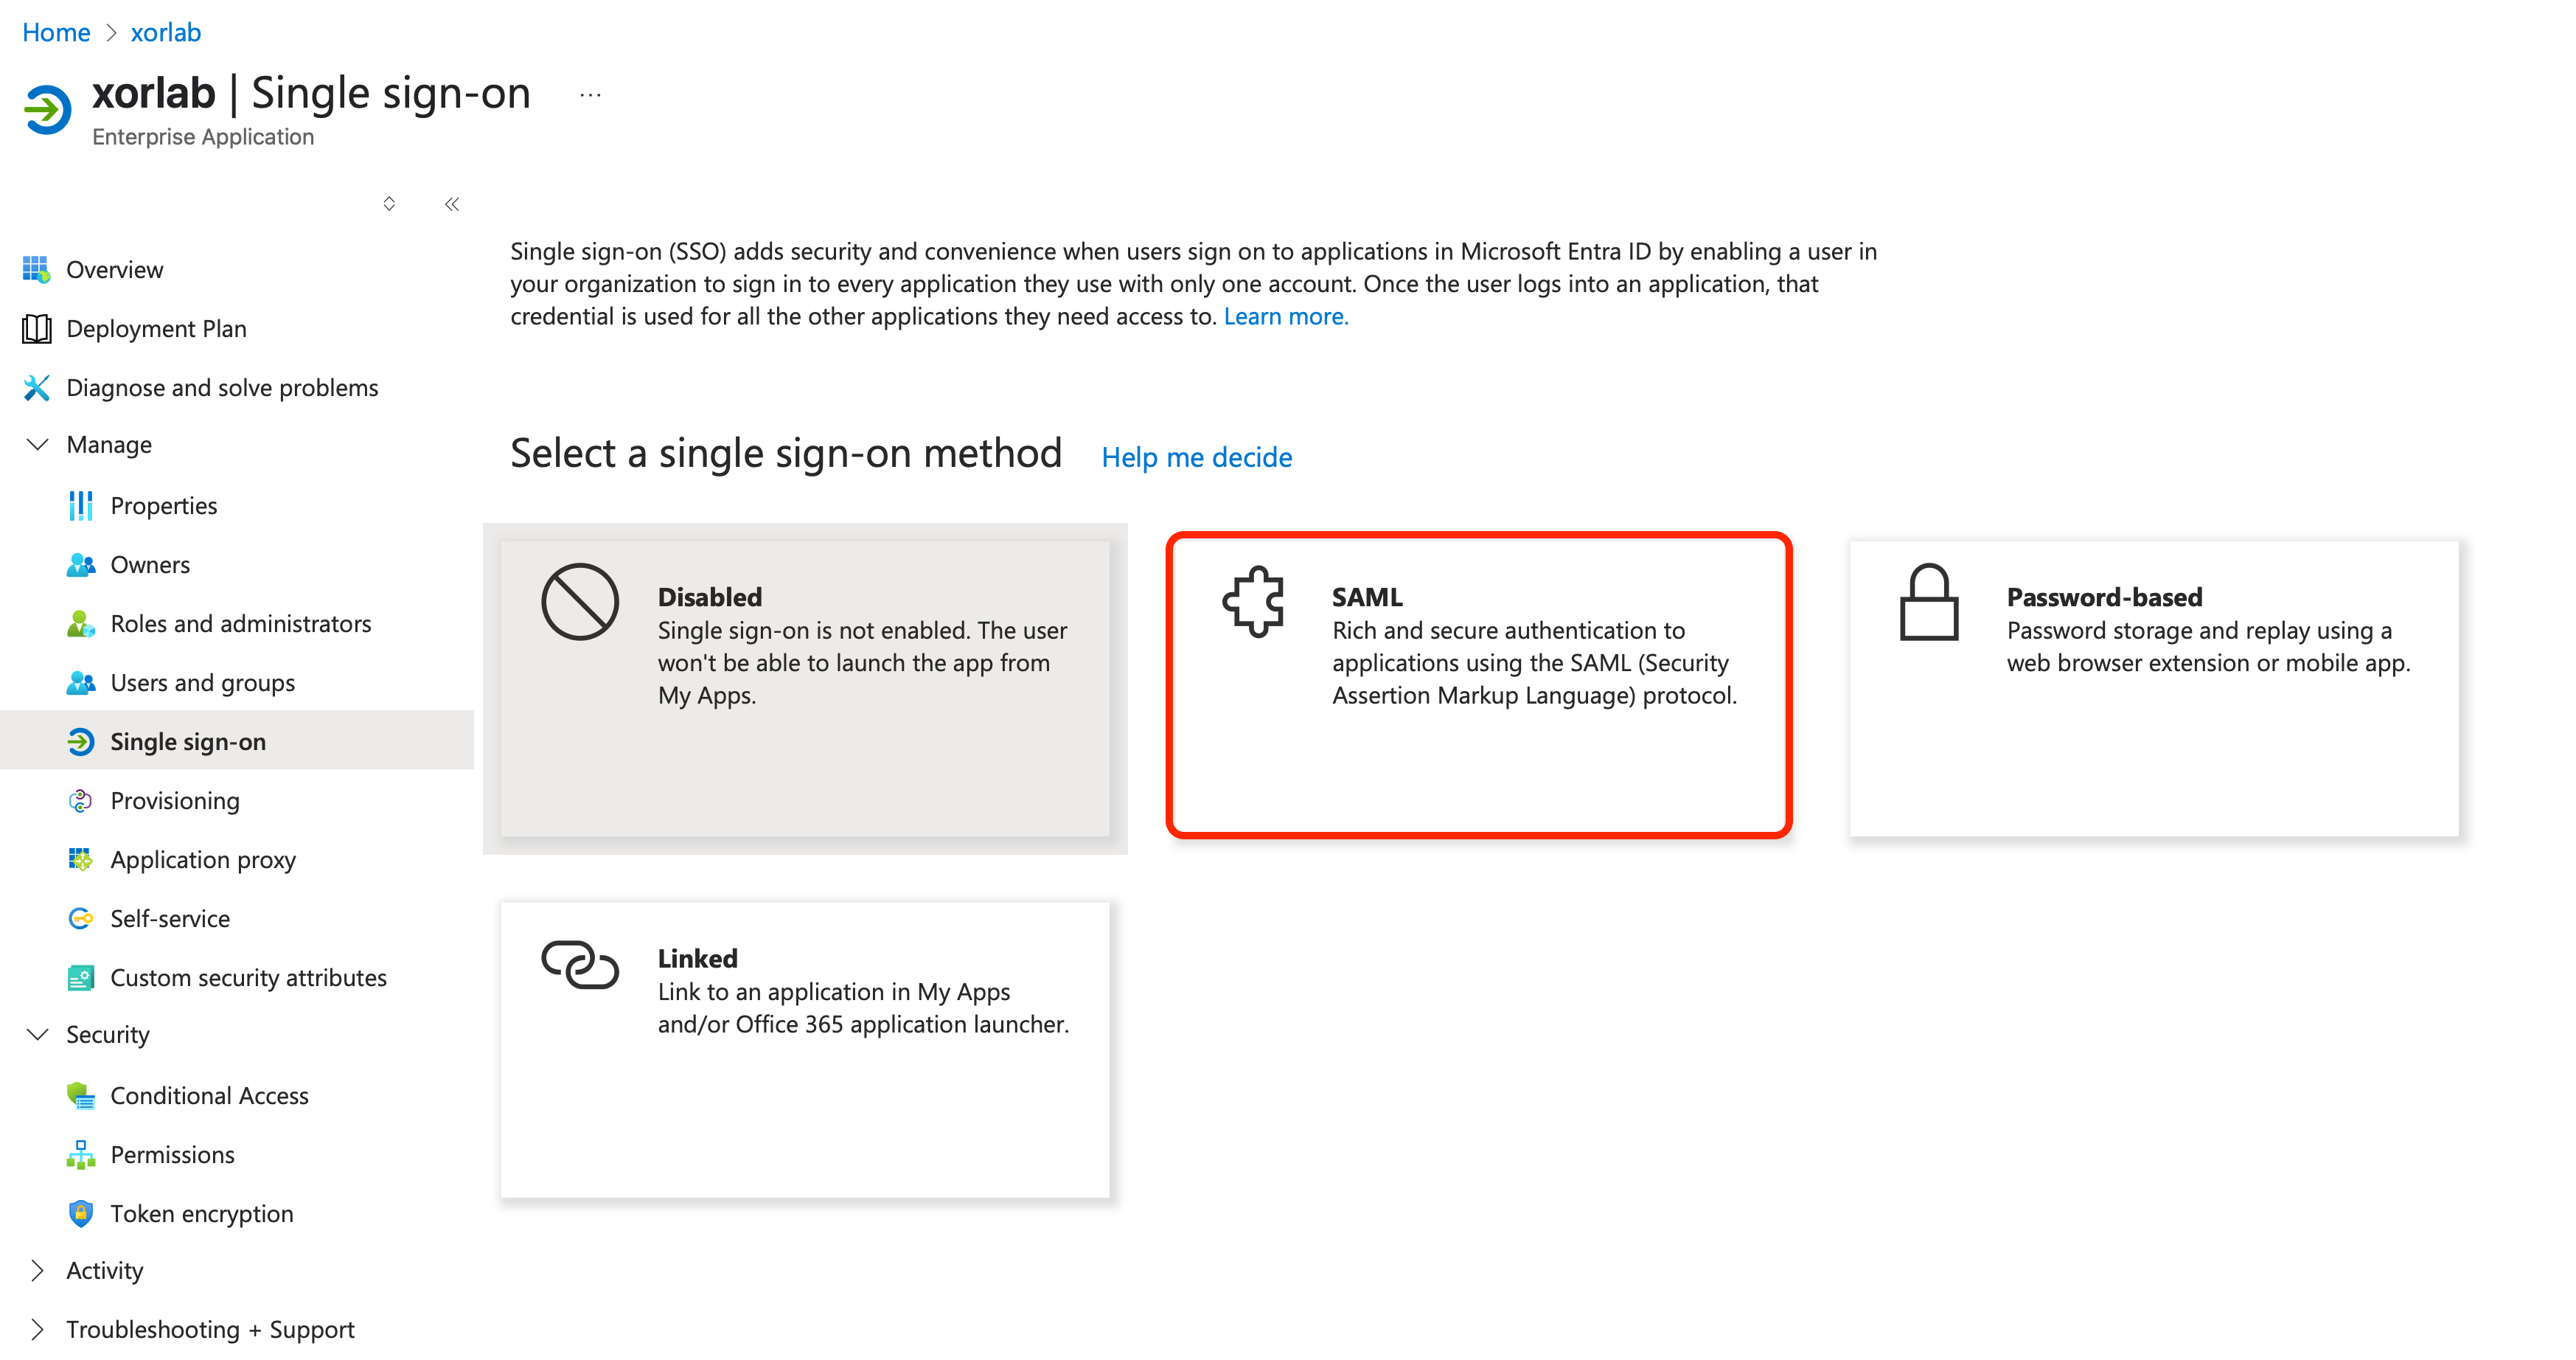
On the Single sign-on page select a single sign-on method by clicking the SAML tile:
-
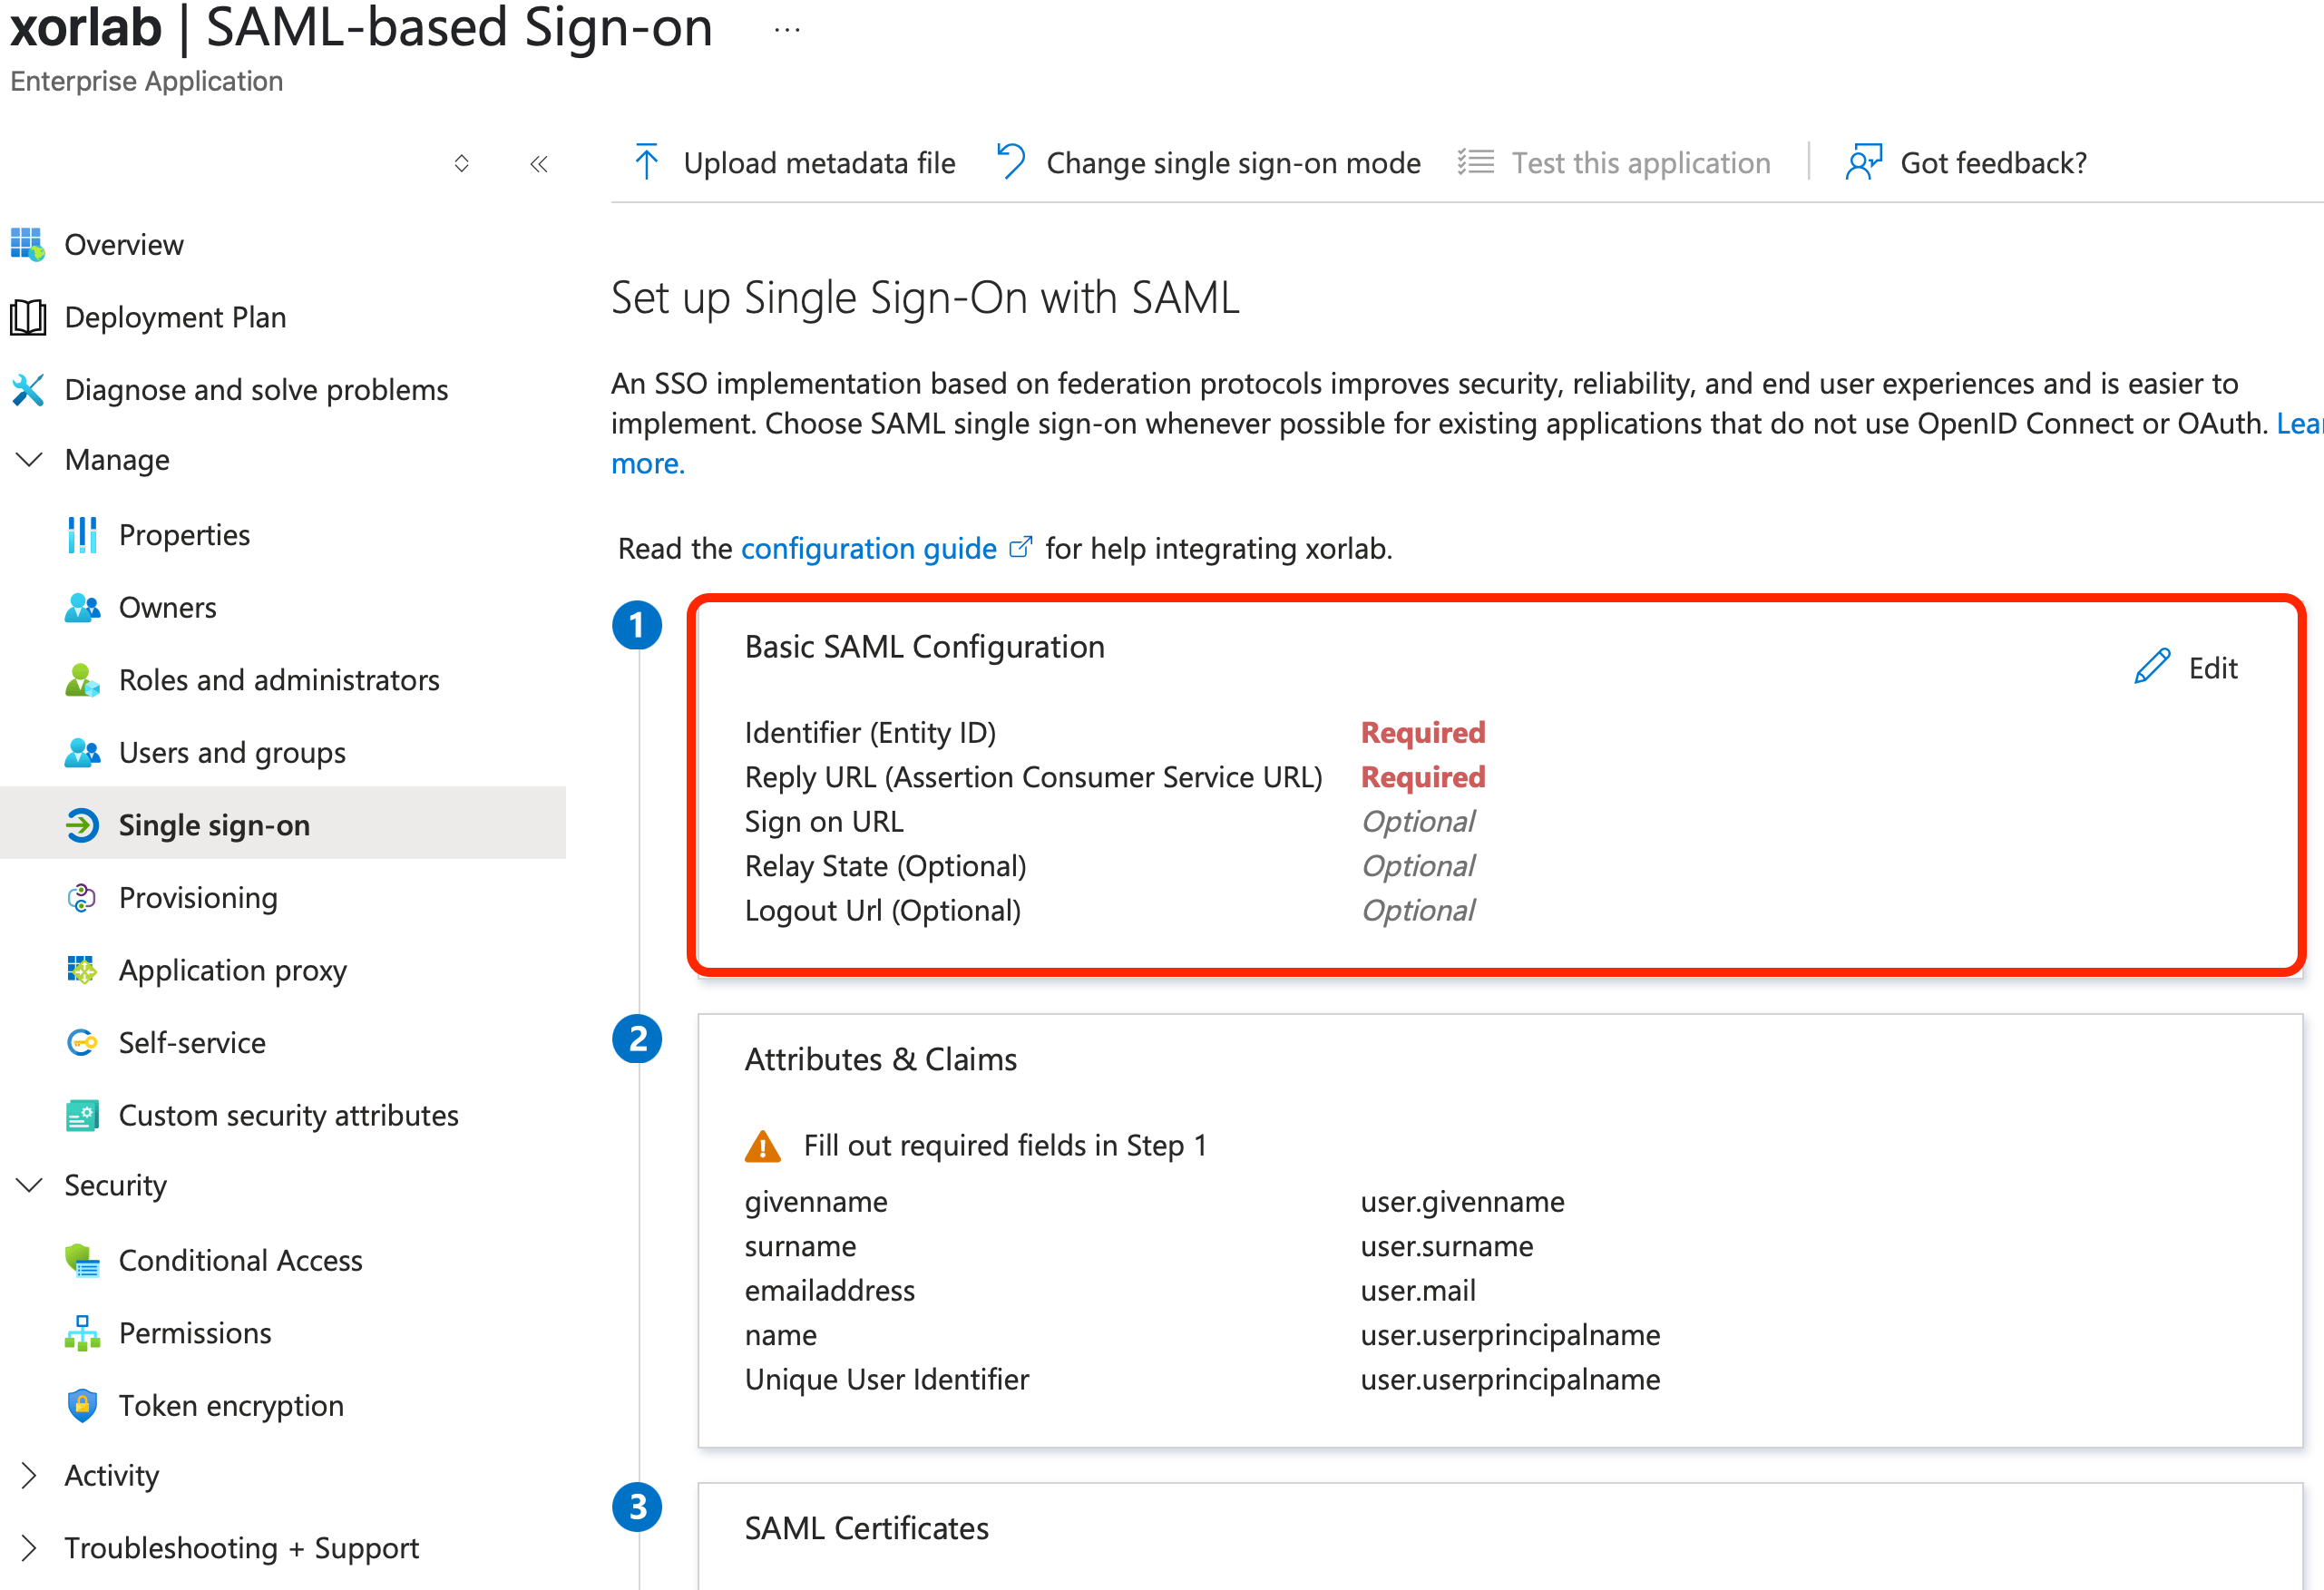
On the next page, click Edit in the Basic SAML Configuration tile:
-
In the Basic SAML Configuration pane that opens on the right, enter the following URLs in the first two input fields:
where
xorlabHostis the domain of the xorlab SaaS instance, e.g.,xyz.activeguard.cloudas in the screenshot below (for more information on SAML authorization in xorlab, please refer to SAML Based Authentication):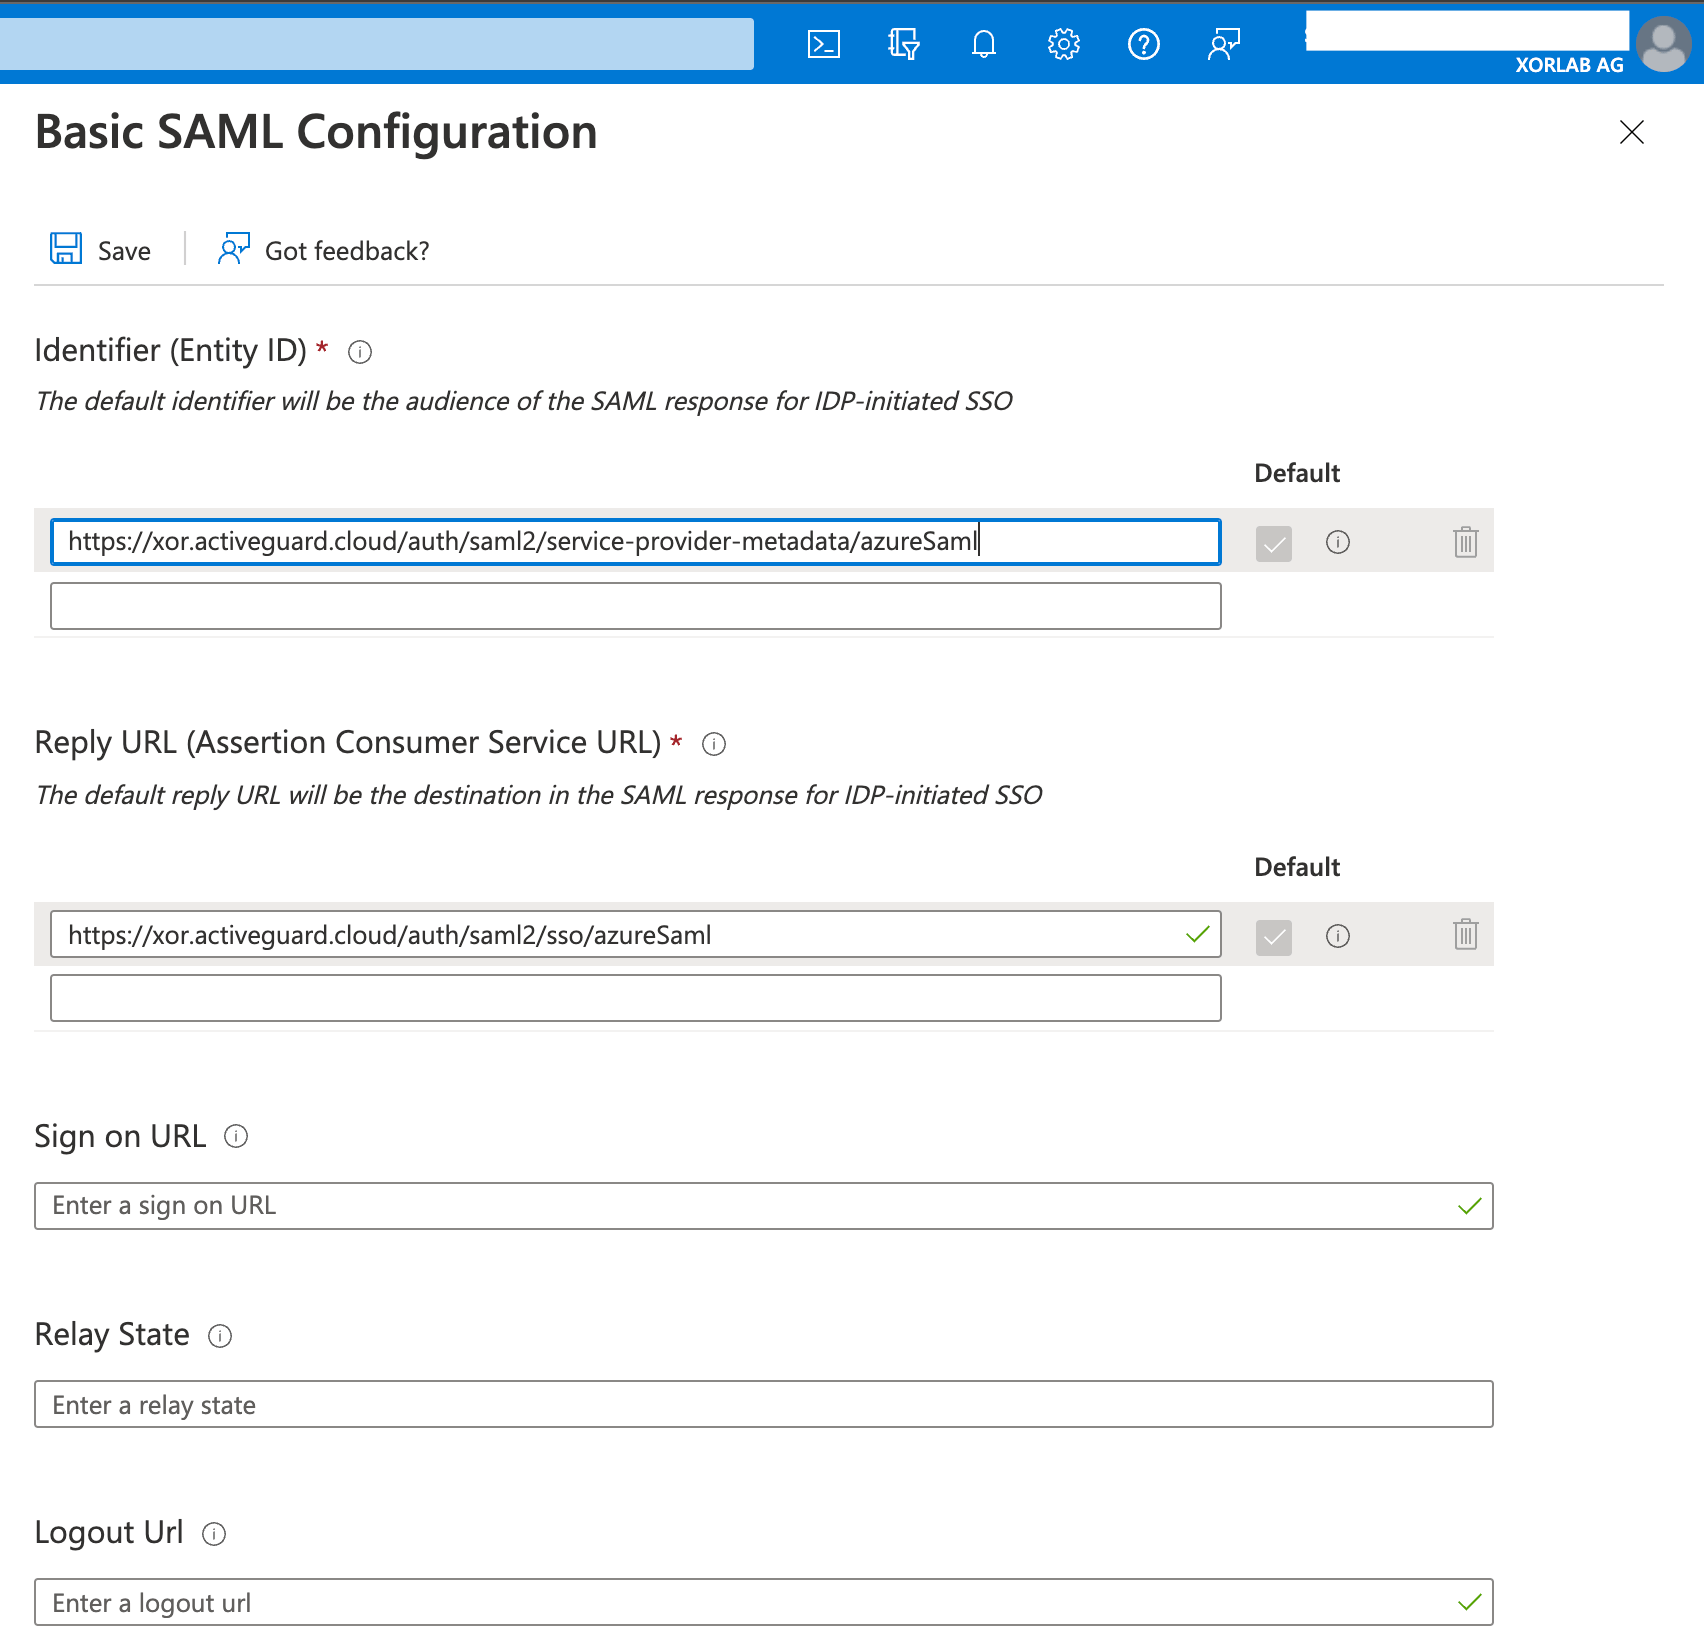
- Click Save to save changes, then click No, I’ll test it later in the message box (since xorlab Security Platform is not yet configured) and close this pane.
-
Copy and save the App Federation Metadata URL from SAML Certificates, you will need it later.
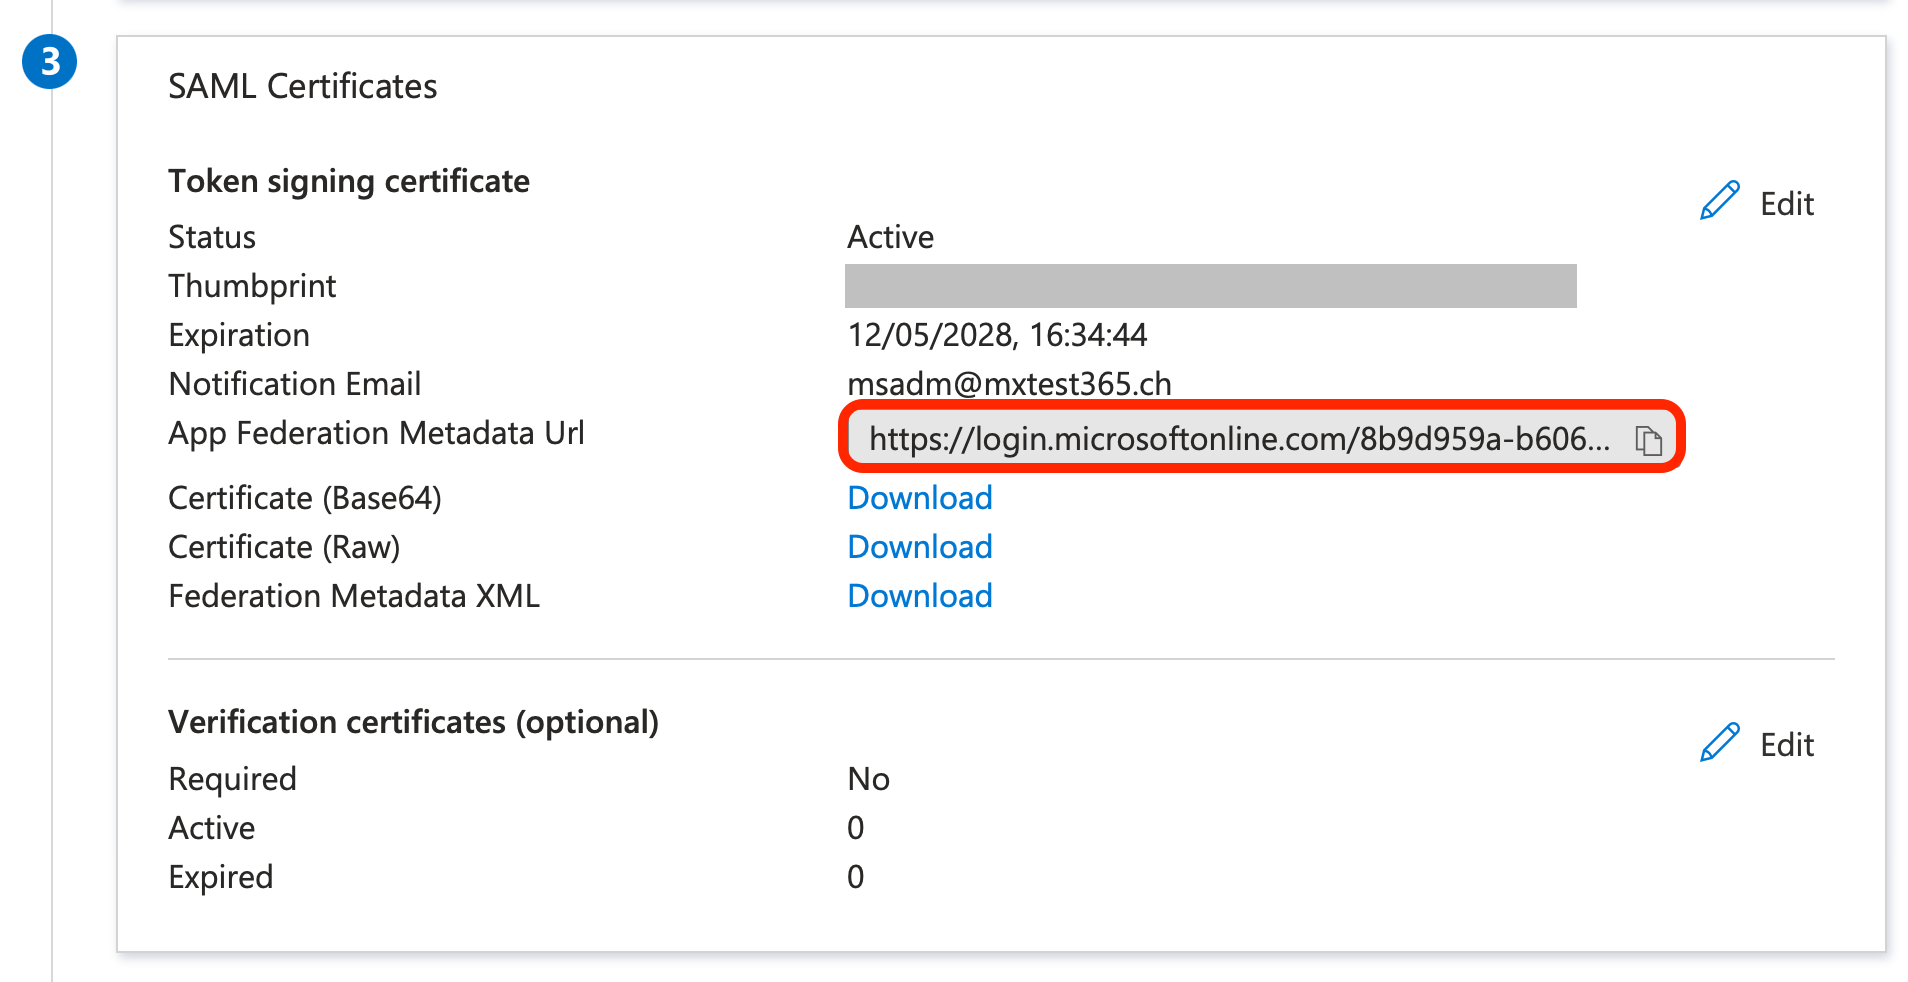
Optional configuration for aliases email addresses
In case you need the aliases email addresses in the self-service quarantine (SSQ), please follow these additional steps.With this integration, users will have access to their main (default) mailboxes in the SSQ as well as all aliases assigned to them. This is done by providing xorlab Security Platform the
proxyAddresses attribute from M365. However, a user will not have access to shared mailboxes.-
After completing the last step in the basic SAML configuration, move down to the next section of the SAML-based Sign-on page called Attributes & Claims and click Edit:
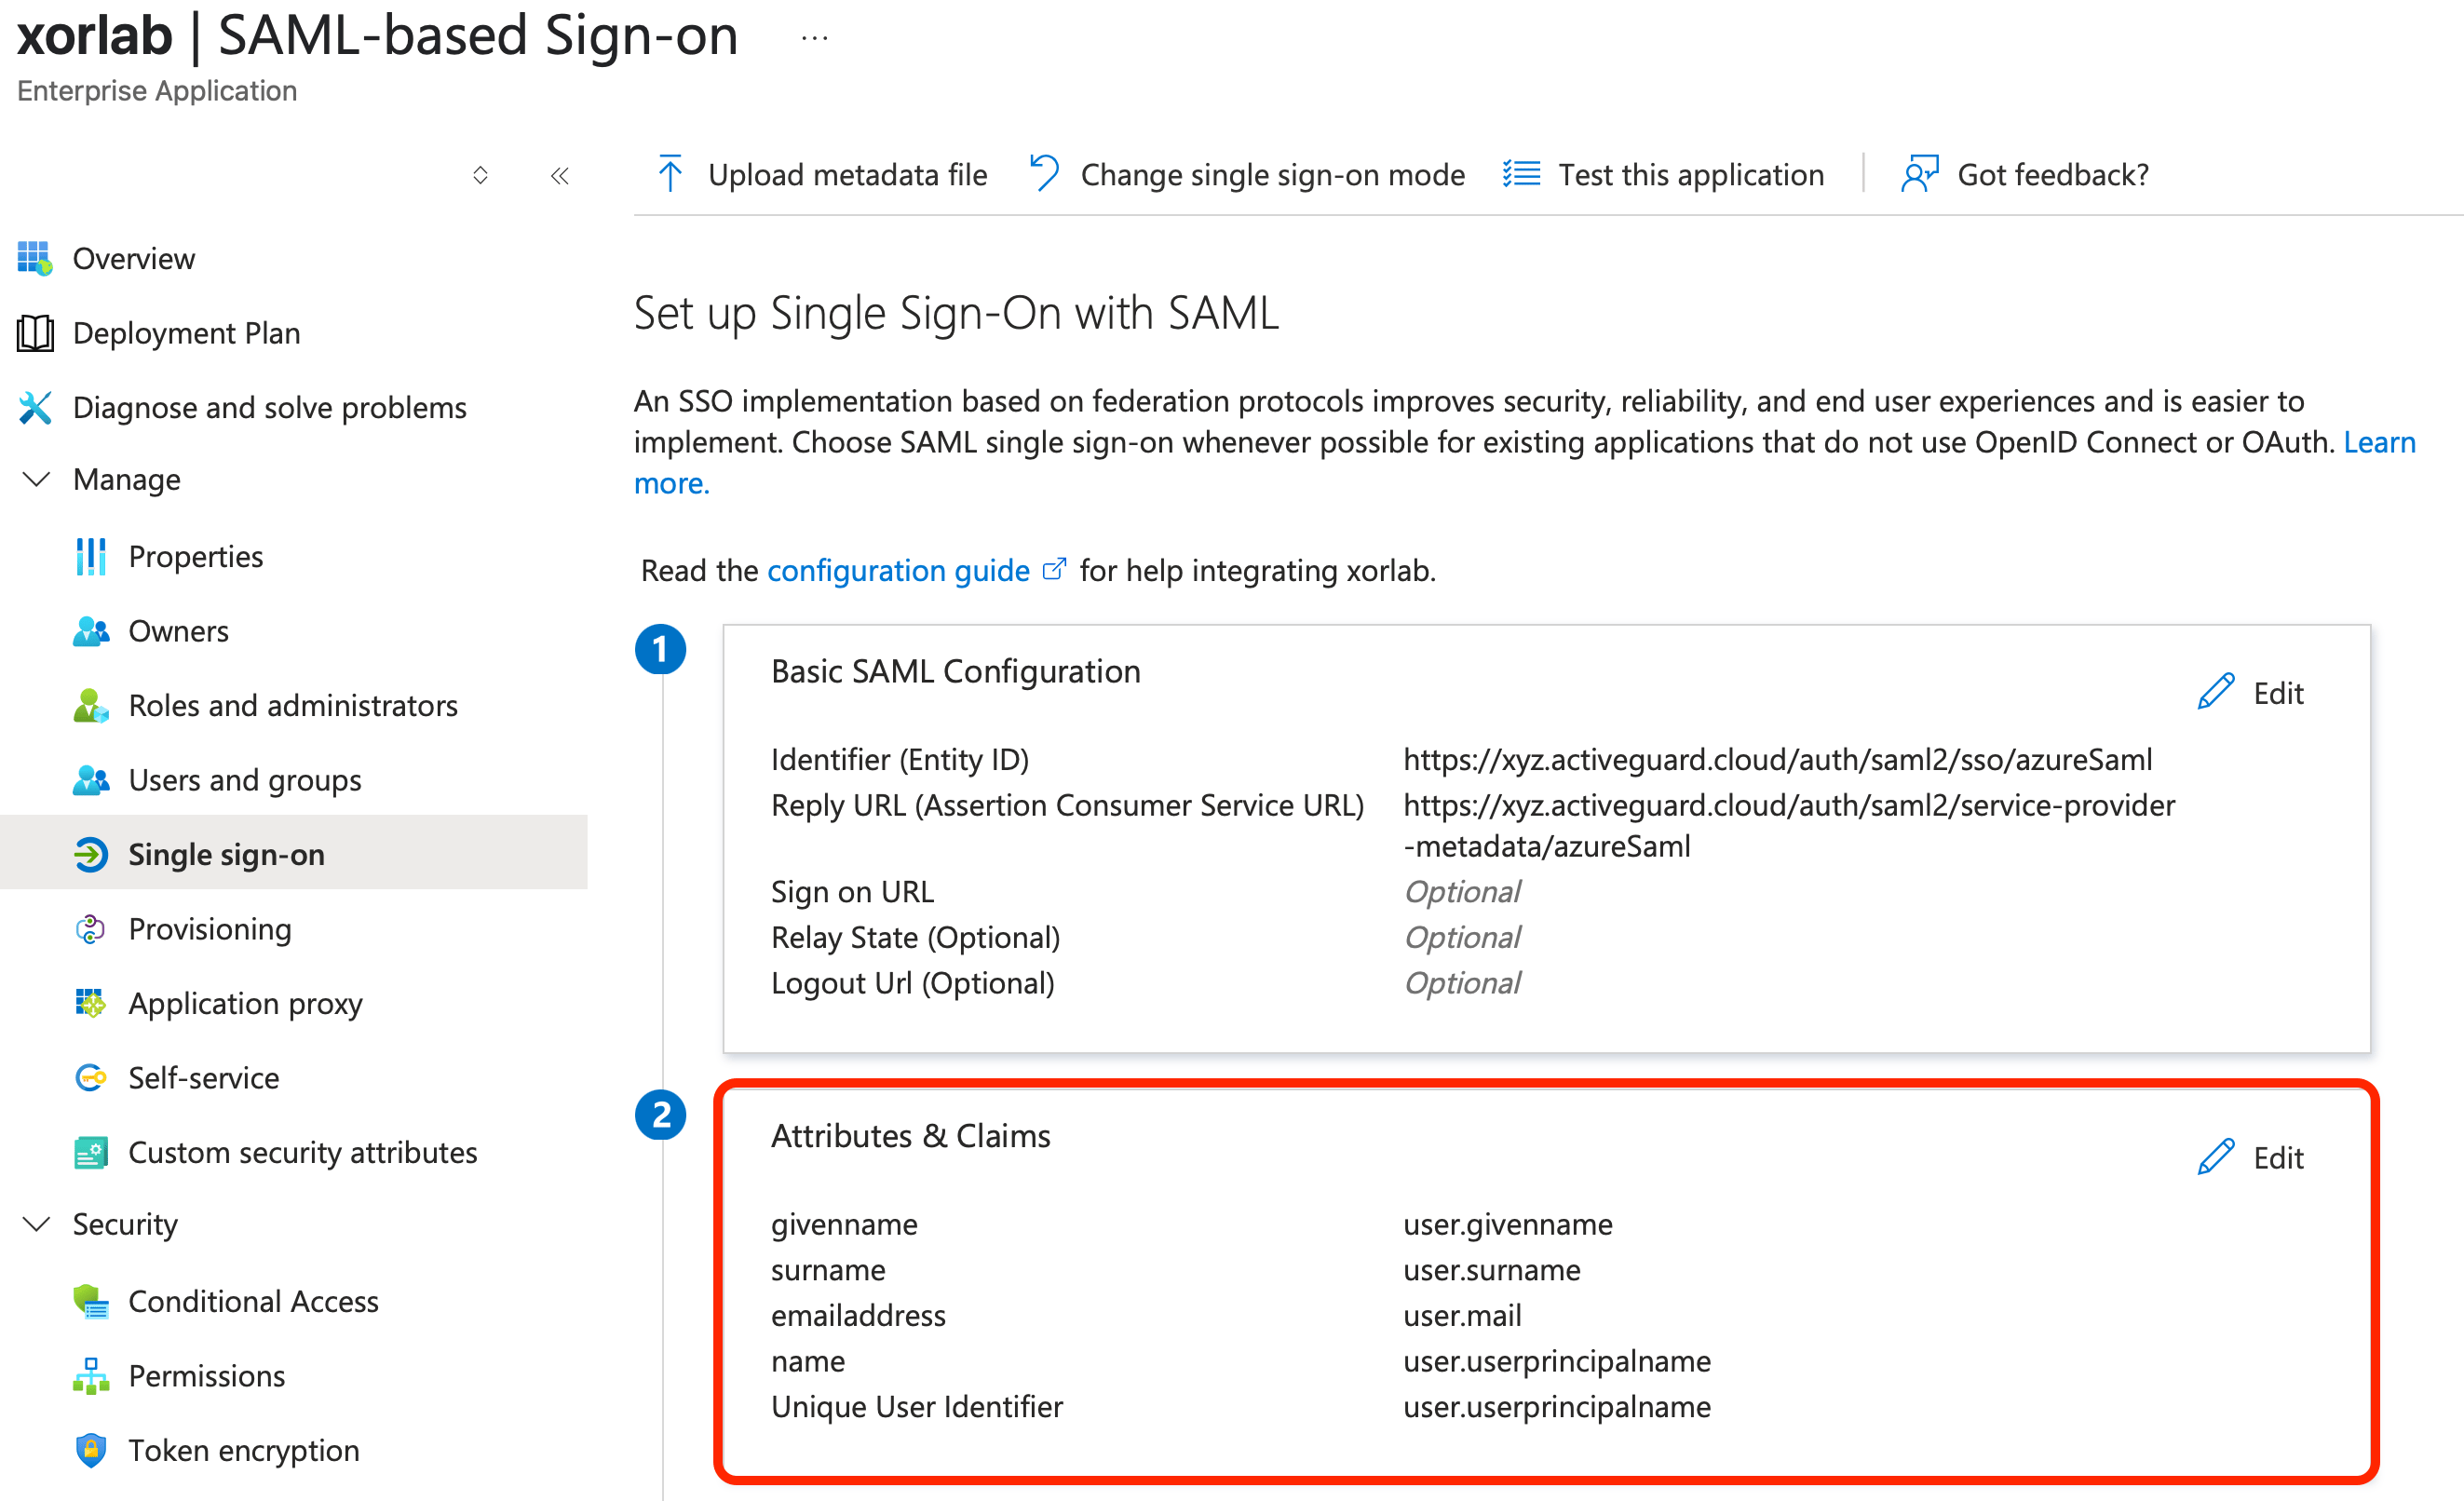
-
On the Attributes & Claims page, click Add new claim:
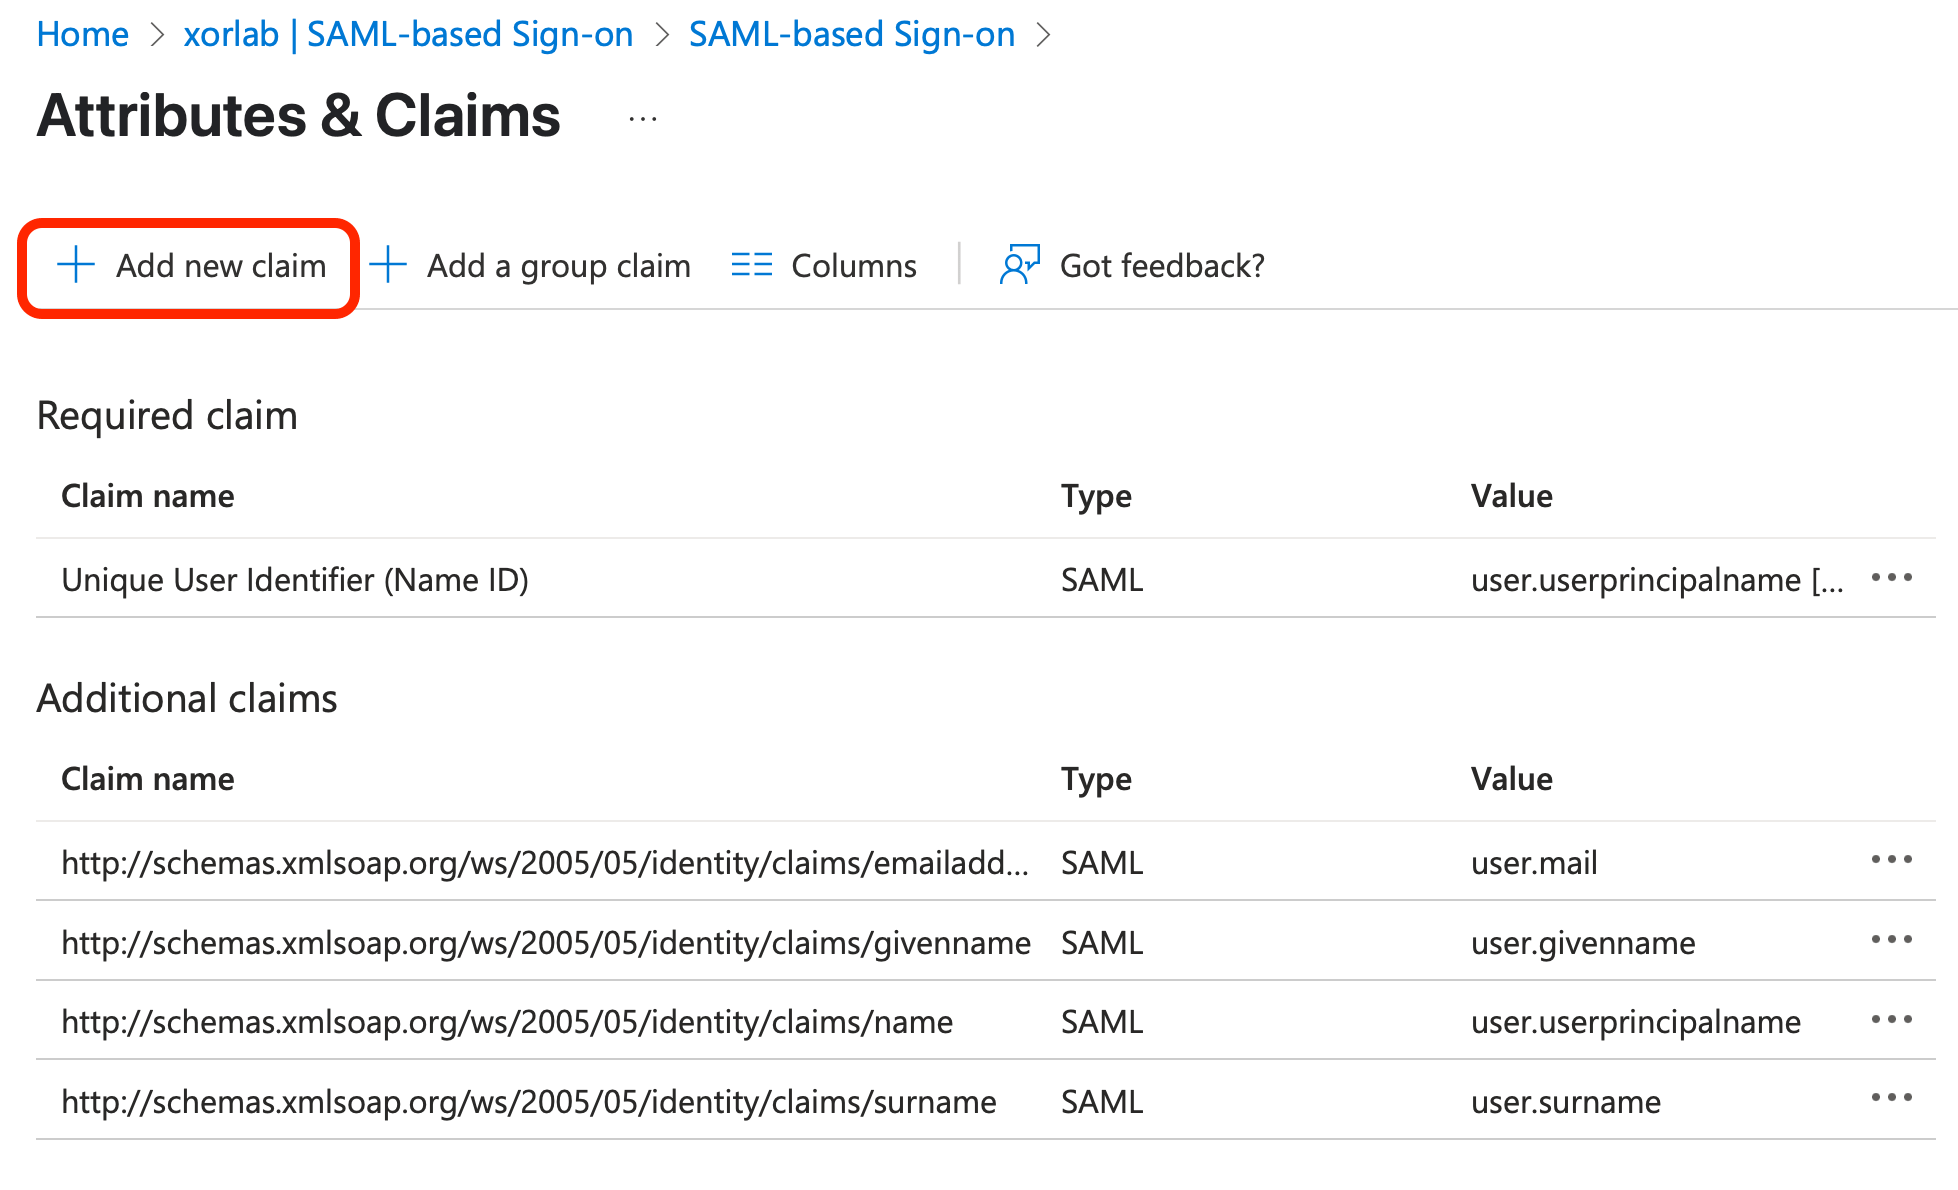
-
In the input fields of the Manage claims page that appears, enter
proxyAddressesas the Name anduser.proxyaddressesas the Source attribute. Click Save: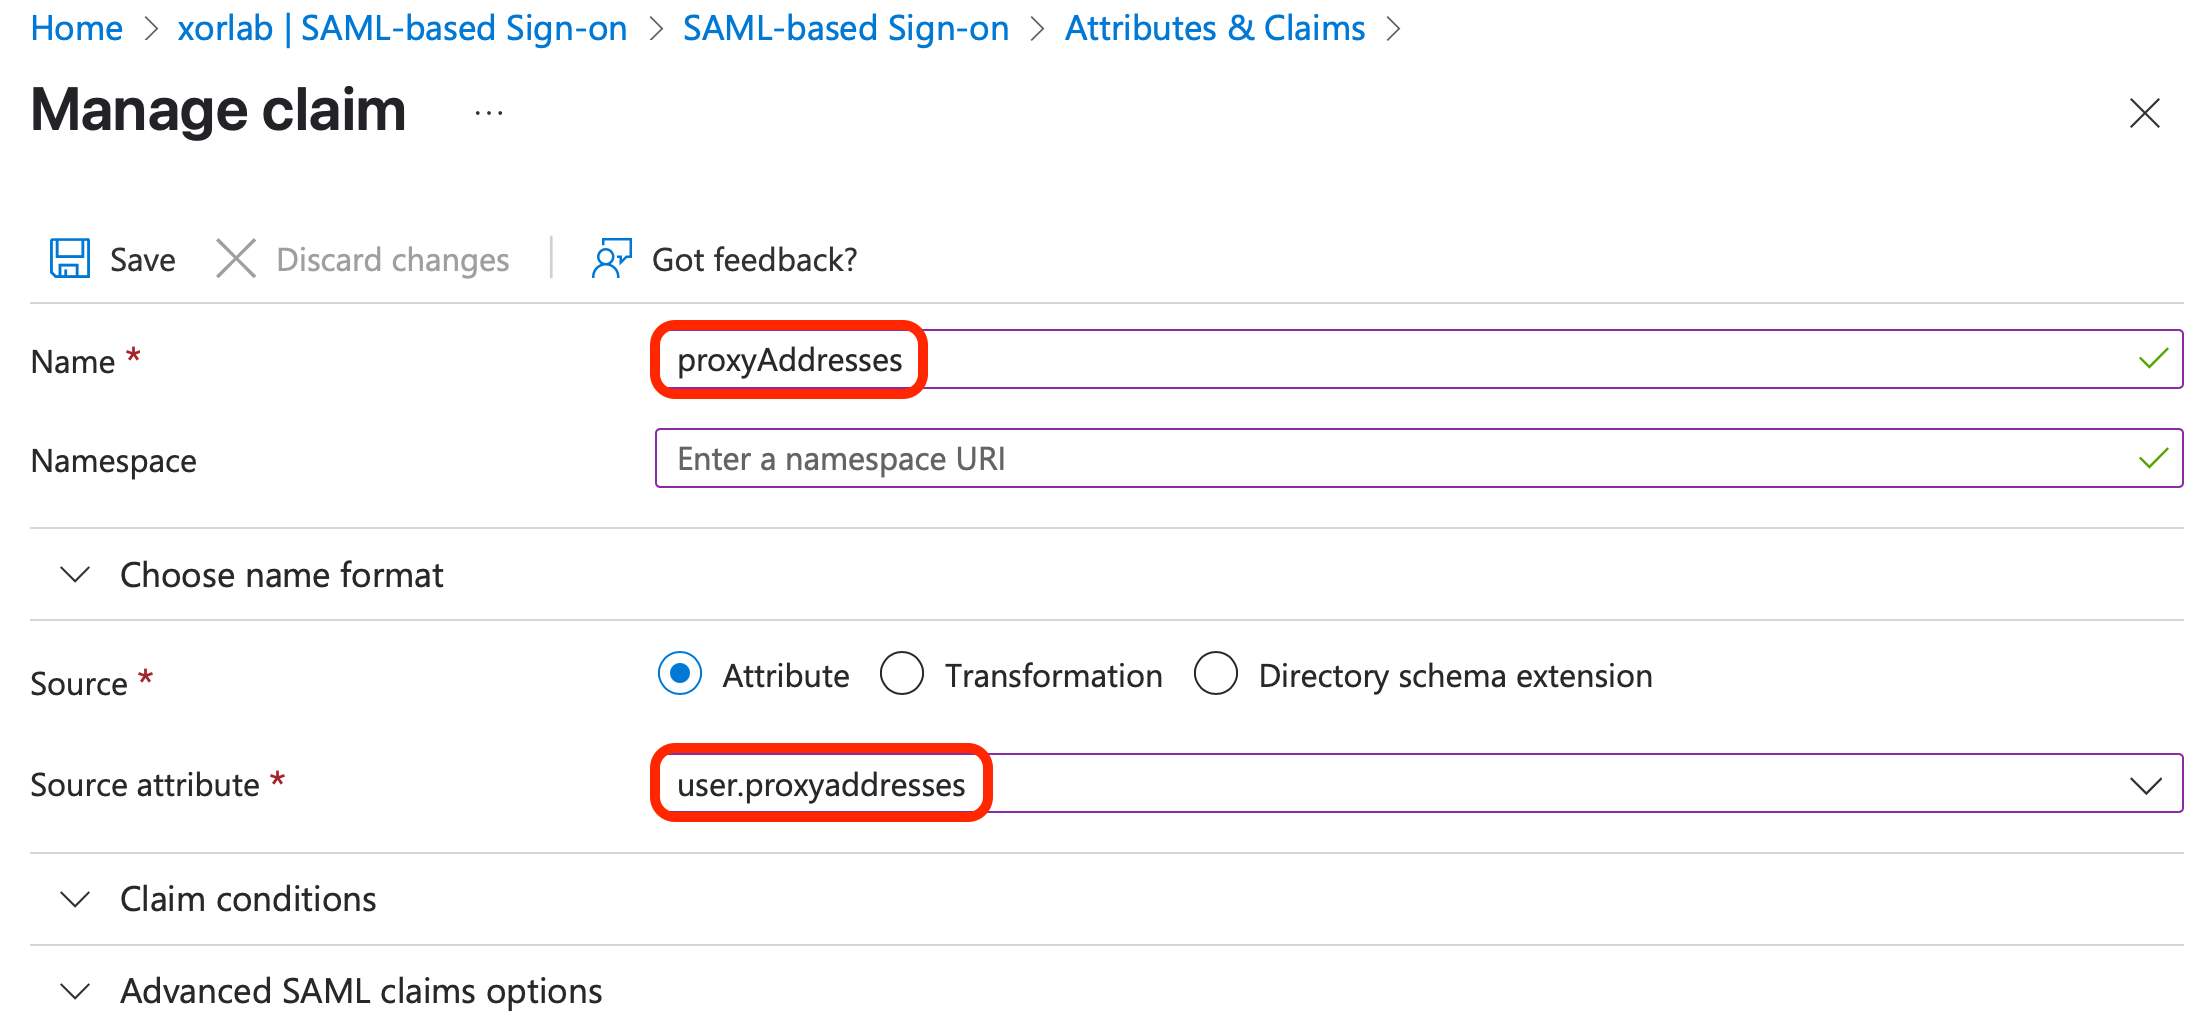
App users, groups, and roles
Next, you’ll create roles in the xorlab App Registration, then add users or groups to the xorlab Enterprise Application and assign them roles.-
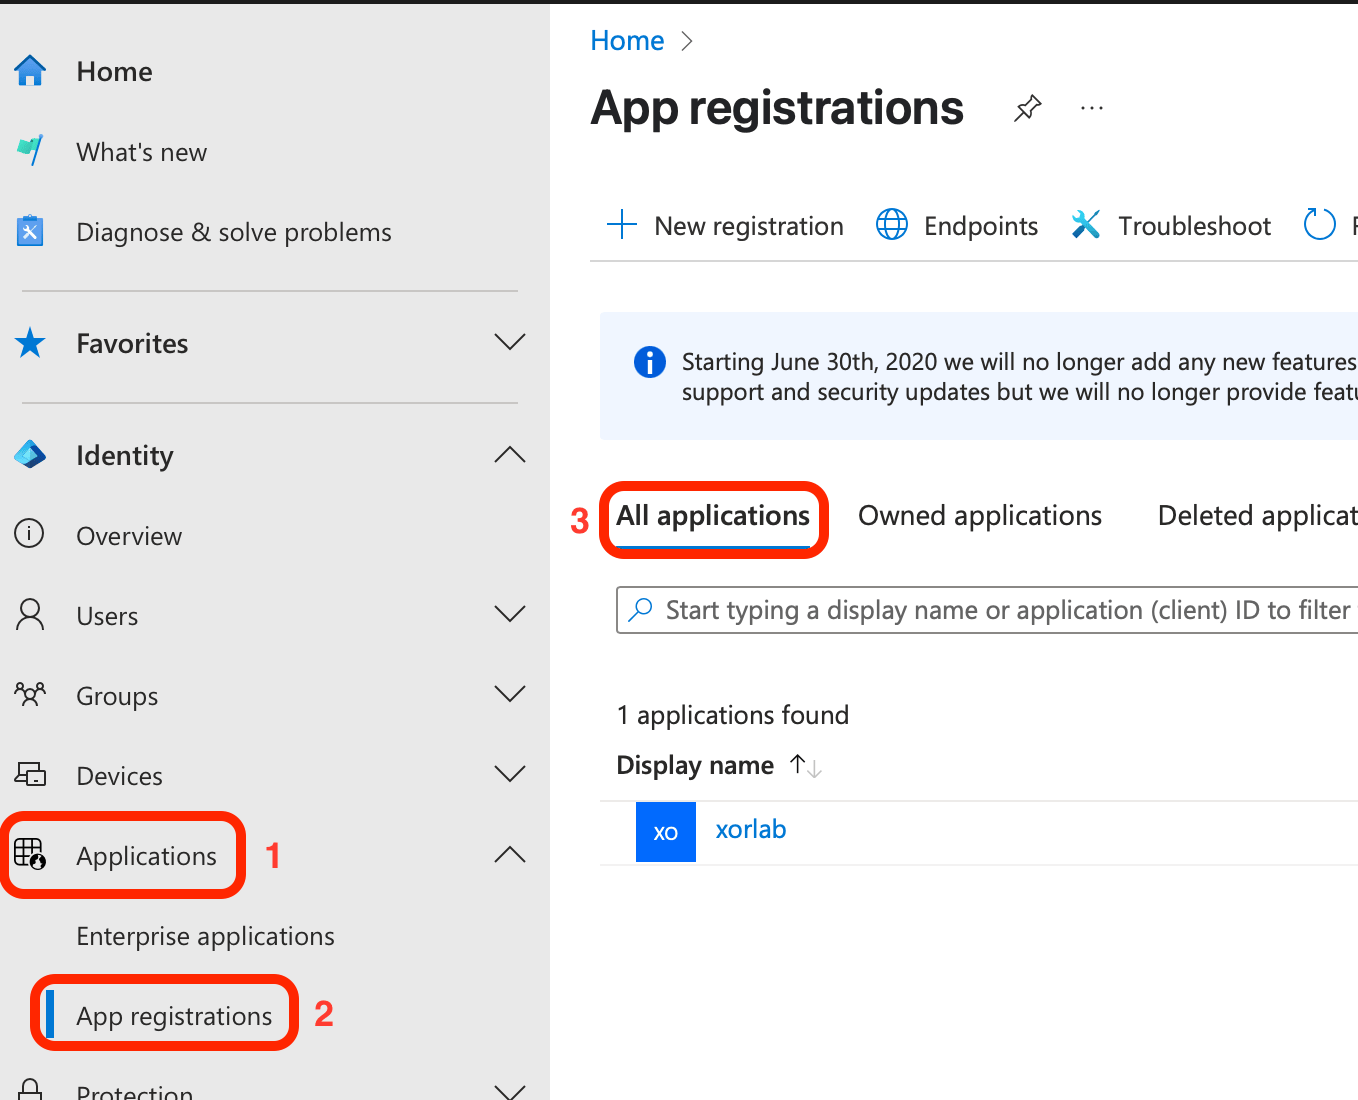
Go to the Microsoft Entra ID screen, click to expand the Applications item on the left pane, click App registrations, then click All applications in the main view, and click your app in the displayed list:
-
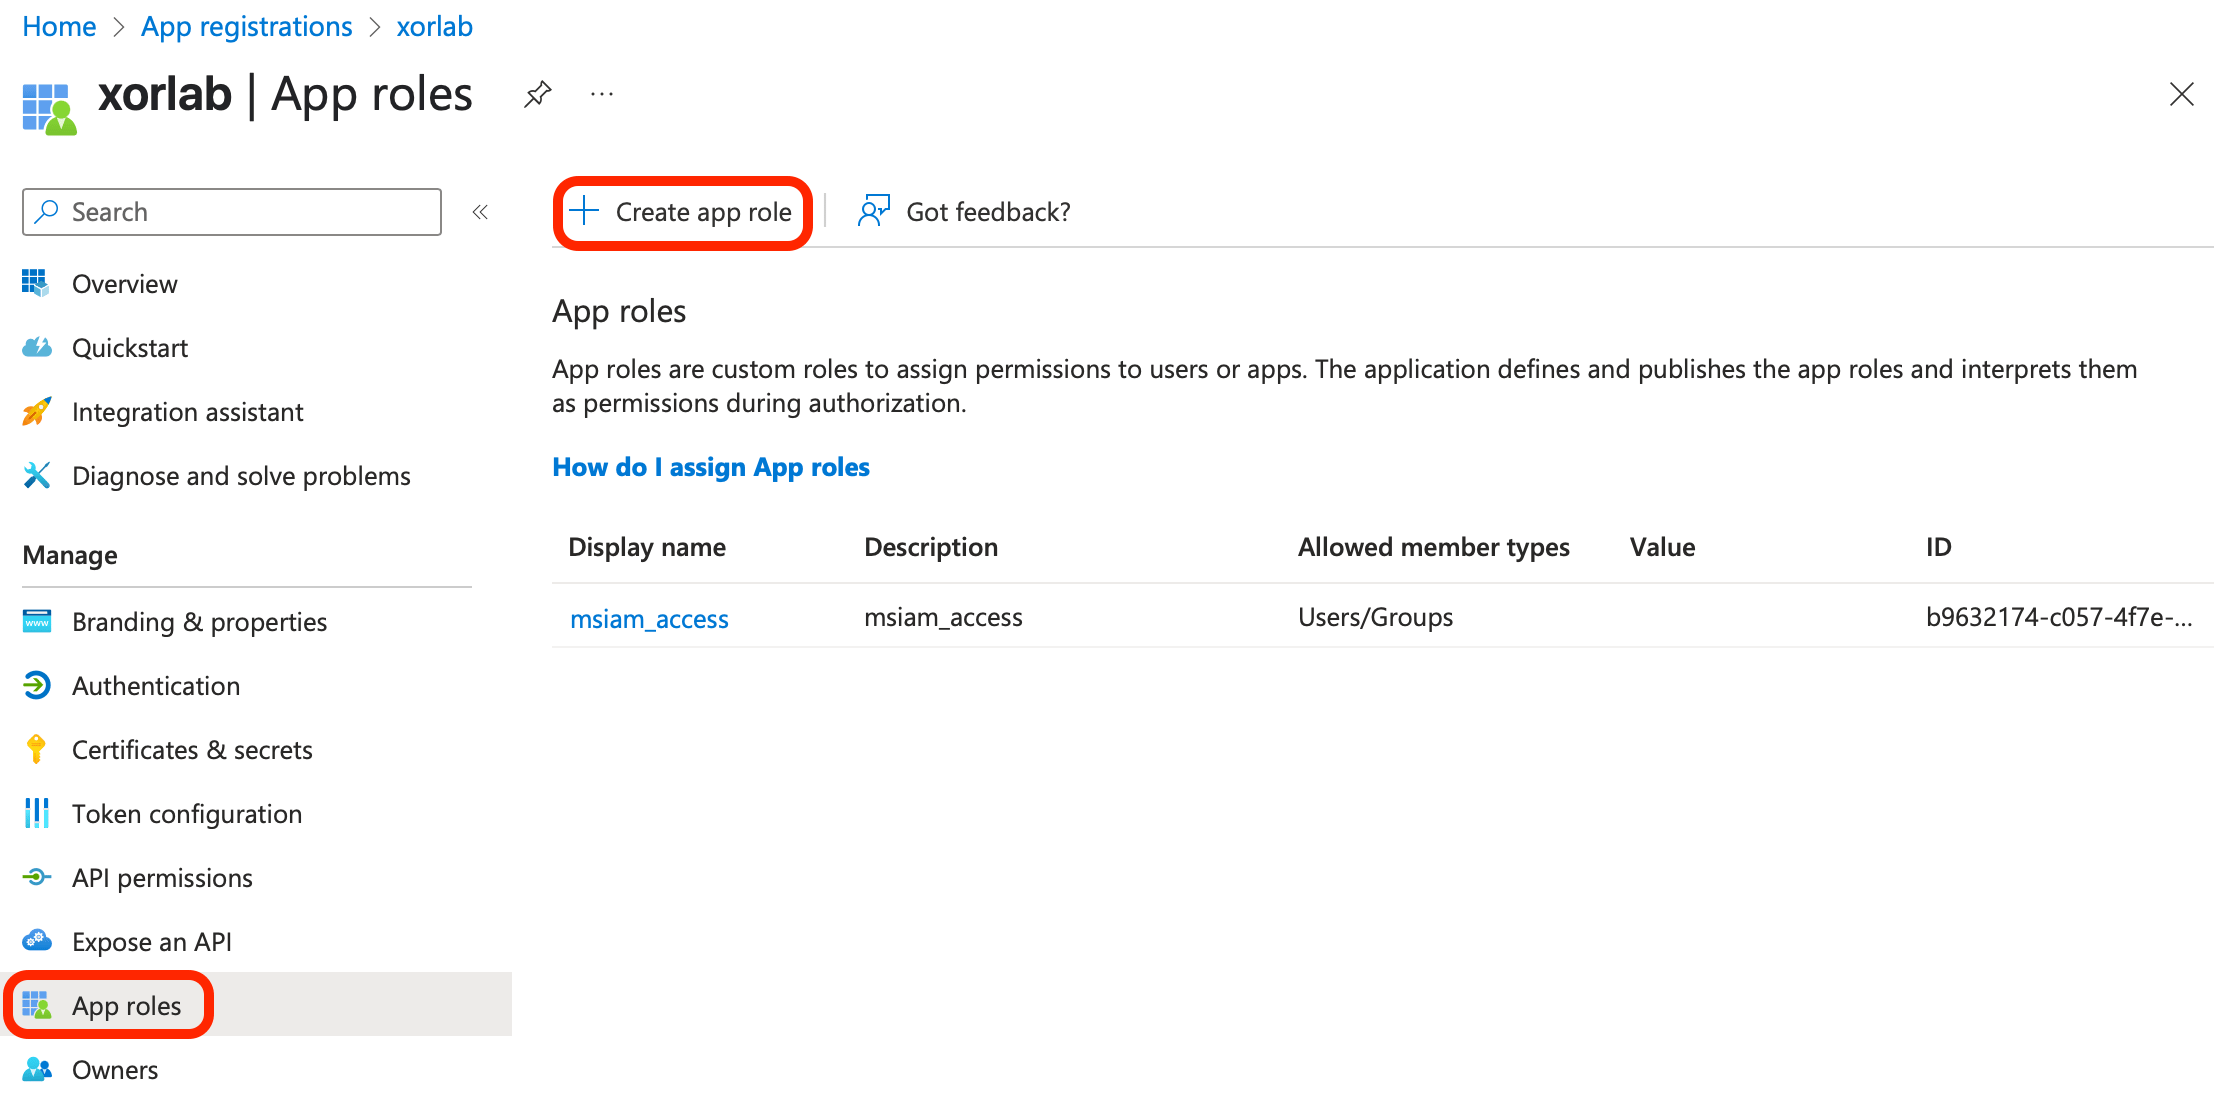
On your app registration screen, click App roles in the left pane and then Create app role in the main view:
-
In the Create app role pane on the right, fill the input fields with necessary data:
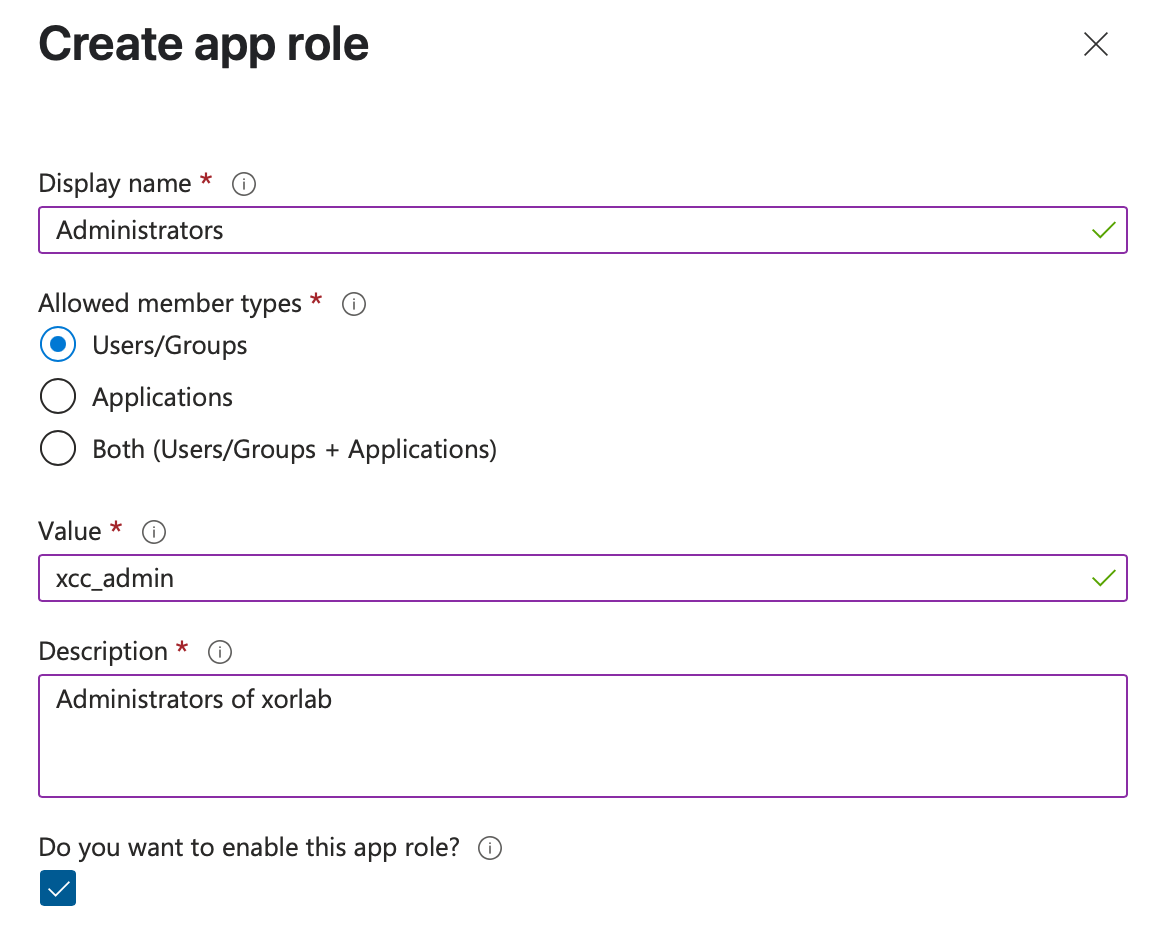
xcc_adminxcc_analystxcc_insightsxcc_monitorxcc_quarantine_user
xsp.admin. You will assign them to the target xorlab roles listed above in the XCC configuration file as described in the next section. - After providing a description for the role, click Apply.
-
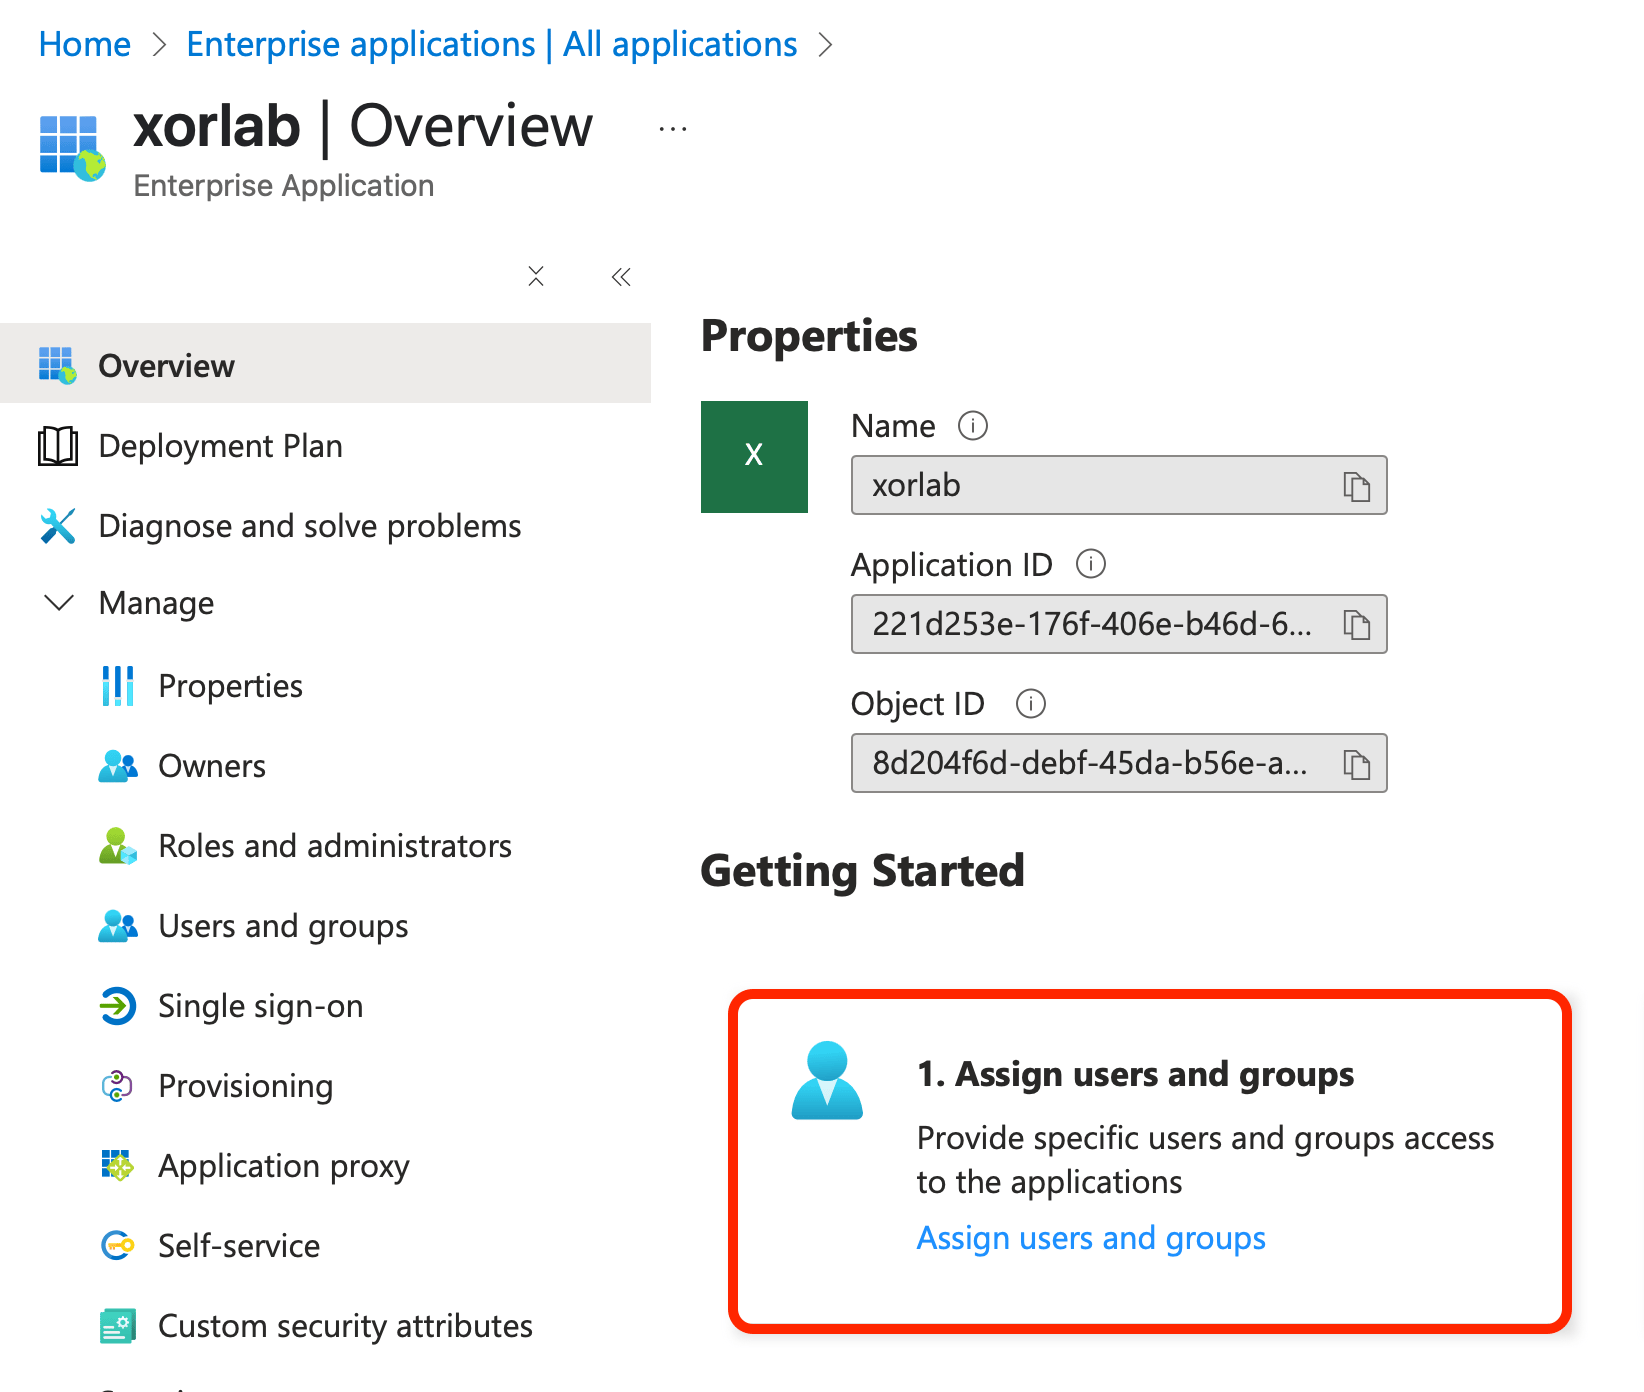
Go to the preview screen of all enterprise applications, click the xorlab app and, on the overview page for your app, click Assign users and groups in the first tile:
-
On the Users and groups screen for your app, click Add user/group:
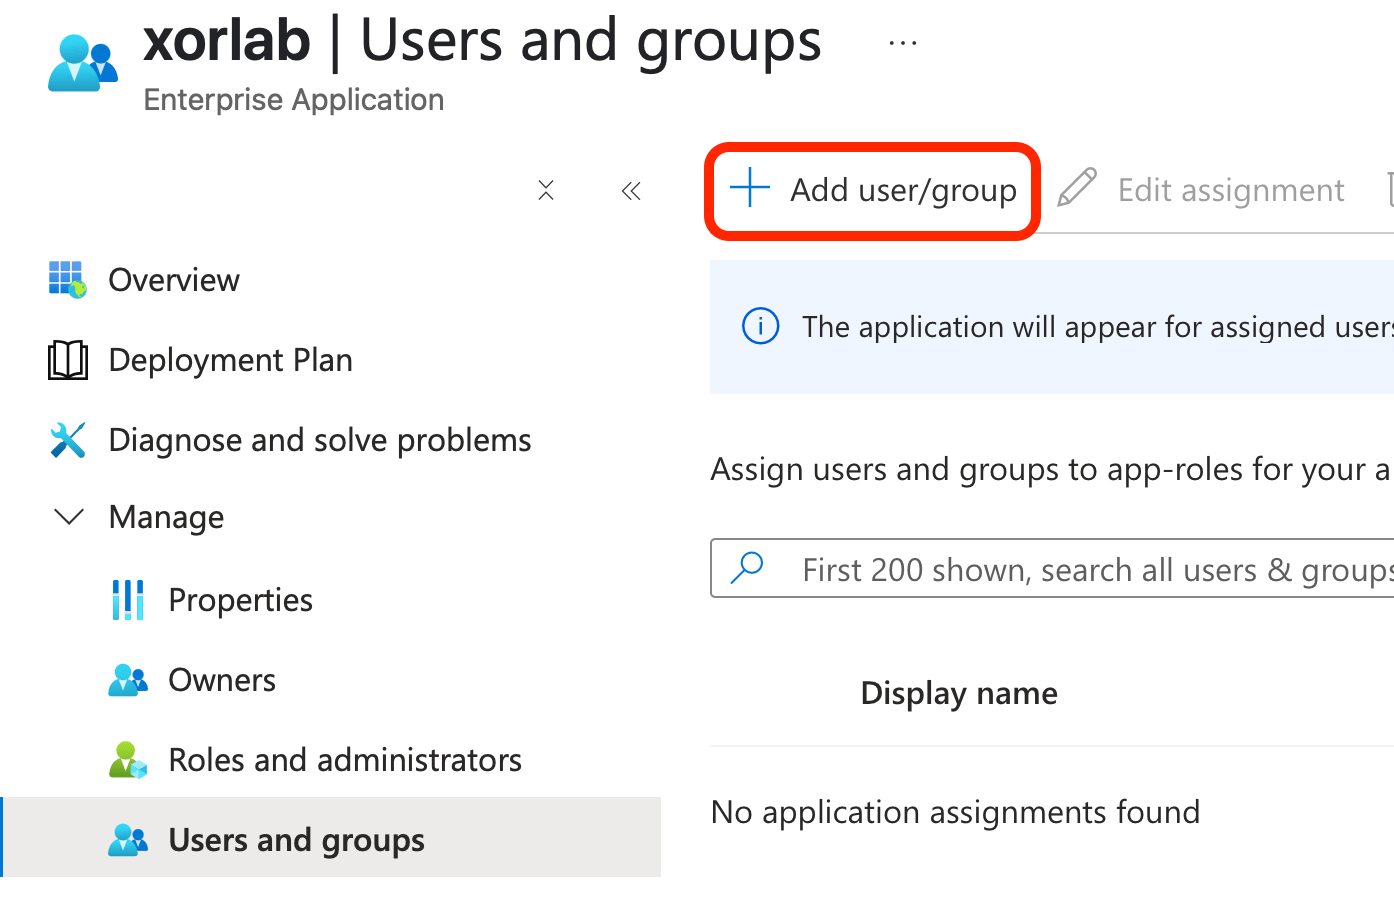
- Add the users or groups who need access to xorlab and assign them one of the roles you created earlier.
Groups and your Azure licenseGroup assigning is available only in the Azure AD P1+ license.
Configuring xorlab to use the AD SAML app
Now that you have the AD SAML app configured, you need to pass the appropriate data to xorlab.- You should have previously copied and saved the App Federation Metadata Url on the SAML-based Sign-on page (see the step #3 in Creating a SAML App in AD).
-
Open the file
auth/auth/auth.ymlin the Expert Editor. -
Enter the App Federation Metadata Url you copied as a value for the
metadataUrlkey. -
In case you configured role aliases, add a
roleMappingkey and assign your role aliases to the roles used by xorlab. The following examples show how you might assign role aliases when you are using custom aliases such asxsp.admin,xsp.analyst, orxsp.user:As you can see, users with thexsp.analystrole assigned in AAD can actually have two roles in xorlab Control Center:xcc_insightsandxcc_quarantine_user, thus having access to both quarantined messages and insights.
auth.yml should look like either one below.
- With role mapping
- Without role mapping
SSQ integration
If you configured the SAML application to obtain aliases email addresses from AD as described earlier, you will need to change theemails line in attributeMapping to:
attributeMapping section looks like this:
Custom trust storeIn case your xorlab configuration uses a custom trust store, you will also have to add the DigiCert Global Root CA certificate when integrating SAML with Azure Active Directory. Please follow the steps described in Certificate configuration.