

This page guides you through the configuration of Entra ID and xorlab to integrate shared mailboxes into the Self-Service Quarantine (SSQ). For on-premises setups the process will differ.
Pre-requisites
- Global Administrator Role on Entra ID Performing the following operations will require administrator privilege on your Microsoft Entra ID and Exchange Admin portal.
- xorlab Entra ID Application Ensure that an xorlab enterprise application and application registration has been created, which should have been done during the Essential Setup for M365.
- Postman or access to Graph Explorer To create the extension property, necessary to store the shared mailboxes, you will need the Postman software with an account (free) or an access to the Graph Explorer.
Configure your xorlab App Registration
Open the Azure Portal, search for the xorlab App Registration created during the Essential Setup for M365.- From the left hand sidebar navigate to Manage -> Certificates & secrets → Client Secrets and create a temporary client secret. You will need it later for creating a custom extension property.
-
Create a PKCS#12 certificate (.pfx) by following the official Microsoft guide below. As a result, you should have two certificate files:
.cerand.pfx. Make sure to take note of the certificate password. -
Upload the public certificate
.cerinto Certificates in App Registration section. -
Once the certificate is uploaded, navigate to the API permissions, and add the following application permissions:
API permissions
- Make sure that the permissions are granted admin consent (Grant admin consent for …).
-
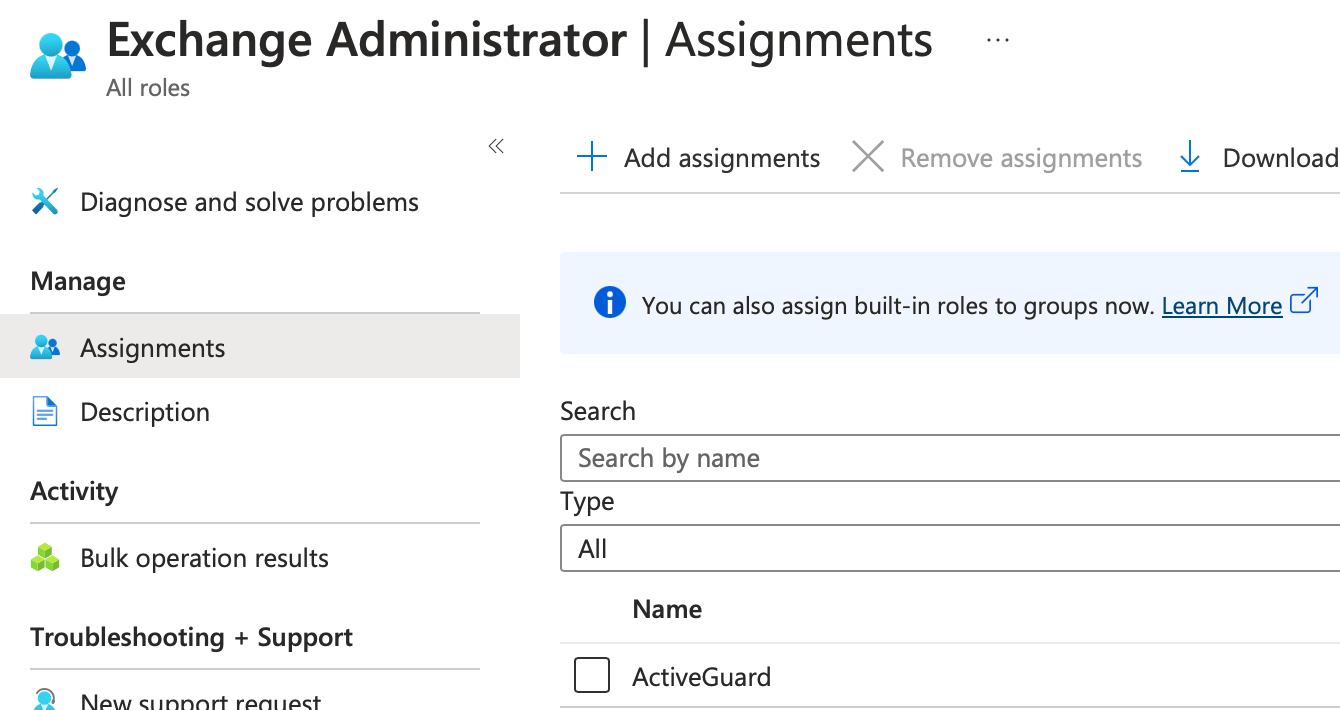
Assign the Exchange Administrator role to the xorlab App Registration:
- Navigate to the Microsoft Entra ID -> Roles and administrators.
- Search for the Exchange Administrator administrative role in the search bar and open it.
- Use the Add assignments button.
Create the custom extension property
To create this property, you will have to use the Graph API. We prepared a Postman collection containing the requests needed.Postman collection for the extension property
Postman collection for the extension property
Copy the collection below, save it as
ExtensionProperty_cheatsheet.postman_collection.json, and import it into Postman with Import.The IDs are collection variables, not values: set tenantID, clientID, appID, objectID and userID on the collection’s Variables tab before you run a request.ExtensionProperty_cheatsheet.postman_collection.json
- Import the collection into your Postman software.
-
In the Collection > Variables section, ensure that you are not syncing or sharing any sensitive variables — especially
GraphAPITokenandclientSecret. The recommended approach is to store the token and any secrets as a secret variable in your local Postman Vault and reference it directly using{{vault:secret-name}}in your requests. This ensures the token remains secure and is not accidentally uploaded or shared. - In Get a token request, replace the different variables and use the request to get a token from Graph API.
-
In Create custom property, replace GraphAPIToken variable with the token returned by the previous request.
You should now be able to run the Create custom property request, as a response you will get the property name, it should be:
extension_**clientID**_xorlab.
Run and automate the script in Azure Automation
Azure provides the possibility to run PowerShell scripts directly in their system for a cheap price. We recommend using this option which save resources and implementation time. You will first need to create an Automation Account, you can do so by searching for Automation Account in the Azure Portal.During the creation, make sure the Managed Identities are System Assigned and that the networking is Public Access
.pfx certificate file created previously. The name of the certificate must be ‘cert’.
You will be asked to enter the password of the certificate and select Exportable as Yes.
Once this is done, you will need to navigate to Variables and create some of them, based on the data you saved before:
Navigate to Runbooks and create a new runbook. Then, import the shared mailboxes script.
Make sure your runbook is using your custom Runtime Environment previously created.
Try to run your runbook, the final output should let you know some of the mailboxes updated. There shouldn’t be any errors.
If you’re happy with the result, publish the runbook and schedule it on a regular basis (e.g each night) via the Schedules functionality.
Use the new extension property in xorlab
- In the Azure portal, search for the xorlab Enterprise Application
- Navigate to Single Sign On
- Edit Attributes & Claims
-
Add a new claim named
xorlabAddresses(Namespace can be left empty) - Select Directory Schema Extension and find your xorlab App Registration
-
Select it and find the
user.xorlabattribute - Save the changes and open your xorlab instance
-
In the Expert Editor, open the
auth.ymlfile and search for your SAML configuration -
Set the
emails:property to
Maintenance Task – Updating an Expired Certificate
Depending on the parameters used in the Configure your xorlab App Registration, the certificate (both .pfx and .cer files) may expire after some time. When this happens, you’ll need to renew the certificate and upload the updated files to both App Registration and Azure Automation.Steps to Renew the Certificate
App Registration
- Repeat steps 2 and 3 from the Configure your xorlab App Registration section.
- This will update the certificate at the App Registration level.
Azure Automation
- Go to your Automation Account>Shared Resources.
- Navigate to Certificates.
- Remove the existing certificate named
cert. - Upload the newly created
.pfxcertificate file.- Ensure the certificate name is exactly cert.
- Enter the certificate password.
- Set Exportable to Yes.