

- General Postfix documentation.
- Transport maps with transport for standard recipient based routing.
- Configuration parameters for looking up specific Postfix parameters.
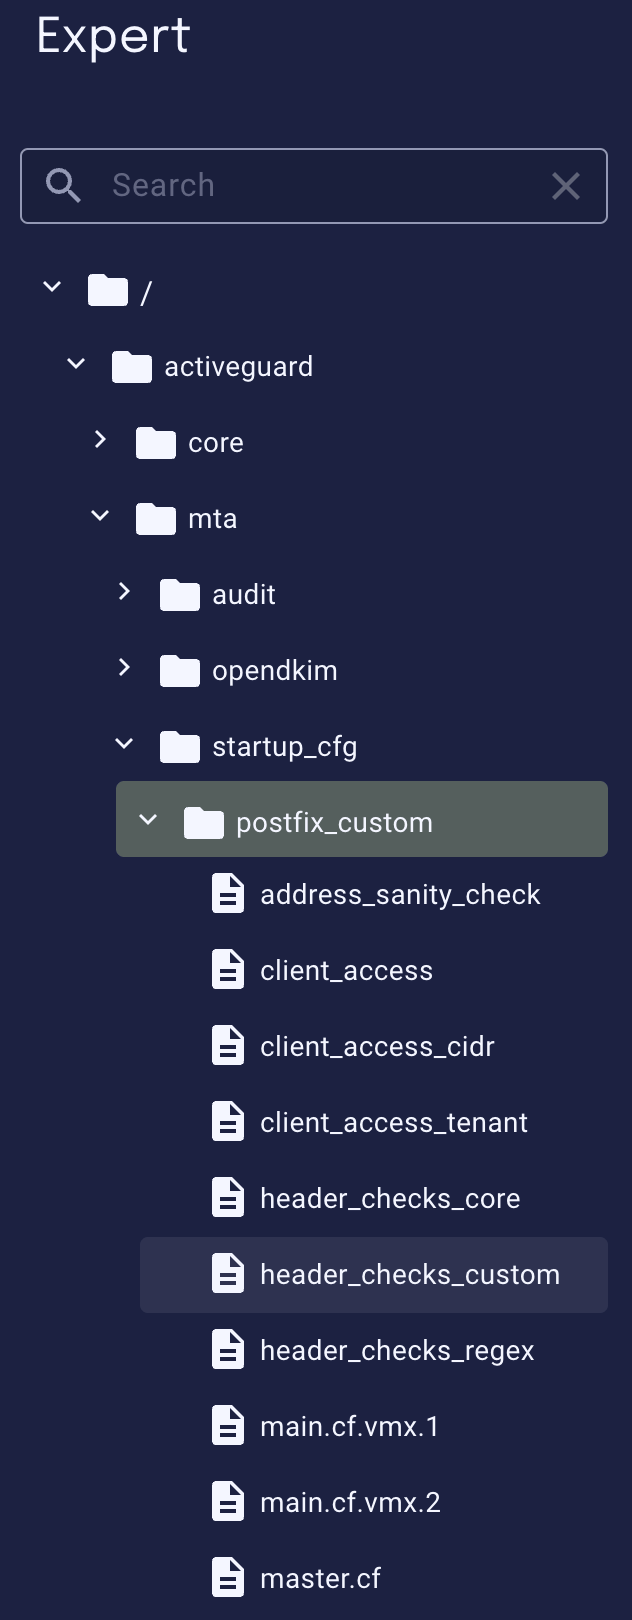
activeguard/mta/startup_cfg/postfix_custom:
Email routing
The email routing configuration depends largely on the integration, i.e., where the XSP instance is located within your mail environment and how it communicates with other elements. All possible deployments are covered in Integrations overview and your routing configuration should reflect the deployment:- Internal MTA—emails are delivered to the next hop, e.g., inbound emails to an internal Exchange server, outbound to the internal email gateway.
- Microsoft 365—self-explanatory: XSP communicates with M365.
- Gateway—outbound emails are delivered directly to the external recipient, inbound ones to a static next hop, for example, to an internal Exchange server.
- Star integration—all emails (inbound and outbound) are delivered to the same destination (next hop). This is typically the case when XSP is integrated into a self-hosted mail infrastructure, with all email traffic going via one mail server, or in an M365 integration when only one domain is used.
- Monitoring mode—self-explanatory: emails are forwarded to XSP, but no actions are taken (messages are deleted/dropped after processing).
Next hop syntax
Before we start with the routing configuration, please be aware of the following possibilities to specify a next-hop destination. This will be useful throughout all routing configuration:
For more details information about the syntax, please refer to the Postfix documentation.
Common scenarios
You can set the email routing based on specific setups and needs. Just go to the section that reflects how XSP is integrated in your environment and you will find a proper config.Internal MTA
In this scenario, xorlab Security Platform will:- Deliver inbound emails to the next hop (referred to as
<inbound-next-hop>), for example, to an internal Exchange server. - Deliver outbound emails to the next hop (referred to as
<outbound-next-hop>), for example, to the internal email gateway.
activeguard/mta/startup_cfg/postfix_custom/main.cf file:
activeguard/mta/startup_cfg/postfix_custom/transport file does not exist, you have to create it.
Then, in Expert Editor:
-
Open the
activeguard/mta/startup_cfg/postfix_custom/client_accessfile and add one line, like shown below, for every internal email server that will send emails to xorlab Security Platform (inbound and outbound): -
Open the
activeguard/mta/startup_cfg/postfix_custom/transportfile. Add a line for every guarded tenant domain with<inbound-next-hop>and one line for all outgoing emails with<outbound-next-hop:
SubdomainsBy default, subdomains do not match the parent domain in the
transport file. For example, test.xorlab.com would be routed as an outbound email in the example above. Please see Subdomain matching for more details.FallbackYou can specify multiple next hops in the
transport file that will serve as a fallback if the first destination is not reachable: smtp:[1.2.3.4],[2.2.2.2].Microsoft 365
If you have only one Guarded Tenant Domain, use the star integration configuration to route all emails (incoming and outgoing) to Microsoft 365. The configuration then looks like this:xorlab.com and xorlab.net domains:
-
activeguard/mta/startup_cfg/postfix_custom/transportfile -
activeguard/mta/startup_cfg/postfix_custom/sender_dependent_transportfile
relayhost parameter in the activeguard/mta/startup_cfg/postfix_custom/main.cf file to make sure that outgoing bounce emails are also sent to Microsoft 365:
activeguard/mta/startup_cfg/postfix_custom/main.cf file, configure TLS certificates required by M365:
Gateway
In this scenario, xorlab Security Platform will:- Deliver outbound emails directly to the external recipient.
- Deliver inbound emails to a static next hop (referred to as
<inbound-next-hop>), for example, to an internal Exchange server.
activeguard/mta/startup_cfg/postfix_custom/main.cf file:
activeguard/mta/startup_cfg/postfix_custom/transport file does not exist, you have to create it.
Then, in Expert Editor:
-
Open the
activeguard/mta/startup_cfg/postfix_custom/client_accessfile and add one line, like shown below, for every internal email server that will send outbound emails to XSP. Those are usually the same servers that XSP will send inbound emails to (<inbound-next-hop>). You can also add:This will ensure that xorlab Security Platform relays emails to the internet only from your internal servers. -
Edit
activeguard/mta/startup_cfg/postfix_custom/transportand, for every Guarded Tenant Domain, add a line with your internal next-hop destination:As explained before,<inbound-next-hop>can be substituted with any format described in Next hop syntax. -
In the last step, open the
activeguard/mta/startup_cfg/postfix_custom/main.cffile and add all Guarded Tenant Domains asrelay_domains:By setting uprelay_domains, you ensure that xorlab will accept all emails going to those domains via SMTP.
Star integration
With a static relay host configuration, xorlab Security Platform will route all emails (inbound as well as outbound) to the same next hop (referred to as<next-hop>).
-
Specify the next-hop destination in the
activeguard/mta/startup_cfg/postfix_custom/main.cffile: -
Add the IP address or domain of the
<next-hop>to theactiveguard/mta/startup_cfg/postfix_custom/client_accessfile:
Monitoring mode
In monitoring mode, emails are forwarded to xorlab Security Platform, but no actions are taken, and messages are deleted/dropped after processing.-
Specify the next-hop destination in the
activeguard/mta/startup_cfg/postfix_custom/main.cffile:Therelayhostentry can have either of the following values:- Your next-hop destination, that is usually your MTA specified in the MX record.
localhostin case xorlab Security Platform should never send any emails to you. This is rather an edge case, and only used when you don’t want to test the reporting feature (no feedback emails will be sent).
-
Open the
activeguard/mta/startup_cfg/postfix_custom/client_accessfile and add one line, like shown below, for every email server that will send emails to xorlab Security Platform:
Special case: sender-based routing
In sender-based routing, the next hop (referred to as<next-hop>) for the email is chosen based on the sender’s address (MAIL FROM). This configuration is usually only used in conjunction with recipient-based routing to address special cases.
First, we need to enable the sender-dependent transport in the activeguard/mta/startup_cfg/postfix_custom/main.cf file:
activeguard/mta/startup_cfg/postfix_custom/sender_dependent_transport file does not exist, you have to create it.
Routing precedencePlease be aware that recipient-based routing has precedence over sender-based routing. If a recipient address matches an entry in
transport, it will overrule any next-hop configurations from a match in sender_dependent_transport.activeguard/mta/startup_cfg/postfix_custom/sender_dependent_transport file. You can specify sender email addresses as well as sender domains:
Subdomain matching
Subdomains in transport maps
When configuring email routing inactiveguard/mta/startup_cfg/postfix_custom/transport, subdomains are not matched by default. This means that if you want to route emails for both a domain (e.g., xorlab.com) and its subdomains (e.g., sub.xorlab.com), you must either specify them explicitly or use the dot-prefix (.) syntax to apply a wildcard rule.
activeguard/mta/startup_cfg/postfix_custom/main.cf:
Subdomains in client access
In contrast, subdomain matching behaves differently forclient_access and relay_domains configurations. For these settings, subdomains are automatically matched without requiring explicit entries. This is because Postfix performs a reverse DNS lookup on the EHLO IP address, which allows it to match both the domain and its subdomains seamlessly.
For example:
- In
activeguard/mta/startup_cfg/postfix_custom/client_access, you only need to list the top-level domain (xorlab.com), and subdomains will be matched automatically. - Similarly, listing the main domains as
relay_domainsinactiveguard/mta/startup_cfg/postfix_custom/main.cfis sufficient for subdomain matching.
Sender and recipient restrictions
This section explains how to impose generic restrictions on either a sending MTA or on a recipient address or domain.SMTP restrictionsThe restrictions described in this section refer to the SMTP connection only. Emails rejected during the SMTP connection will not appear in the Control Center GUI (XCC).
Reject clients
To reject emails from certain sender IPs or hostnames during the SMTP connection, list them in theactiveguard/mta/startup_cfg/postfix_custom/client_access file with reject:
Reject recipients
To reject all emails to certain recipients, add these recipients to the fileactiveguard/mta/startup_cfg/postfix_custom/recipient_access:
TLS configuration
TLS policies can be defined for xorlab Security Platform when acting as a client as well as when acting as a server. The policies are set inactiveguard/mta/startup_cfg/postfix_custom/main.cf:
none: Disable TLS.may(default): Opportunistic TLS. Use TLS if the client, respectively the server, supports TLS.encrypt: Enforce TLS. Do not send or receive emails without TLS. No valid certificate required.verify: Enforce TLS and successful certificate verification. Only supported forsmtp_tls_security_level.
smtp_tls_security_level as well as smtpd_tls_security_level.
SMTP auth for specific email addresses
If you want emails sent from specific addresses to be routed through an SMTP server requiring authentication, you can follow this configuration. For example, you can authenticate xorlab Security Platform when sending reported email feedback from thethreatanalyst@example.com address:
-
Set the desired sender address for feedback emails as described in Feedback emails. We will use
threatanalyst@example.comhere. For any other email addresses, just skip this step. -
Configure sender-dependent transport in the
activeguard/mta/startup_cfg/postfix_custom/main.cffile by enabling (uncommenting) this line: -
If the
activeguard/mta/startup_cfg/postfix_custom/sender_dependent_transportfile does not exist, create it and add this entry: -
In the same folder, create two files:
sasl_passwd.lmdband ansasl_passwdfile. Leave the former empty, while in the latter add this line: -
Finally, go back to the
main.cffile and add the following block under the line you enabled in step #2: - Click PUBLISH to apply changes.
Message size limit
The maximum message size that xorlab Security Platform will accept during an SMTP connection can be defined inactiveguard/mta/startup_cfg/postfix_custom/main.cf and activeguard/mta/startup_cfg/postfix_custom/master.cf:
main.cf
master.cf
- Many major email providers don’t accept message sizes over 35 MB.
- The xorlab Security Platform file size limit for dynamically scanned attachments is 50 MB.
- Aggressively increasing the message size limit can slow down email processing times.
Additional configuration
xorlab Security Platform exposes the internal Postfix configuration files and thereby allows you to use the entire SMTP configuration that Postfix offers. This includes, for example:- Address rewrites
- Header rewrites
- SMTP connection configuration (limit, rate, delay, etc.)
Postfix lookup tablesxorlab supports Postmap lookup tables in
lmdb: format (Lookup tables).The following files are automatically postmapped: client_access,client_access_tenant,recipient_access,sender_access,transport,sender_dependent_transport and postmap_*.If you use a different file name, you need to either:a) Prefix your file postmap_.b) Create an empty file with the same name and .lmbd suffix. E.g., for custom_transport, you need to create an empty file called custom_transport.lmdb in the same folder.Reserved configuration
The following Postfix features are reserved for internal use and must not be configured:mynetworks: Use theclient_accessfile instead to allow certain IPs to relay emails through xorlab Security Platformcontent_filter