

- issues marked as
OPare related to on-prem instances only, - issues marked as
Care related to cloud (SaaS) instances only.
How to change config files in the command line in case GUI is not reachable
When you made changes to config files in XCC Expert Editor and XCC no longer starts due to some errors in the files, you need to access those files from the command line, fix errors, save the files and restart XCC. The procedure is as follows:- Make an SSH connection to your XCC instance.
-
Stop the XCC backend container:
cd /etc/xorlab/xccthendocker compose down -
Enter the commands listed below:
sudo su -s /bin/bash xcc_backendthencd /var/lib/xorlab/xcc/config/work/ag_local/ - You are now in the folder containing config files presented in Expert Editor. Find and adjust (with vim) the required file.
-
Enter the commands listed below:
git add <changed file>thengit commit -m «<comment the change>» - Press Ctrl+D to close the current shell (exit).
-
Start the container again:
docker compose up -d - Restart XCC (see Operation Guide for information on how to do it).
Solving the campaign “filter not supported” error
When you want to add a campaign but you get an error that readsThe query contains a filter that is not supported for a campaign, please have a look at Query Based Classifiers (Campaigns). If no solution can be found, please contact support@xorlab.com.
No emails received in the organization
When email flow isn’t working and no emails are received throughout your organization, please follow these steps:- In the Grafana dashboard, check if the email flows are running correctly.
- Follow the instructions from the An email didn’t appear in a user’s inbox section.
- Log in to the MTA GUI. On the button configuration and system test page you got the possibility to do a health check of the email flow.
- Observe in the command line if all servers are running properly via the
docker pscommand. For further reset commands please see Operation Guide.
Solving problems using log files (OP)
For an overview of our architecture and for the exact commands, please see Operation Guide.
How to find MTA logs using the command line
If you want to check the MTA logs, you can do this using SSH connection and the following commands in terminal:- Go to the right location:
cd /var/log/xorlab/activeguard/core/for the email processing logs orcd /var/log/xorlab/activeguard/mta/for SMTP logs. - Make all files visible:
ll - Select the log file of the date relevant to your investigation and open it with
less(for.logfiles) orzless(for.zipfiles).
How to connect to MTA GUI
You can connect with your MTA GUI using the following URL:your.domain.name:8443. Keep in mind that the URL might defer if you change the setup.
How to find a GGRID of an email
You can use a unique identifier (GGRID) of an email used by xorlab Security Platform to make your search easier in the core logs:- Go to XCC in your browser.
- Select the email you are looking for so that it opens on the Message Detail page.
-
In the address bar of your browser you will see the GGRID of this email. It can be used to find the specific email in the core logs, for example using the
grep <ggrid> activeguard.logcommand.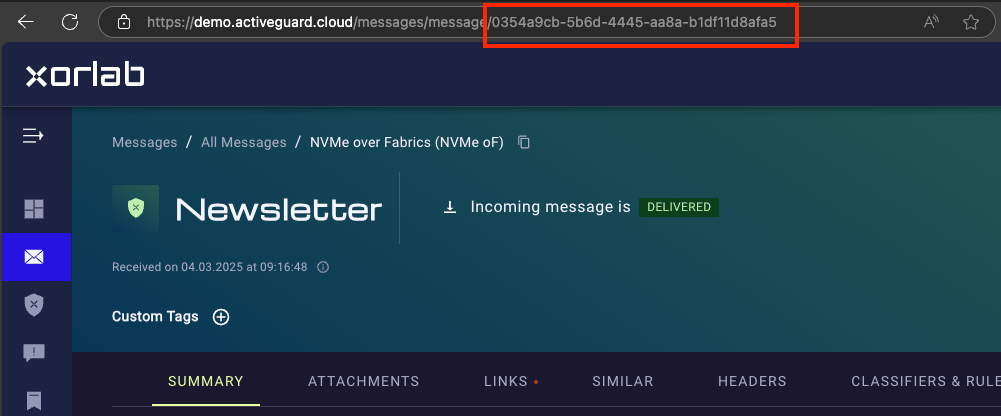
An email didn’t appear in a user’s inbox
If a message got lost on the way to a user’s inbox, you can search for some information:-
We recommend to start checking the main XCC web interface if the email can be retrieved. You could search for the sender or even refine your query to find the exact email—please see Search.
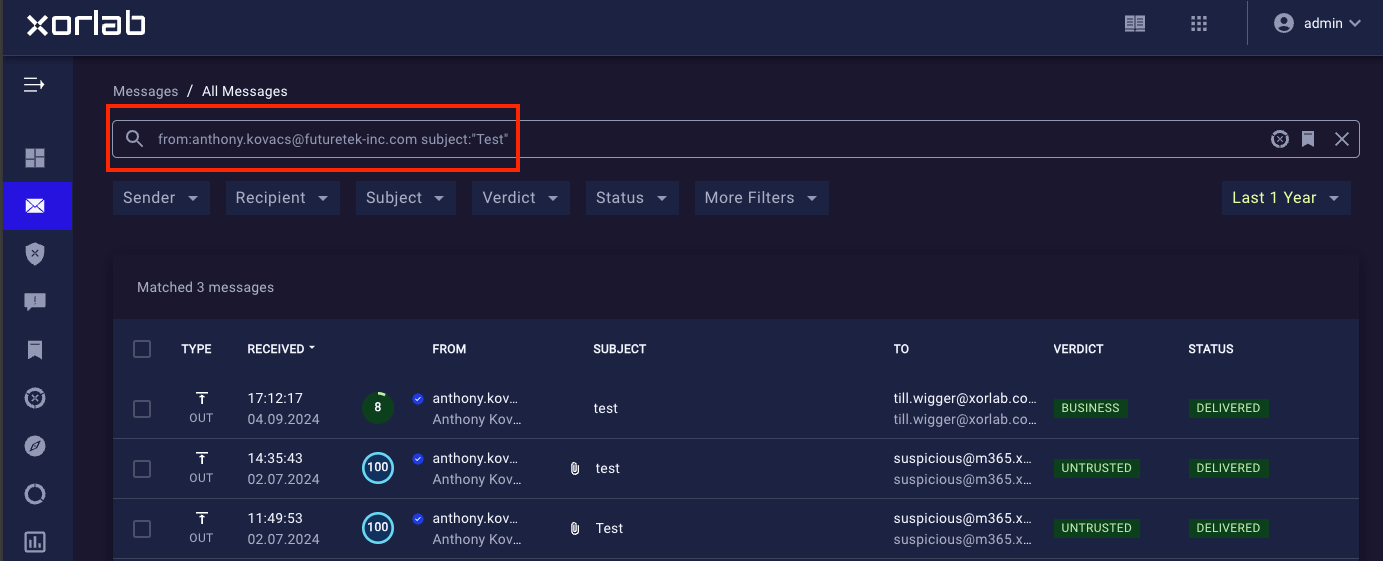
-
If nothing can be found, get the message ID in the interface to simplify your search in the SMTP logs. Open the email in XSP and select the Headers tab:
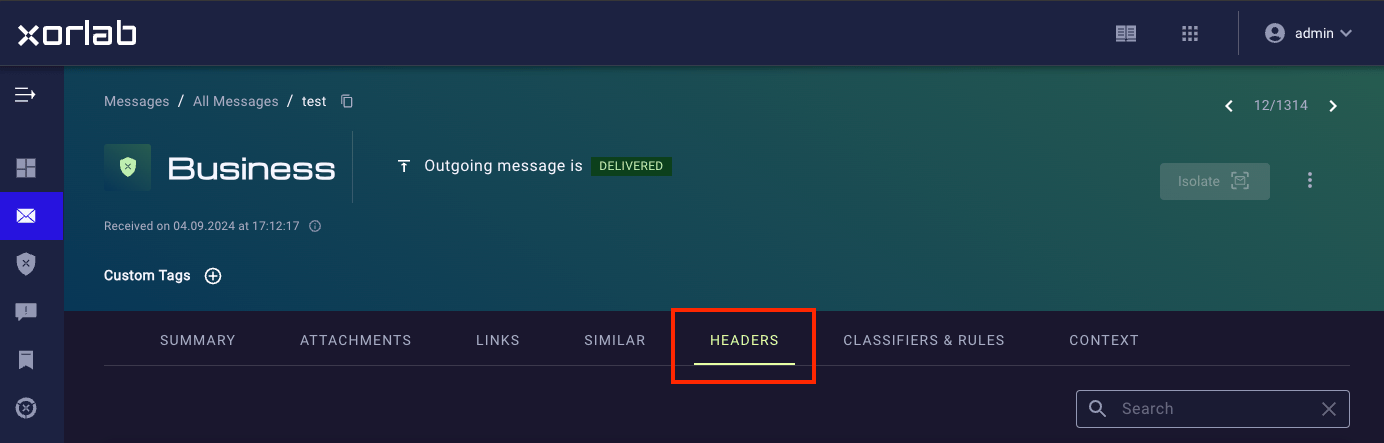
-
Scroll down until you see the message ID:
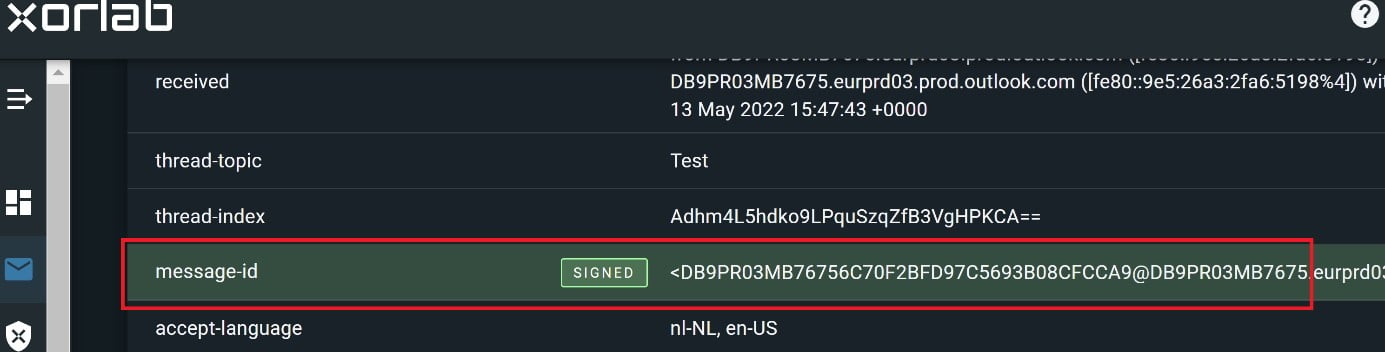
-
Start checking the SMTP logs to see if the email arrived at xorlab Security Platform and whether postfix could forward it to the core or not. SMTP logs are available on MTA:
/var/log/xorlab/activeguard/mta/mail.info.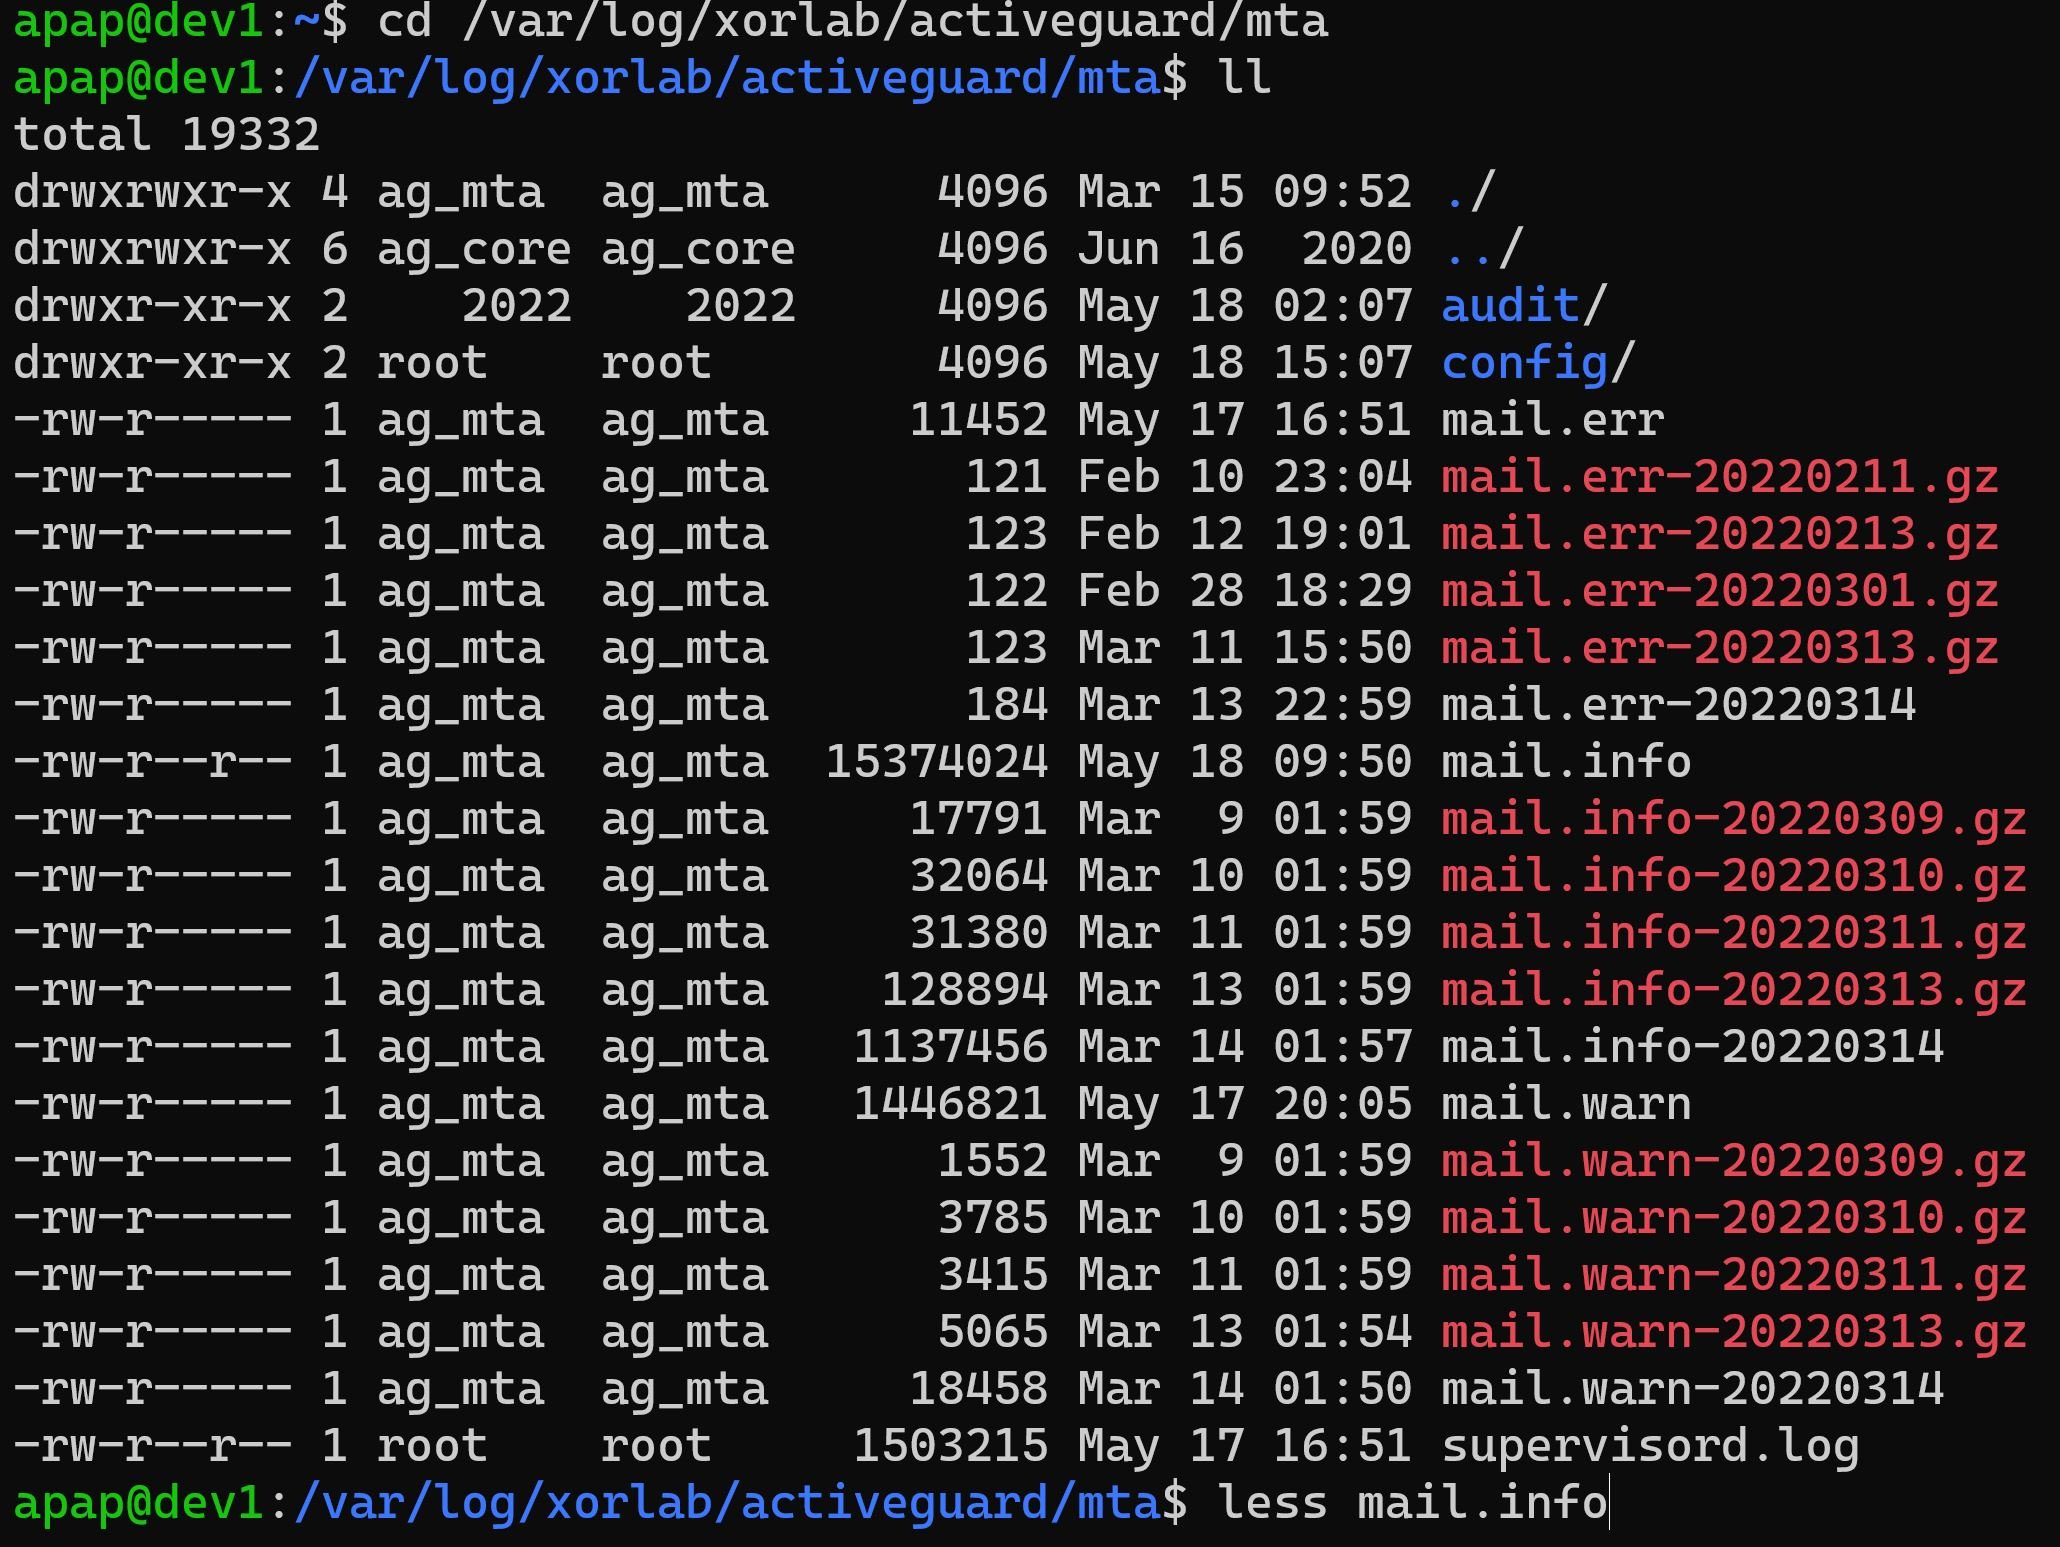
-
Check SMTP logs if the core sent the email back to postfix after processing and whether postfix could forward the email to the external system: use
grepformessage-idinmail.info. There should be two entries: one when the email arrives at postfix, and one when it is coming from the core. Verify that the email has been forwarded to the external destination.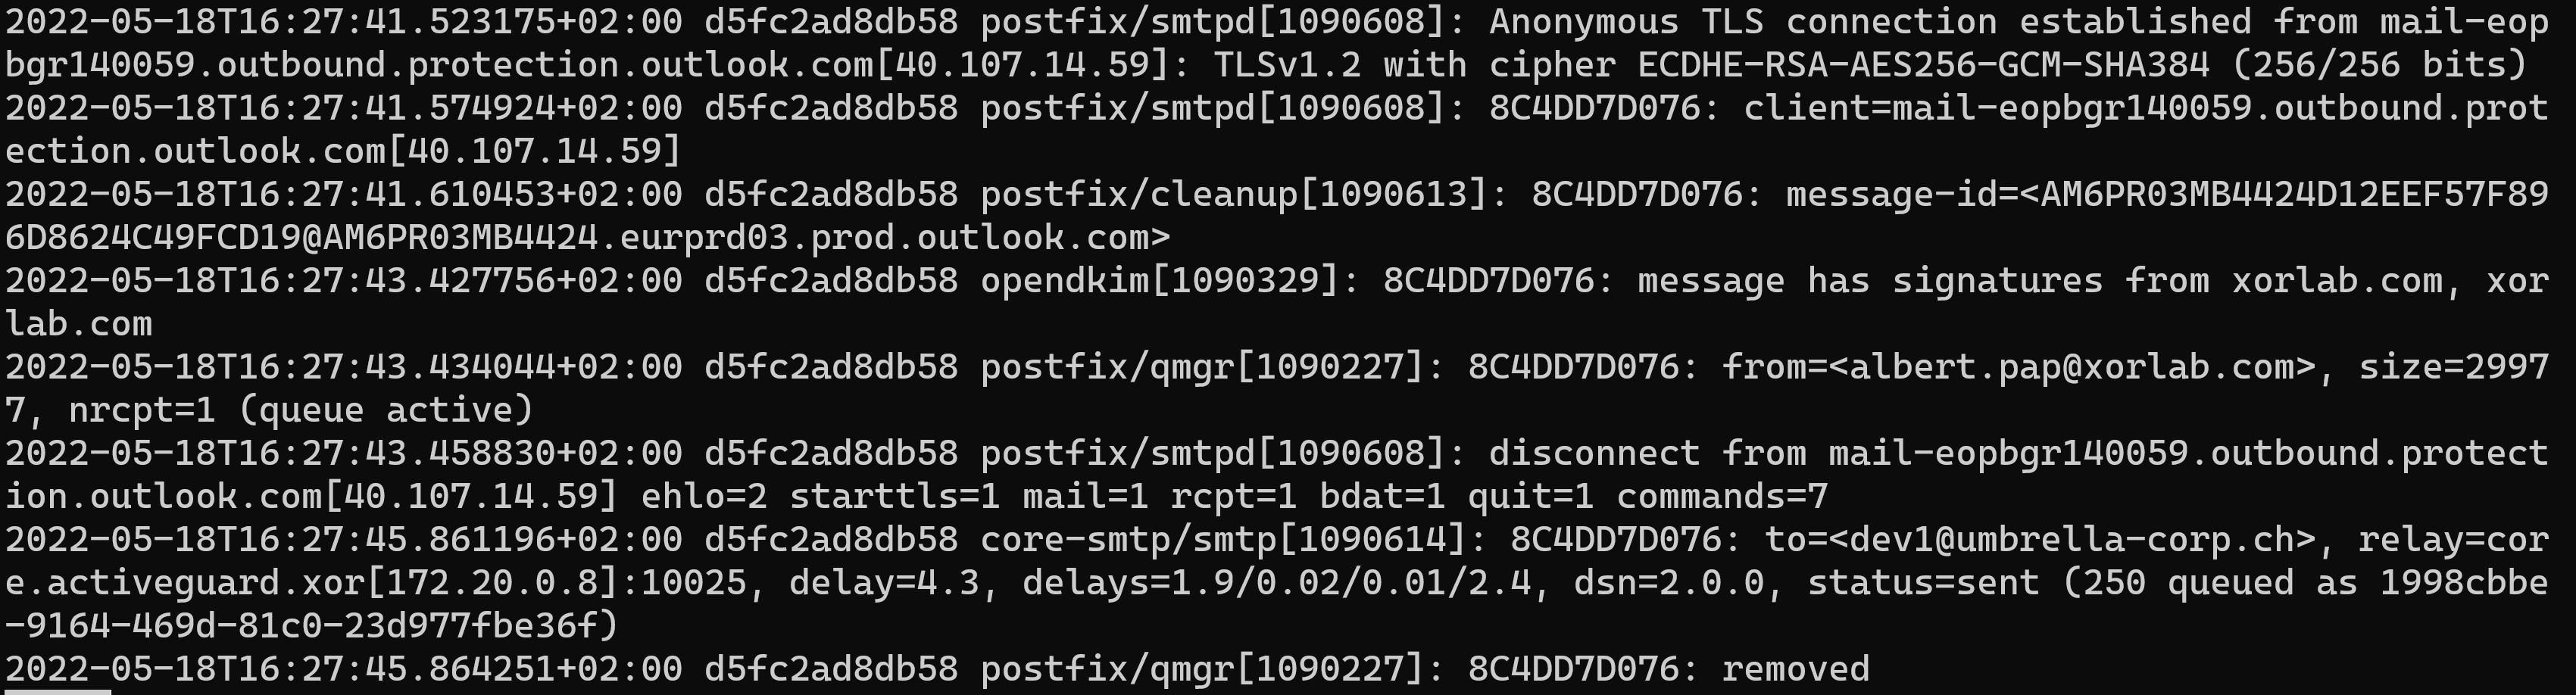
-
If the email got stuck on the core, then check the Processing log (
activeguard.log). Processing logs on MTA are located here:/var/log/xorlab/activeguard/core/activeguard.log. We recommend togrepfor the email GGRID to find all logs for a specific email (zgrep <ggrid> <logfile.zip>, e.g.,zgrep 7ce1d657-3a0b-48d3-9bbe-cea302d535db activeguard_2022-05-11.0.log.zip).
grep command to make your troubleshooting easier.
Functionality doesn’t work in the GUI
If some feature such as establishing a campaign doesn’t work in the graphical interface, please check the XCC backend logs for any errors:/var/log/xorlab/xcc/backend/xcc.log/var/log/xorlab/xcc/backend/xcc_err.log
Sandbox doesn’t scan documents
Please see xorlab Sandbox.Users can’t log in with SAML or LDAP
If users can’t login to SSQ or XCC GUI:- Depending on your SSQ setup, please verify if users are set up correctly in your AD, LDAP, and SAML settings as well as in the
auth.ymlandpasswordFile.ymlfiles in the XCC Expert Editor. - Check the log files for errors:
- auth log on XCC:
/var/log/xorlab/auth/auth/auth.log - backend log on XCC:
/var/log/xorlab/backend/xcc.logandxcc_err.log
- auth log on XCC:
SSQ login error
Customers trying to set up our self-service portal or adding new users sometimes have experienced an error that no mailbox is configured. This happens when the user authentication has not been set up to provide the list of mailboxes that a user can see in the self-service portal. Please see the error below:
- SAML Authentication Using AAD Services in the case of Azure.
- SAML-based Authentication for other auth providers.
How to disable the WAL directory cleanup (OP)
On MTA instances, we delete the WAL directory at every startup by default to prevent Prometheus from consuming too much memory. We don’t recommend deactivating this feature, but in case it’s absolutely necessary, set the DELETE_WAL_AT_STARTUP env variables to never for the Prometheus service in the Monitored MTA docker-compose.yml file, i.e.:
admin user:
List of supported browsers
If you want to know which browsers are supported by xorlab Security Platform, type this URL in a tab where you are already logged in to XSP and replacexyz with your customer ID:
https://xyz.activeguard.cloud/supported-browsers.txt
If you are not signed in, you will be redirected to the login page.
What to do with external blacklist false positives
When an external service such as Spamhaus flags some messages as spam, but their senders are legitimate, you can use a special whitelist called Spam blacklist exclusion—simply add domains that should be excluded from the spam blacklist.How to view the current permissions of a user
To check what permissions a particular user has:- Log in to AG as the said user.
-
Go to the
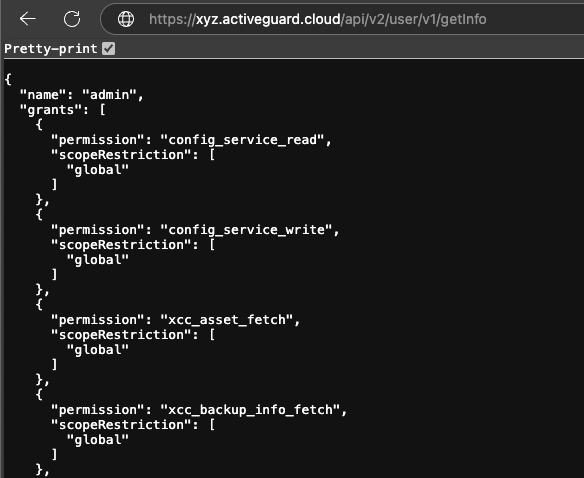
/api/v2/user/v1/getInfoendpoint on your AG instance, e.g.,xyz.activeguard.cloud/api/v2/user/v1/getInfo. -
You will see a list of permissions:
How to use group names for XCC roles
If you want to use existing groups in AAD for SAML authentication and role assignment, you can simply include the information about the group(s) a user belongs to in the SAML token, then map these groups to XCC roles in the xorlab Security Platform configuration file as if their names were role aliases. Let’s start with adding the information about groups to the SAML auth token:-
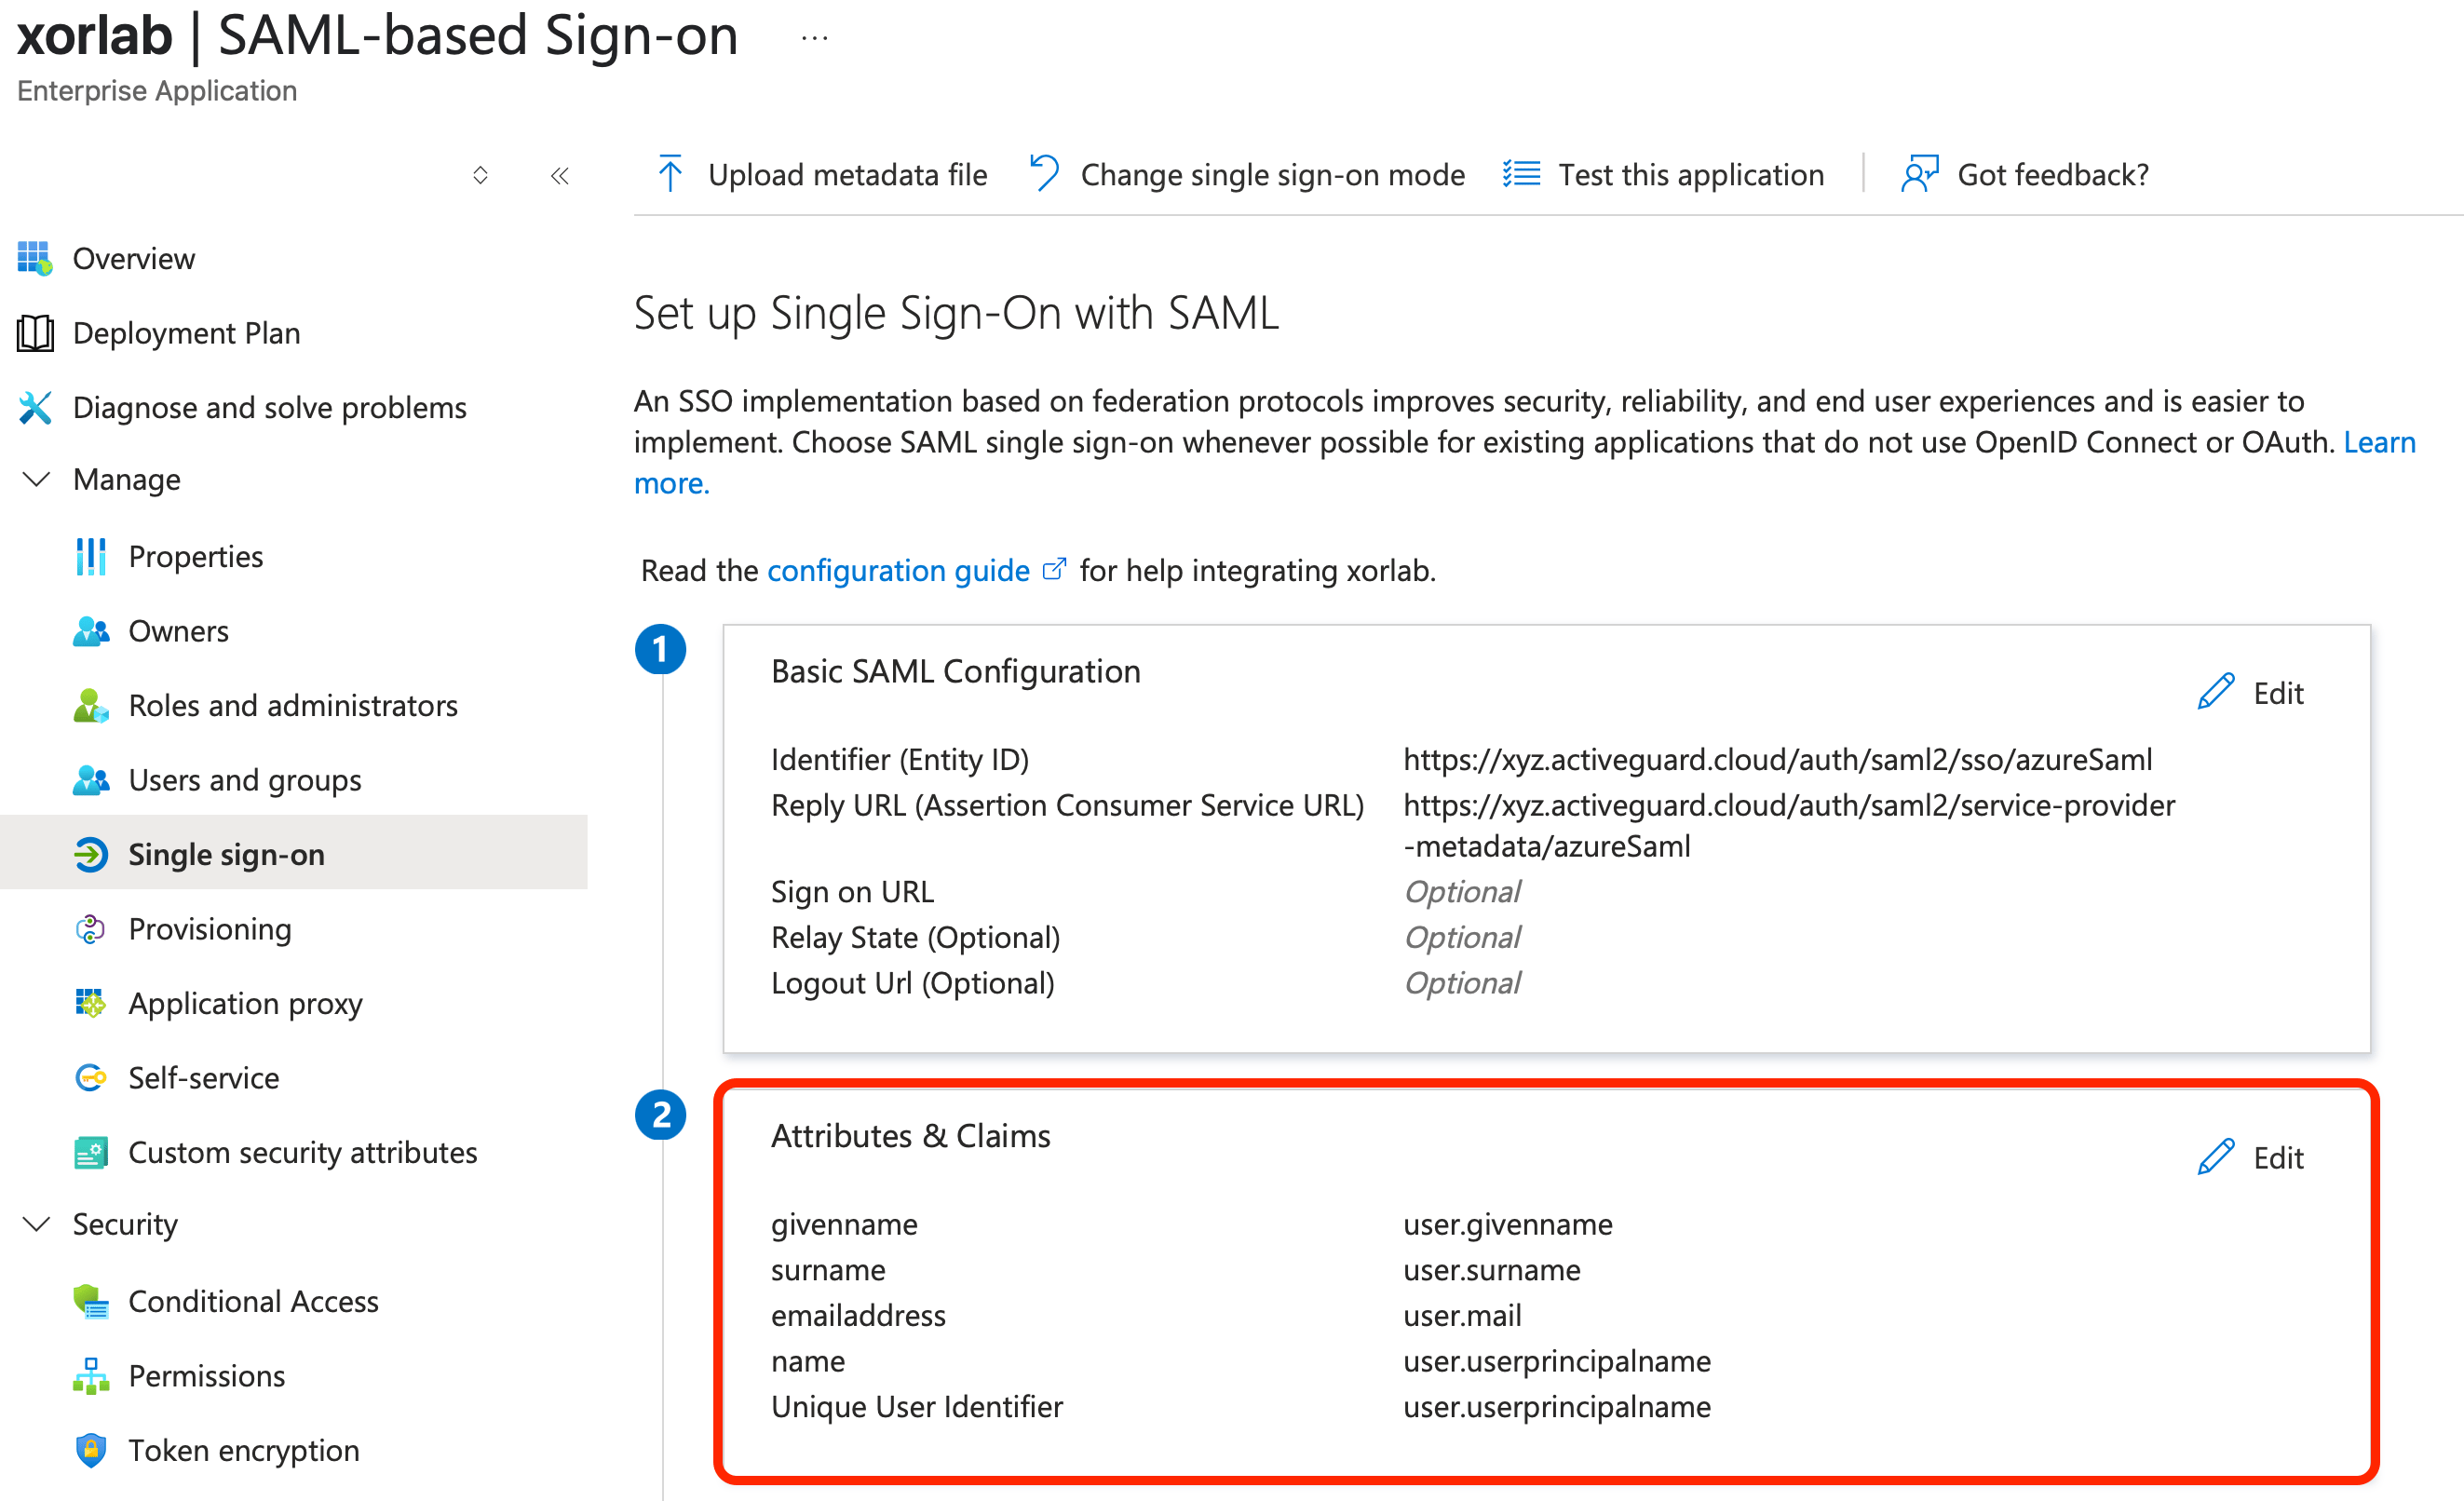
Similarly to SSQ integration, after completing the last step in the basic SAML configuration, move down to the next section of the SAML-based Sign-on page called Attributes & Claims and click Edit:
-
On the Attributes & Claims page, click Add a group claim:
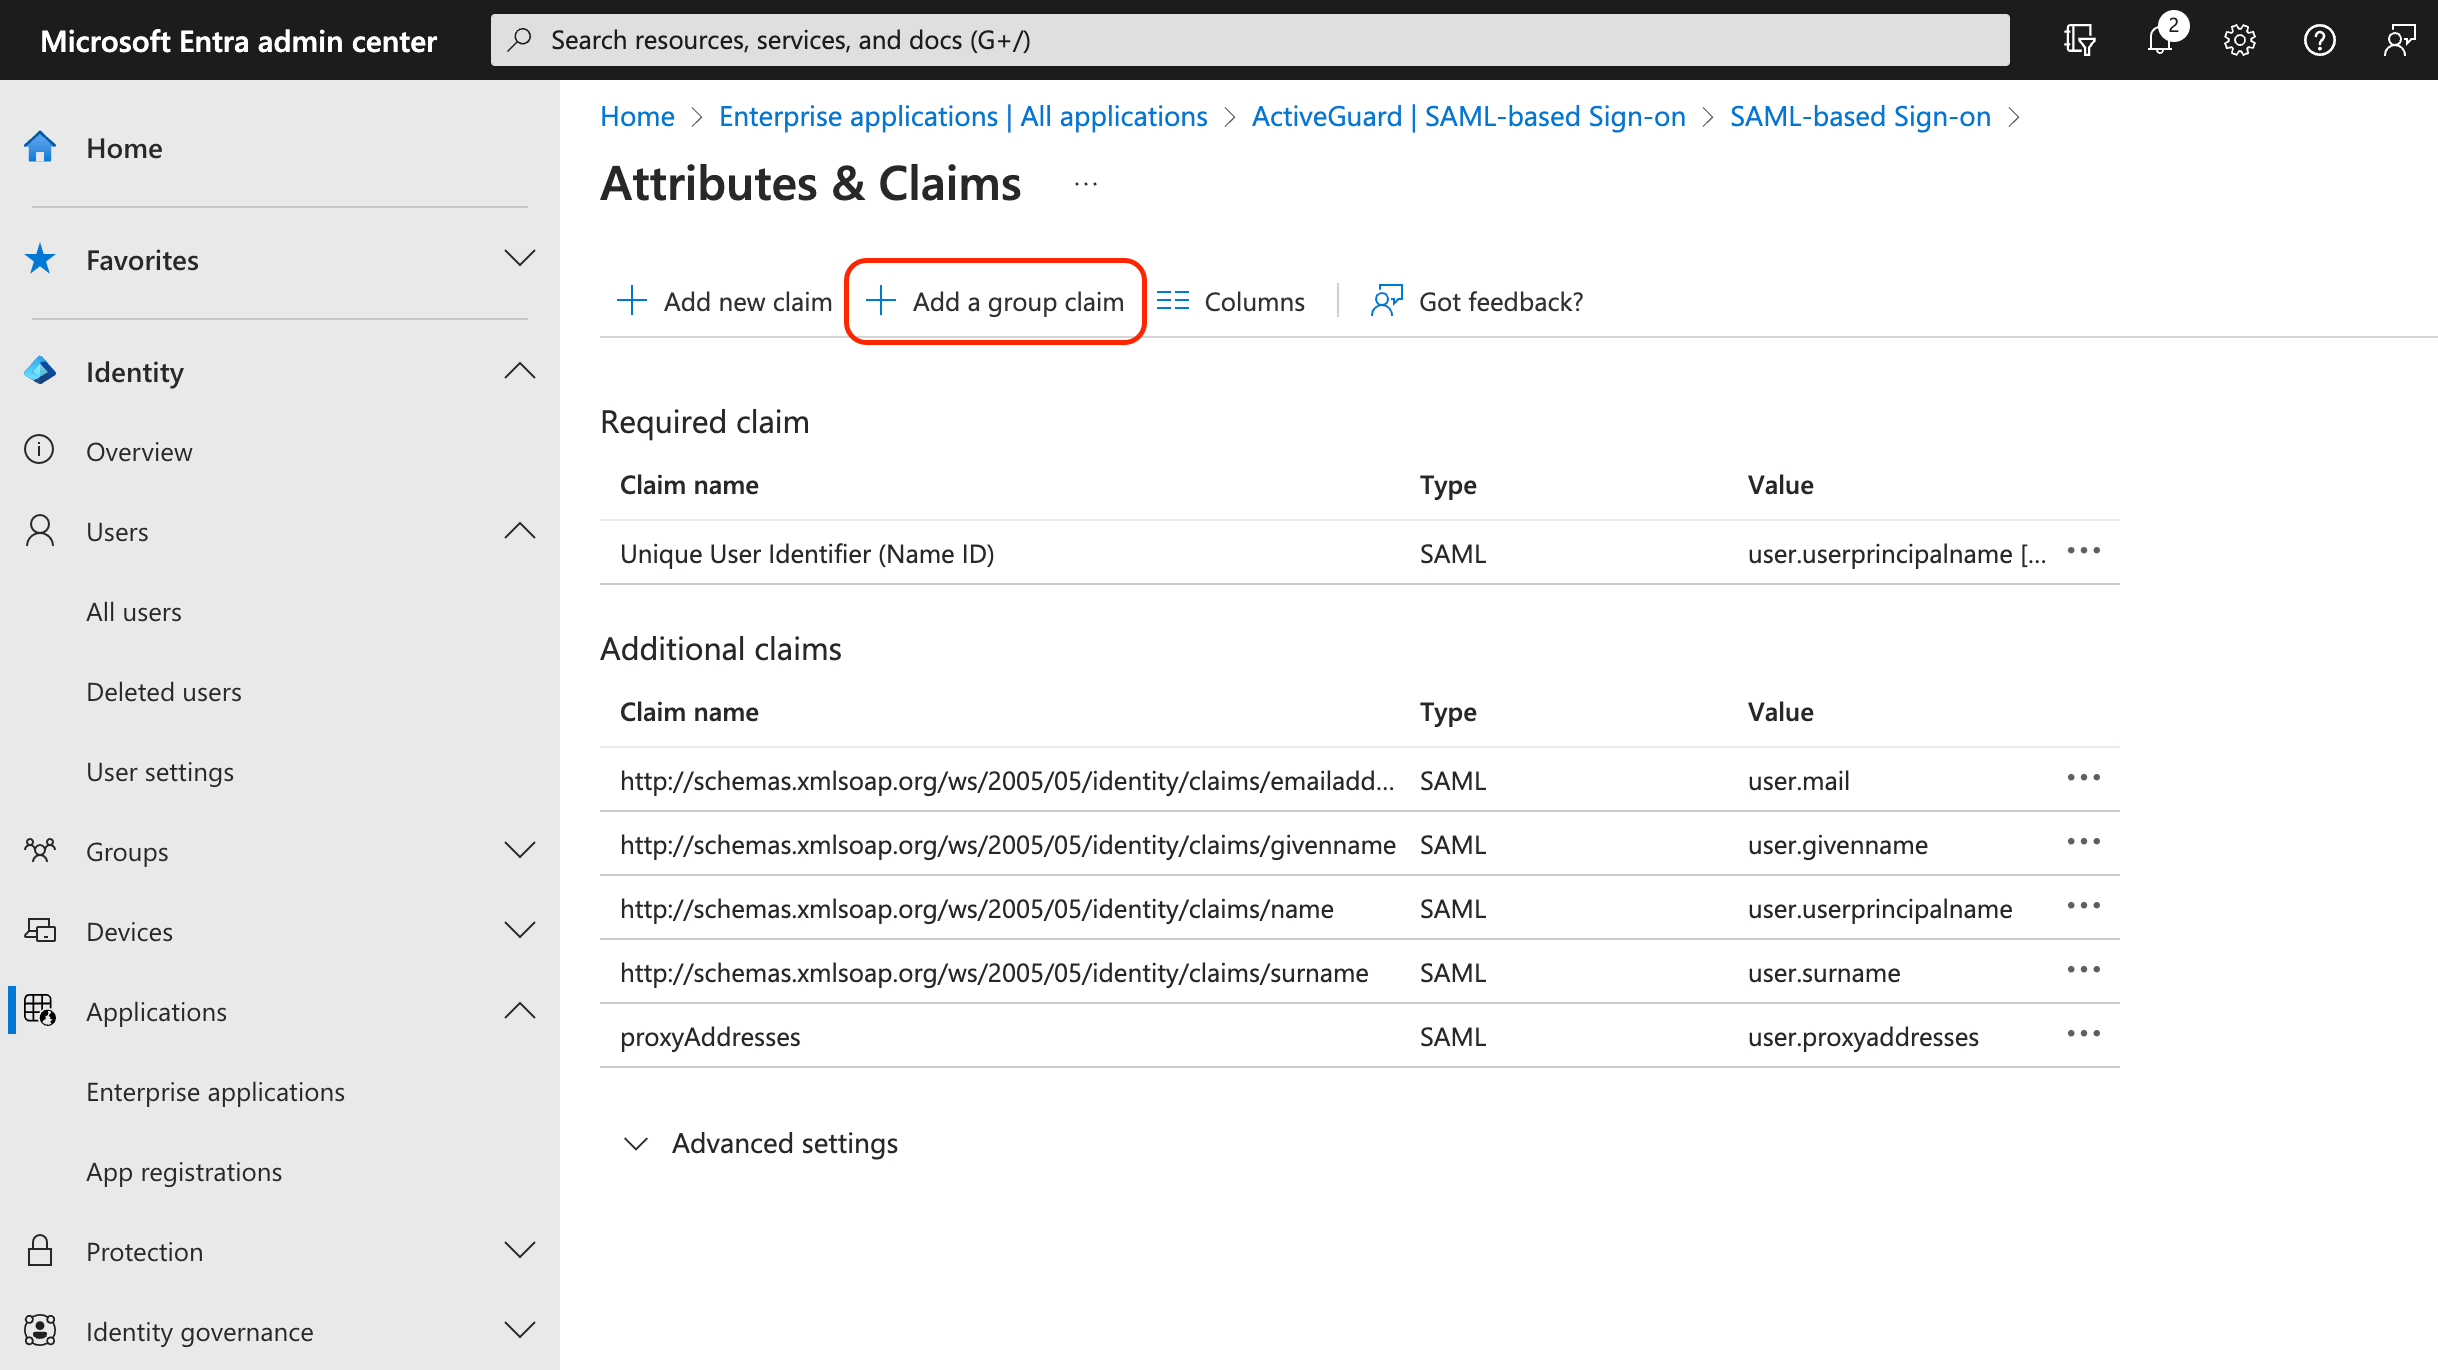
-
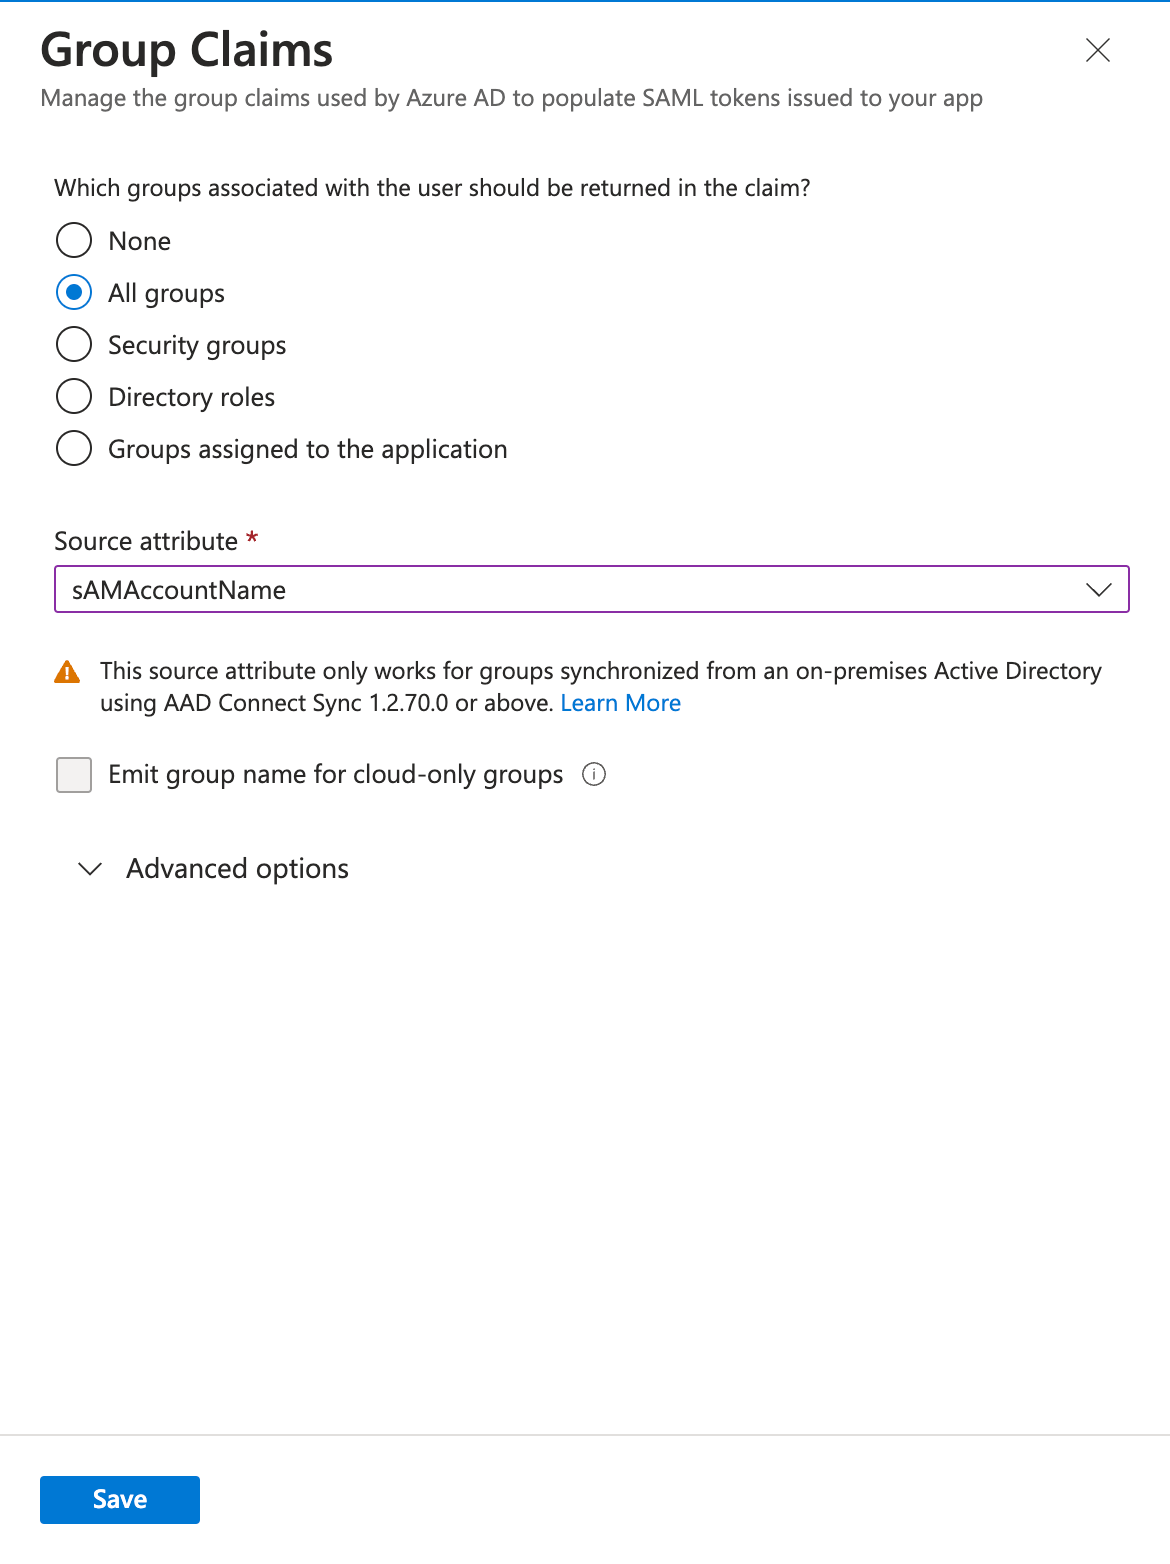
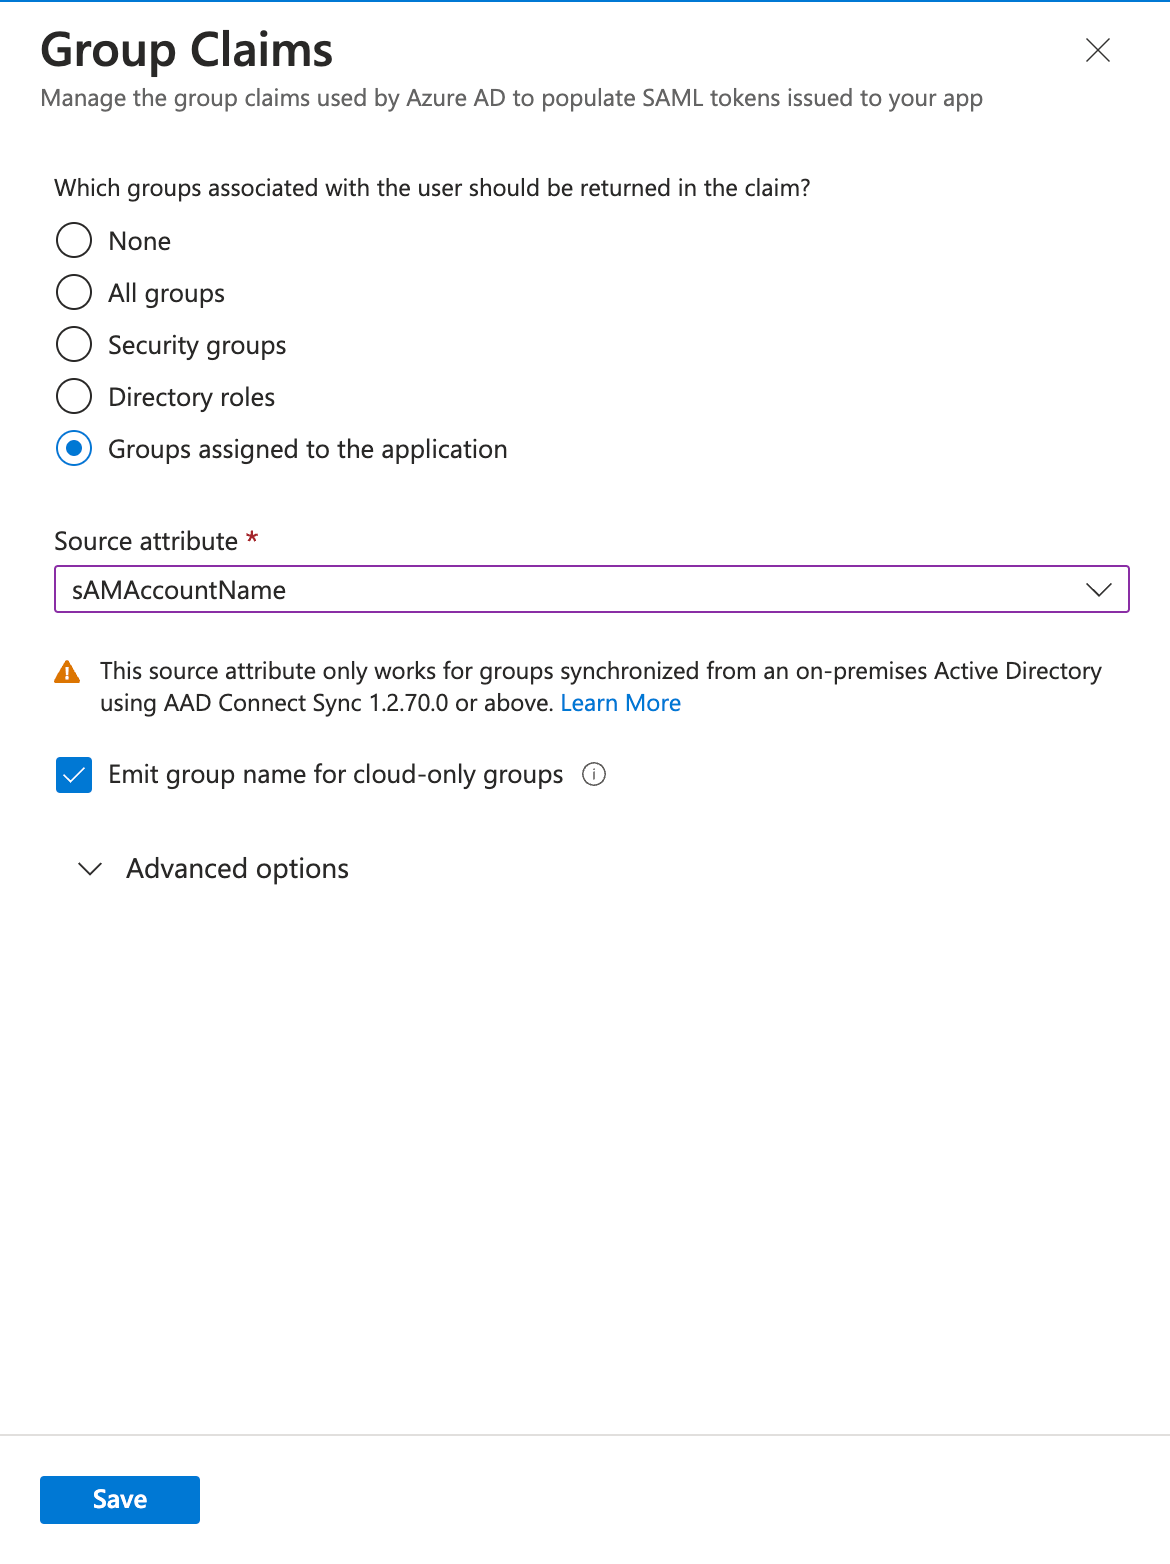
In the input fields of the Group claims page that appears, set the following options:
-
For hybrid/on-prem environments: click to select All groups or Security groups depending on your setup, then select sAMAccountName from the Source attribute drop-down list.
-
For cloud environments: click to select Groups assigned to the application, then select sAMAccountName from the Source attribute drop-down list, and click to check the Emit group name for cloud-only groups option.
-
For hybrid/on-prem environments: click to select All groups or Security groups depending on your setup, then select sAMAccountName from the Source attribute drop-down list.
- If you have a cloud environment and selected Groups assigned to the application in the previous step, you must assign groups to this application by clicking Users and groups in the left pane and then adding the desired groups.
-
Now, follow the steps outlined in Configuring XSP to use the AD SAML app to use the group claim as the source of roles and then map the group names to XCC roles. Make sure to:
-
Change the
attributeMapping.rolesvalue in theauth.ymlfile to:This way, your group names will be read as roles. -
Also, look at the example below to see how you might assign role aliases when you are using existing group names such as
IT_monitoring,sec_analysts, ororg_admins:
-
Change the
auth.yml should look like the one below: