

Script coverage
In the tables below, you can find all configuration settings needed to set up the XCC and MTA VMs with their respective config files; if they are covered by the setup script, and whether the change is mandatory or optional. EachSetting / topic links to a detailed description of the configuration changes. If the step is covered by the setup script, it is not necessary to manually execute these steps again.
- XCC
- MTA
Using the script
The first run of the script is always interactive. You answer a series of questions, inputting desired values, which you can save in the config file. Subsequent runs can be non-interactive, provided you have made changes directly in the config file. After setting the desired values,xorlab-setup offers to restart the services and Docker daemon. It then checks xorlab update and backend services. On MTA VMs, it also checks XCC reachability; on the XCC VM, it prompts for the MTA hostnames to check.
xorlab-setup supports these switches:
--helpprints the available switches and exits.--restart-servicesrestarts the xorlab services without changing configuration.--reachability-testloads the saved/etc/xorlab/bootstrap_configwhen available and runs only the reachability checks.
- hostname - sets the hostname on the VM itself (via hostnamectl) and updates all relevant entries in xorlab configuration files.
- bind IP - the IP address of the interface to which xorlab stack components bind
- proxy - APT, Docker daemon, bootstrap, and
active_guard.ymlproxies.PROXY_USERandPROXY_PASSare optional settings
- client ID - unique ID number of the MTA VM
- XCC FQDN - fully qualified domain name (or hostname) of the XCC VM
/var/log/xorlab/host/host_bootstrap.log. In the file you can find commands with arguments that the script executes. It should be the first place to look whenever there are problems, or the script does not execute properly. To see the log file, open it with less -R, more, tail, or other program which interprets colors.
Config values entered by the user can be saved to a config file (/etc/xorlab/bootstrap_config), which also serves as a history of changes. The config generated on one MTA can then be copied to other MTAs, adjusted, and sourced by the script, without the need to give the same answers again.
Reachability test prompts are transient and answers are not stored in /etc/xorlab/bootstrap_config.
Enter optional internal service destinations as host or host:port. IPv6 literals are not supported; the script reports inputs containing more than one colon as invalid and skips the corresponding check.
Example config file
Example config file
Logic of the setup script
Logic of the setup script
The initial setup of the VM and xorlab is done by running 
xorlab-setup. This is a wrapper which will execute the following steps:- Determine whether it is run on a XCC or an MTA VM.
- When started without arguments, optionally update the actual setup script
xorlab-set-up-[xcc|mta]. If the update process fails, or the update is skipped, a preinstalled local version will be run. - When started with arguments such as
--help,--restart-services, or--reachability-test, skip the update prompt and forward the arguments directly to the local role-specific script. - Execute
xorlab-set-up-xccorxorlab-set-up-mta, depending on the VM type.
Script breakdown
Hostname
- XCC
- MTA
Connect to the XCC VMand set the new VM hostname.Open Open the Expert Editor, you will need to set new hostname value in these files: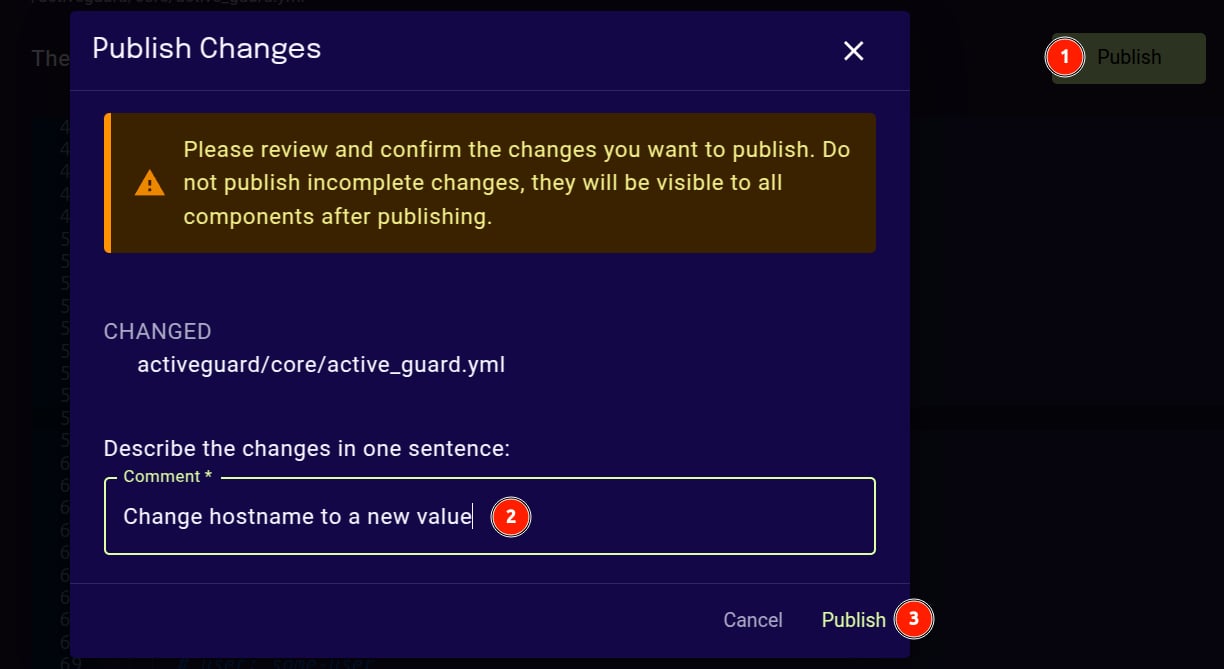
/etc/xorlab/elastic/kibana/kibana.yml config, and set the server.publicBaseUrl:-
activeguard/mta/audit/audit.yml -
monitoring/grafana/grafana.ini -
monitored_mta/promtail/config.yml.vmx.N -
activeguard/core/active_guard.yml
Bind IP
- XCC
- MTA
Connect to the XCC VM:Enable browser access to the XCC web interface by opening the and restart the
/etc/xorlab/xcc/.env file and changing the XCCWEB_BIND_IP variable to the IP that the XCC web interface should bind to:xcc stack.Template Domain
- Open
/activeguard/core/active_guard.ymlin the Expert Editor. - Set
templateDomainto the domain that resolves via MX to all MTAs, as set in 2. step in DNS registration.
active_guard.yml
- Click Publish, then restart all MTAs. The
templateDomainsetting is inactive_guard.ymland requires an MTA restart; see How to Activate the Configuration.
Trusted MTA Profiles
-
Open
/activeguard/core/active_guard.ymlin the Expert Editor. -
Insert all MTA Fully Qualified Domain Names (A records) registered in the 1. step in DNS registration:
-
Click Publish, then restart all MTAs. The
trustedMTAProfilessetting is inactive_guard.ymland requires an MTA restart; see How to Activate the Configuration.
Client ID
Connect to the MTA VM:/etc/xorlab/<STACK>/bootstrap.env file for each stack (activeguard,rproxy_mta,monitored_mta) and change the clientId variable to the number of the MTA VM:
Repeat the steps for each MTA VM.
XCC URL
Connect to the MTA VM:/etc/xorlab/activeguard/.env file, and change the redis_url variable to the Fully Qualified Domain Name or the Hostname of the XCC VM.
/etc/xorlab/<STACK>/bootstrap.env file for each stack (activeguard,rproxy_mta,monitored_mta) and change the Fully Qualified Domain Name or the Hostname of the XCC VM in the configServiceProvider_ag_local variable:
Repeat the steps for each MTA VM.
Proxy Configuration
If the xorlab can only connect to external servers through an HTTP proxy, you’ll need to execute the following steps:- Enable APT to pull OS updates
- Enable the Docker daemon to pull new Docker images
- Configure the XCC and MTA containers
- Update
active_guard.ymlin the Expert Editor to enable SystemTests - If integrated, configure the VirusTotal service
Optional and mandatory proxy settingsUser (
PROXY_USER) and password (PROXY_PASS) are optional, whereas type (PROXY_TYPE), port (PROXY_PORT), and host (PROXY_HOST) are mandatory across all the config files.APT proxy
Connect to the XCC or MTA VM:/etc/apt/apt.conf.d/proxy.conf file:
Repeat the steps for each MTA VM.
Docker Daemon proxy
The proxy for the Docker daemon is set using environment variables usingsystemd. XCC and MTA VMs come with prepared, commented out proxy configuration in the /etc/systemd/system/docker.service.d/http-proxy.conf.
Connect to the XCC or MTA VM:
docker compose down to shut down all running container stacks. Then reload the service configuration and restart the Docker service:
Repeat the steps for each MTA VM.
ServiceProvider proxy
Configure the proxy used by containers for most outgoing connections, including downloading the latest global configuration, in the bootstrap files (bootstrap.yml and bootstrap.env).
Connect to the XCC VM:
bootstrap.env file in your favorite editor for the auth, monitoring and xcc stacks:
configServiceURL_ag_global (line 12), uncomment configServiceProvider_ag_global (line 11) and add the value in the JSON format to use the corresponding proxy and xCloud:
bootstrap.env file in your favorite editor for the activeguard, monitored_mta, and rproxy_mta stacks:
configServiceURL_ag_global (line 12), uncomment configServiceProvider_ag_global (line 11) and add the value in the JSON format to use the corresponding proxy and xCloud:
Repeat the steps for each MTA VM.
xorlab Services and SystemTests
To enable connection to the xorlab backend services (DANA, xCloud, ML), open the Expert Editor and navigate to/activeguard/core/active_guard.yml. Here you can uncomment and set proxy values for each backend service.
ReachXorlabSystemTest and URLRedirectFollowerSystemTest. In order to configure them, you need to insert the httpProxy block into /activeguard/core/active_guard.yml.
activeguard stack on each MTA. These active_guard.yml service and proxy settings require an MTA restart; see How to Activate the Configuration.