

Configuring the app in AAD
-
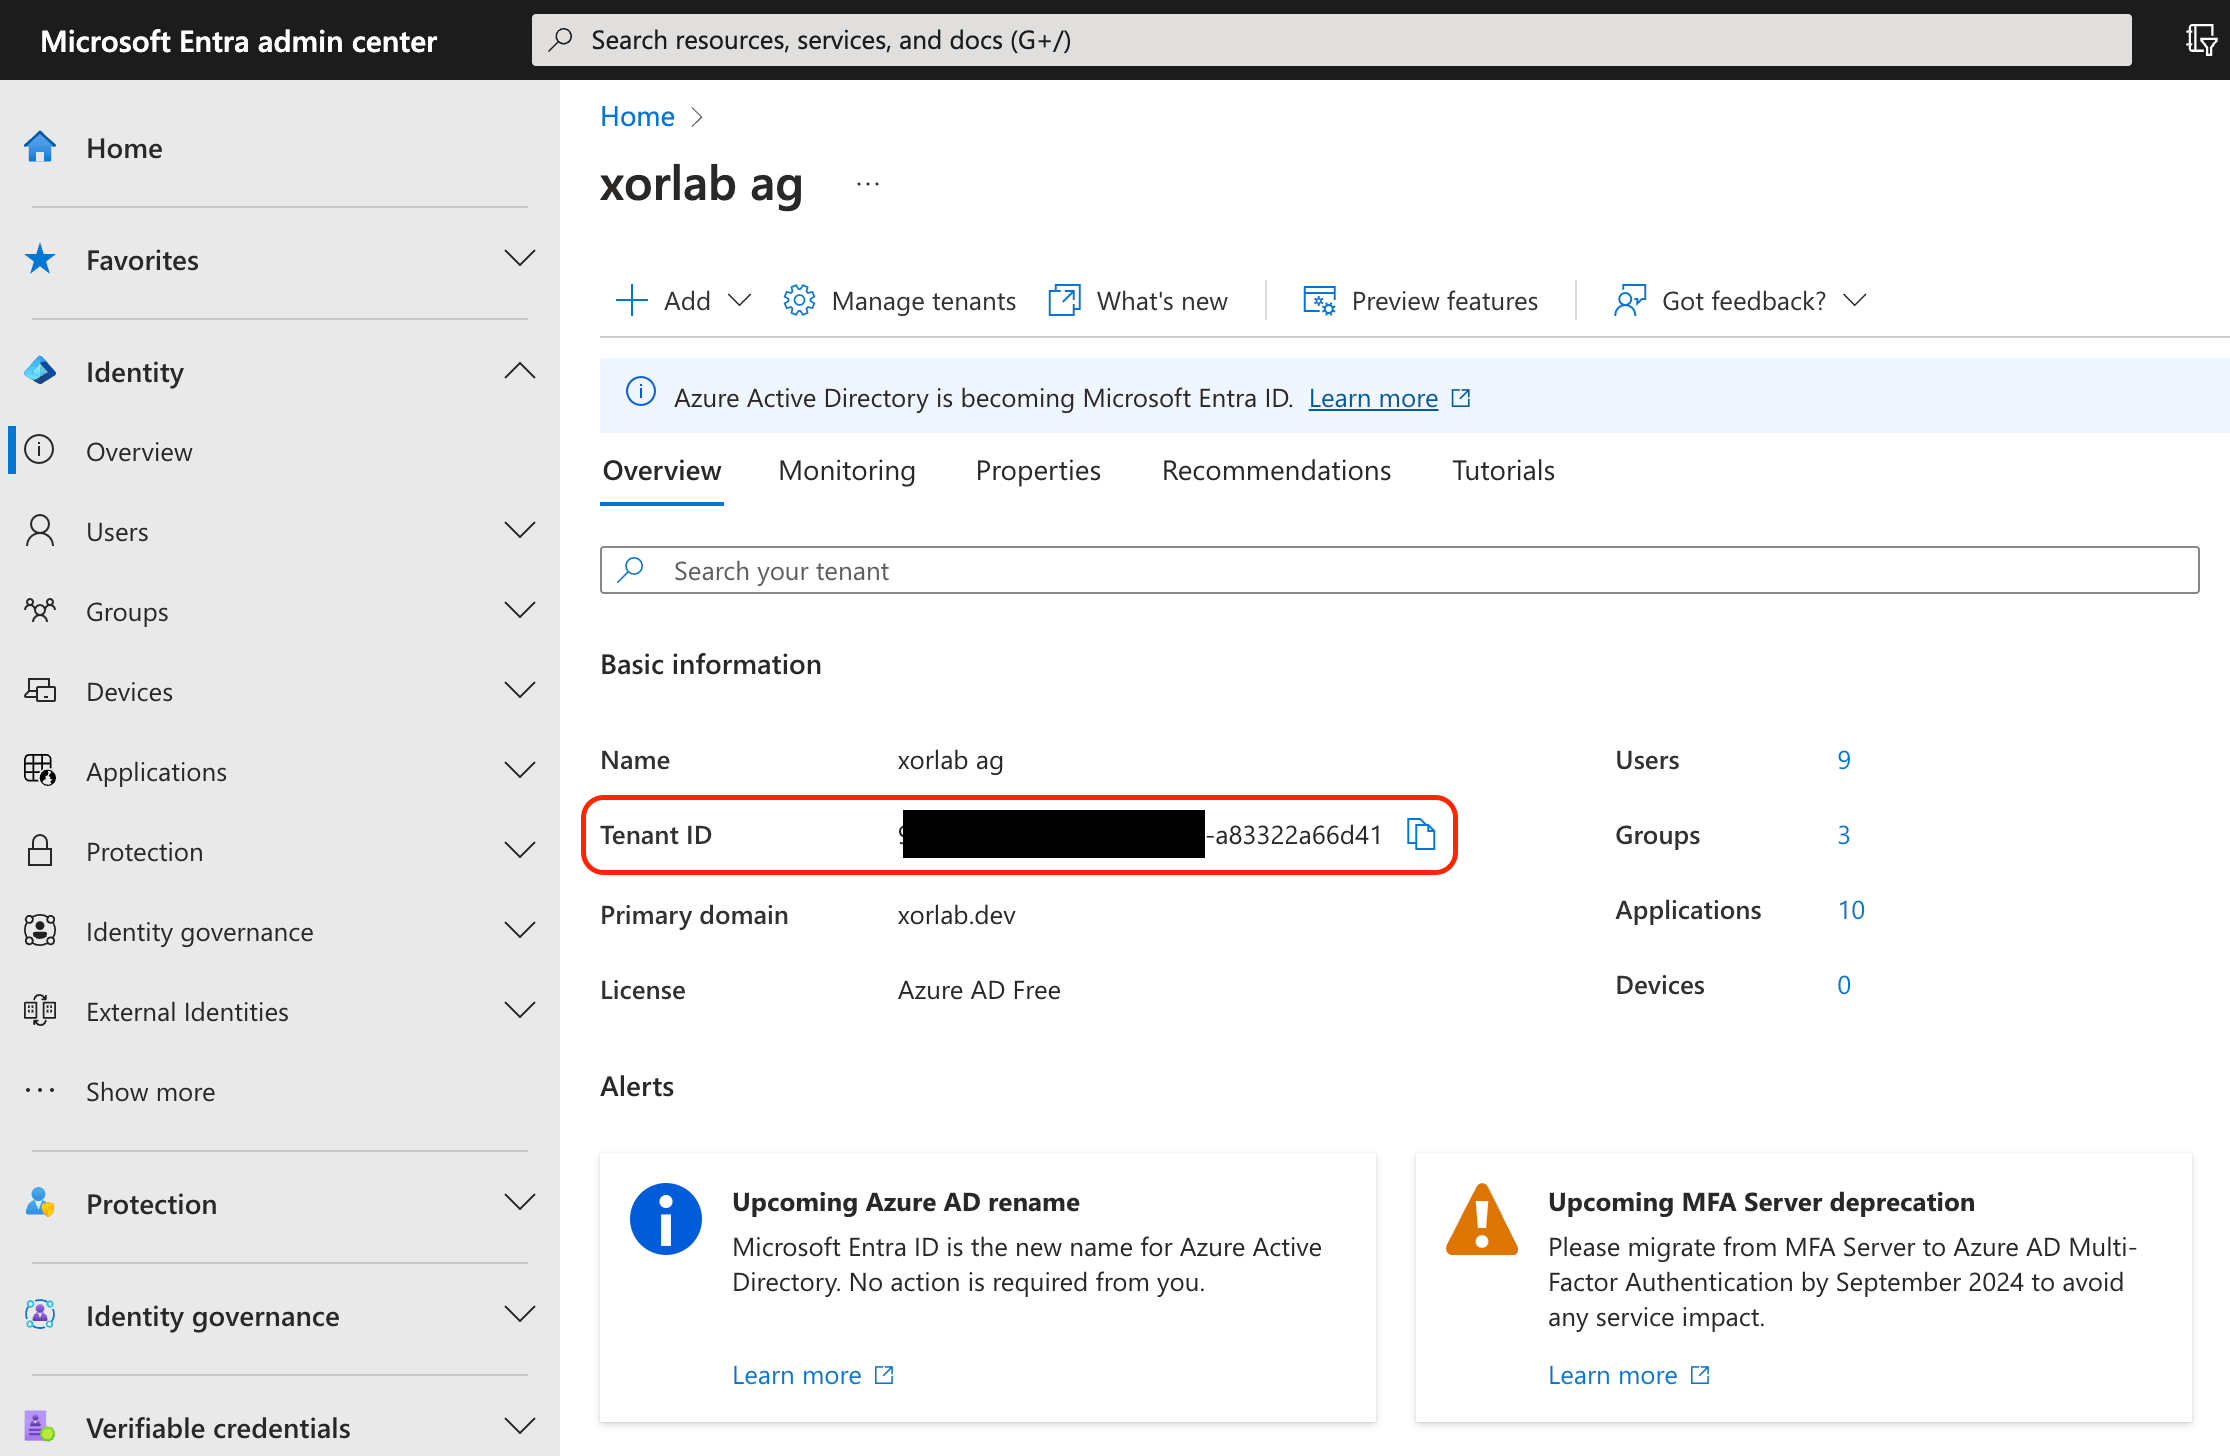
Open Microsoft Entra Admin Center and select Overview under Identity in the left pane. You will see the Overview page with some basic information for your account, including your Tenant ID. Copy this value and keep it somewhere for use in the last steps.
-
From the menu on the left, click to expand the Applications section and click App registrations. Select All applications on the page that appears.
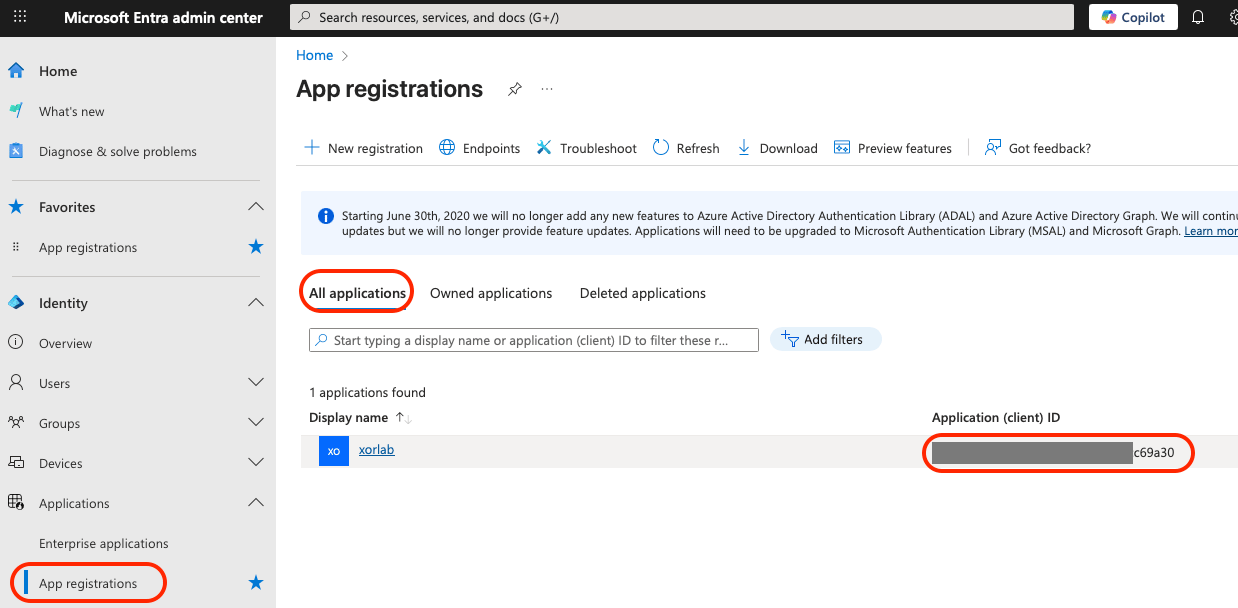
- Copy the Application (client) ID value for the app used to connect your M365 with xorlab and keep it somewhere, just like you did with the Tenant ID.
-
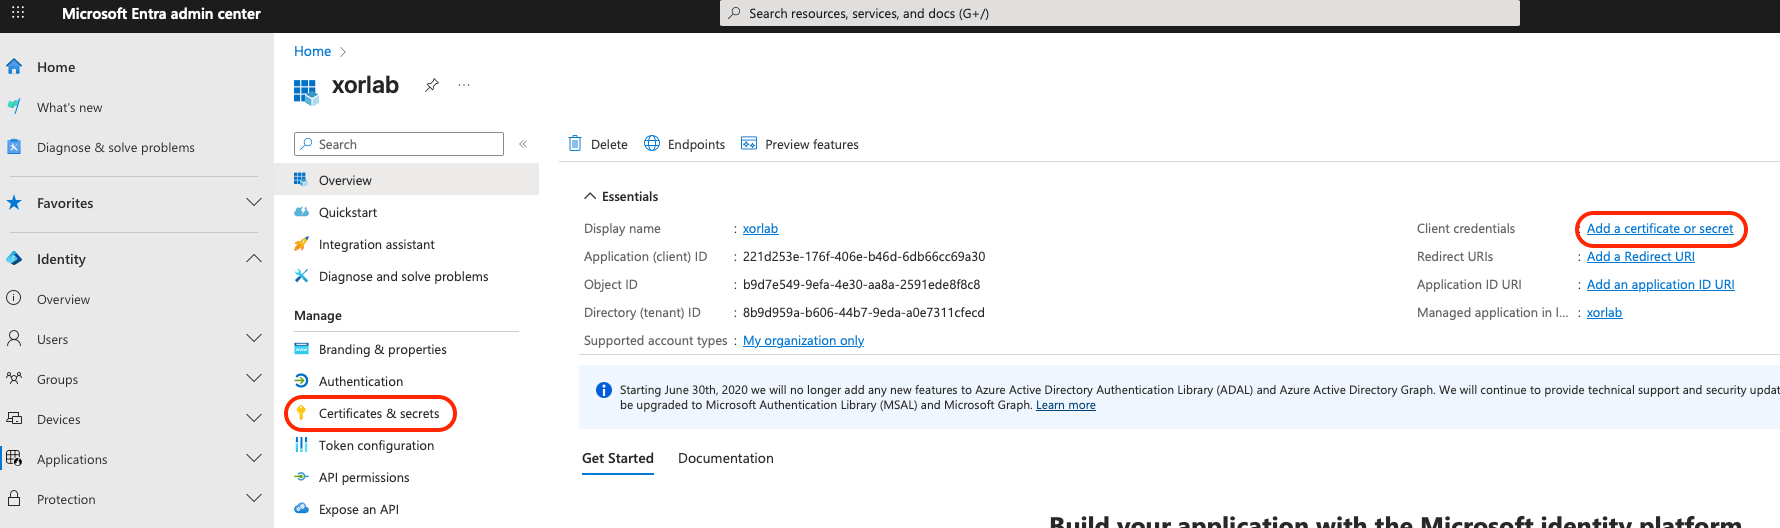
Click the name of the app. You will see the overview page of the app. Select Certificates & secrets from the left pane or click Add a certificate or secret in the list in the main view:
-
On the Certificates & secrets page for your app, click New client secret:
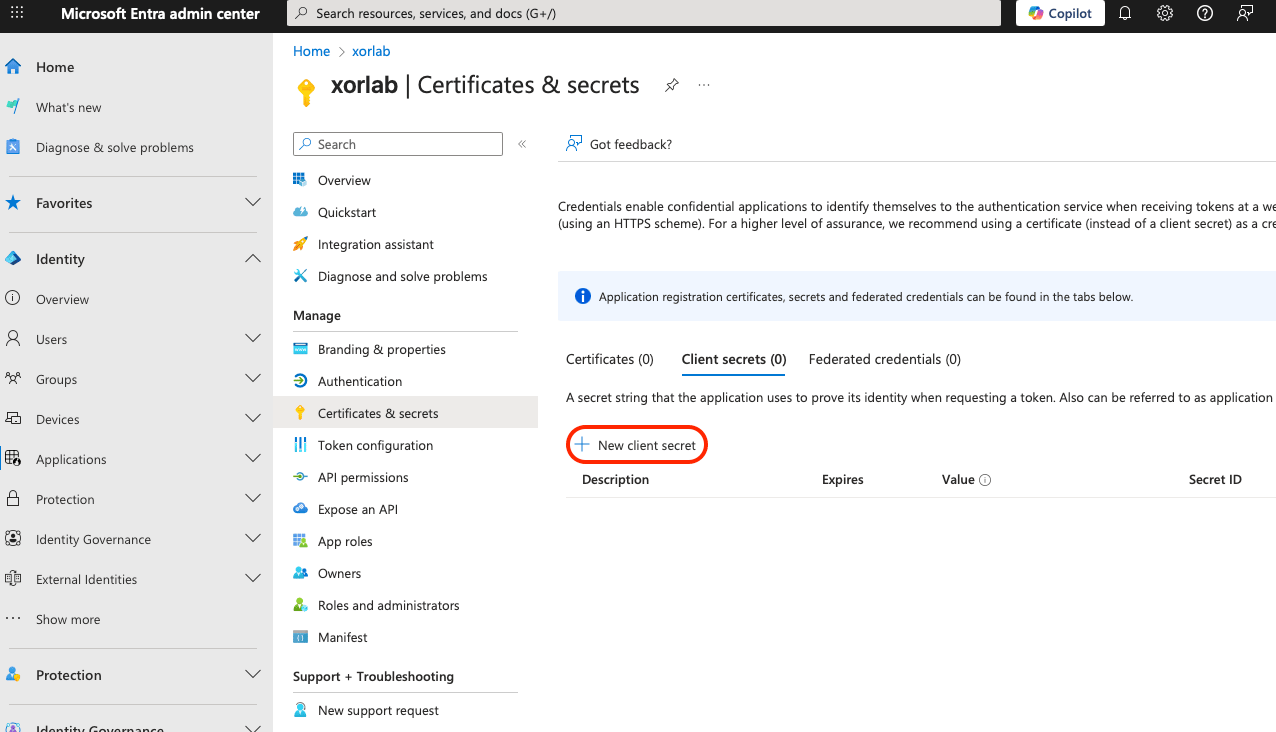
- Enter a description for the client secret and set the expiration time in the Add a client secret pane that shows up on the right. Click Add.
-
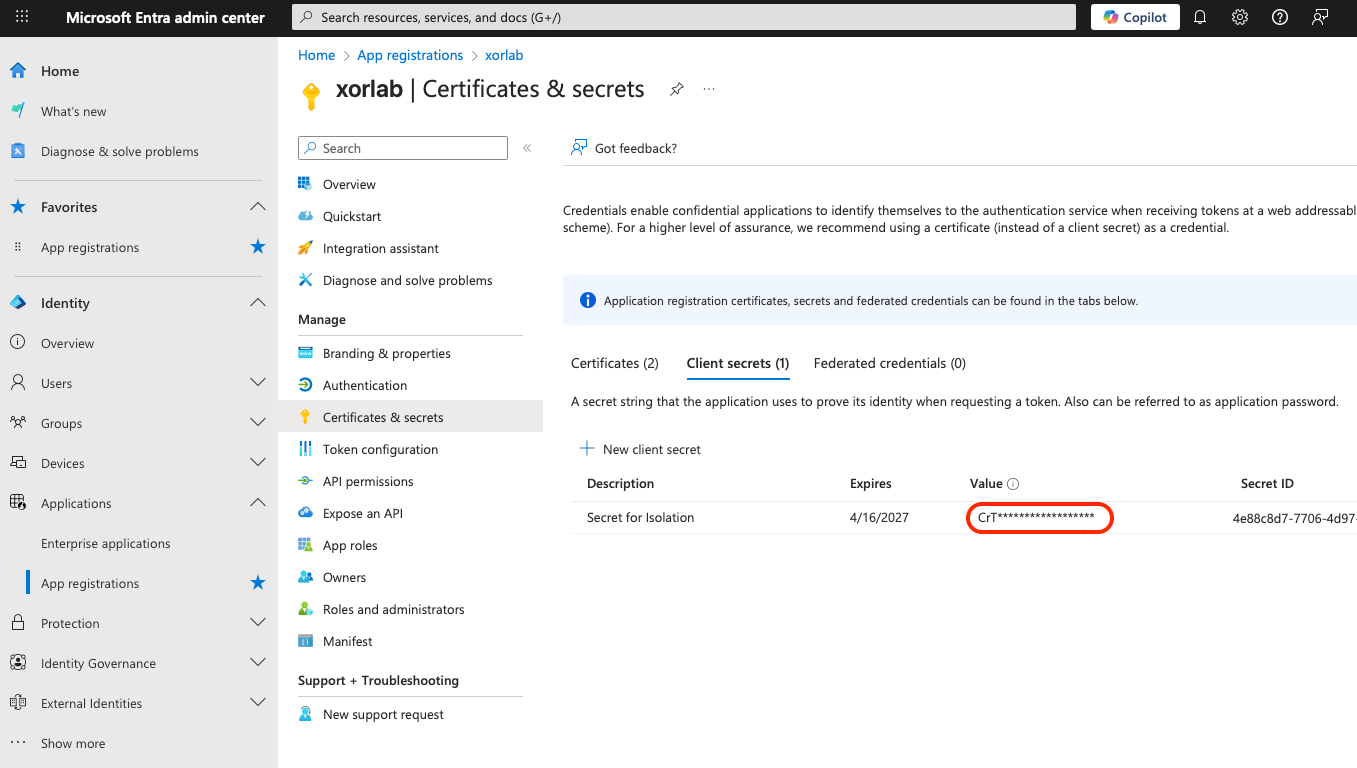
The Certificates & secrets page now displays your new client secret. Copy the Value of the secret and keep it somewhere for future use:
-
Select API permissions from the left pane and click Add a permission on the API Permissions page that appears:
 There can be a default
User.Readpermission already added to your app. Don’t worry, it’s safe to leave it there. -
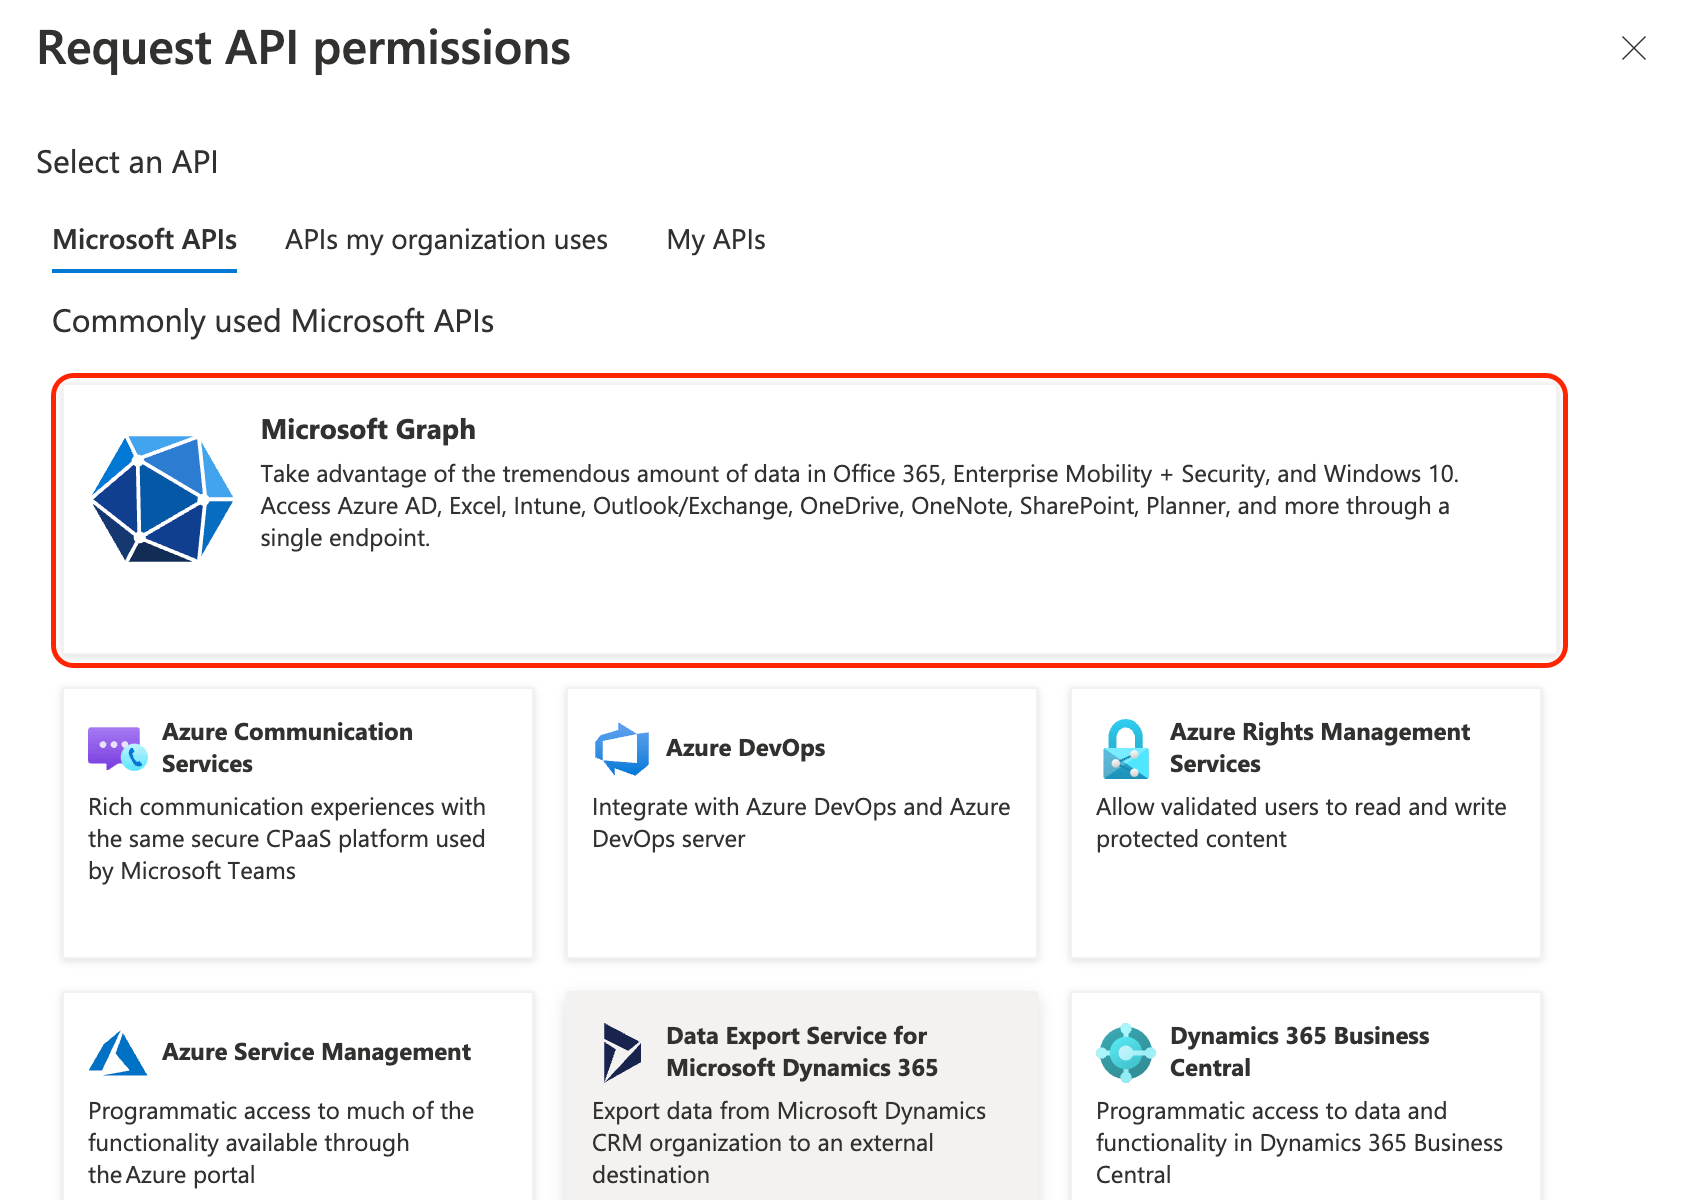
Click the first option—Microsoft Graph—on the Request API permissions pane displayed on the right:
-
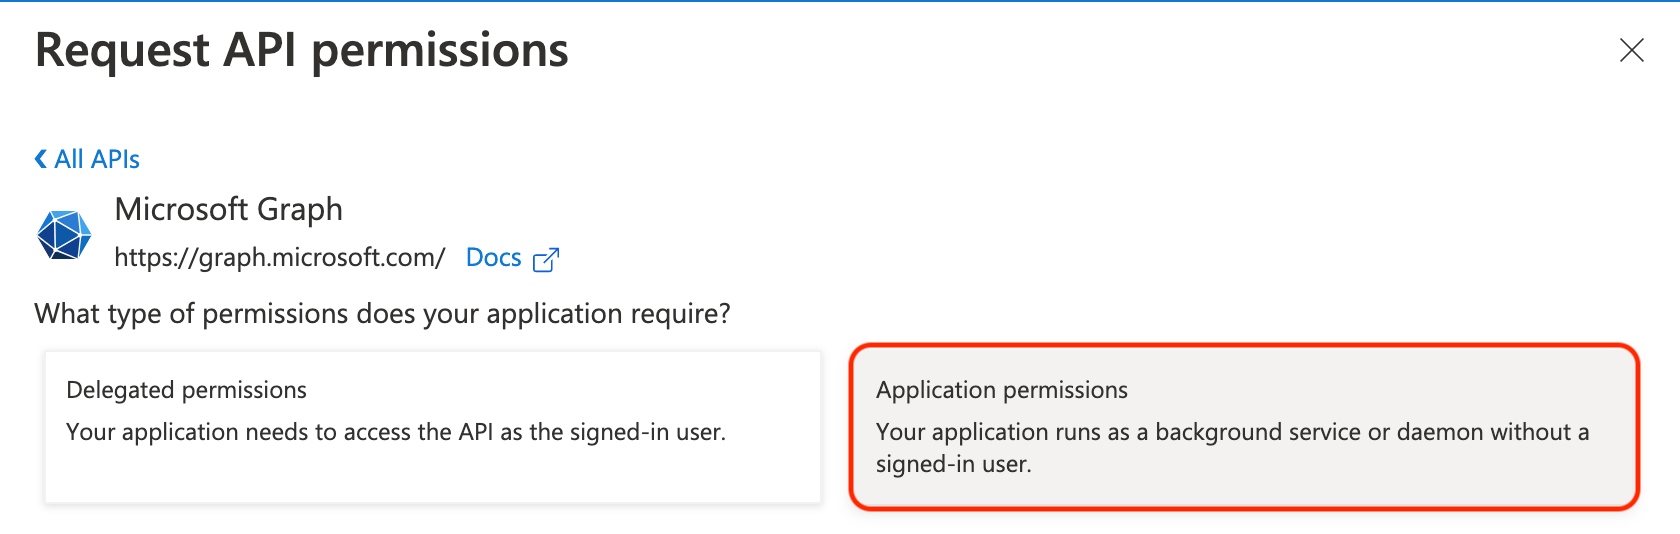
Click Application permissions tile on the next page:
-
Available permissions grouped in categories are displayed. Use the search field to filter the permissions:
-
type
mail, expand the Mail group, and check the boxes next toMail.ReadandMail.ReadWrite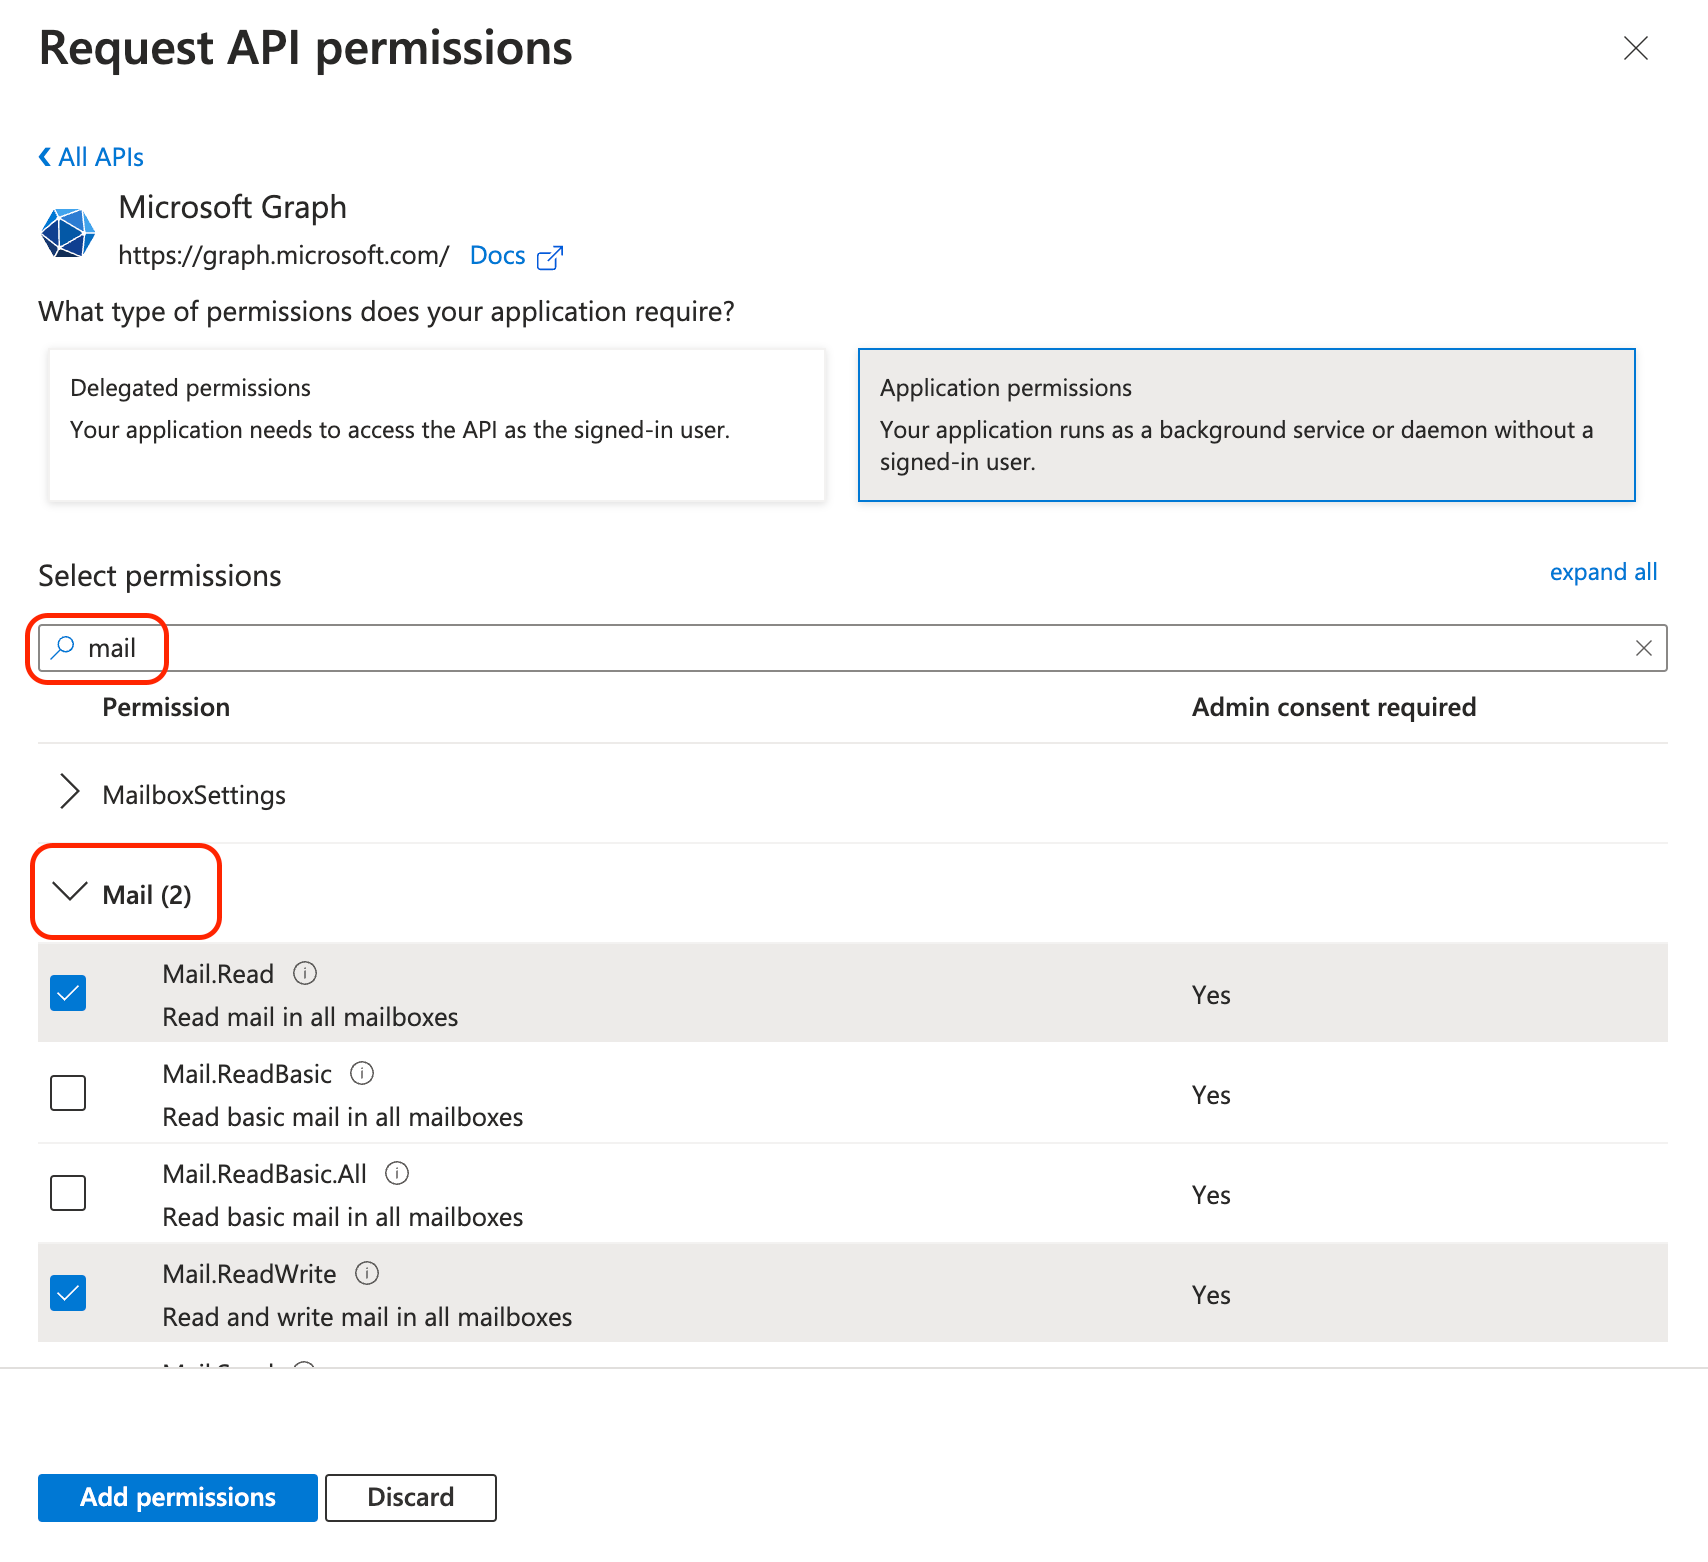
-
type
group, expand the Group group and check the boxes next toGroup.Read.AllandGroup.ReadWrite.All(note: group permissions are not required now but the future releases of xorlab might support group case isolation)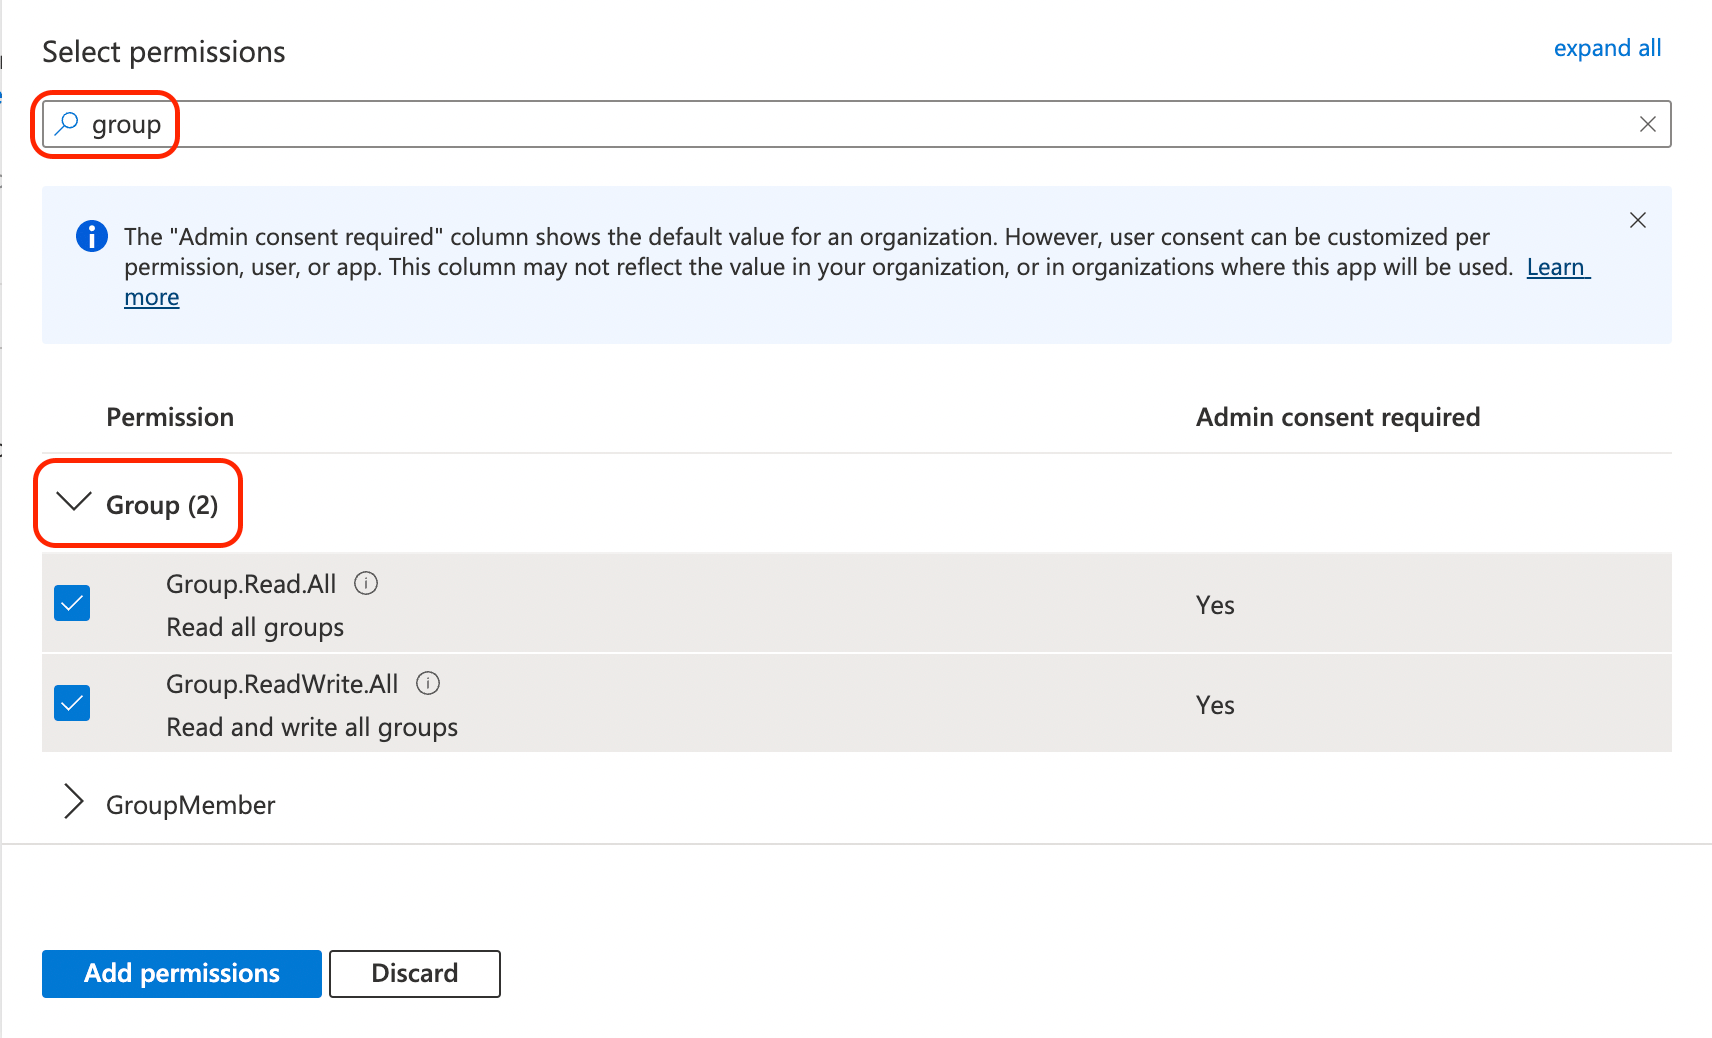
-
type
user.read, expand the User group, and check the box next toUser.Read.All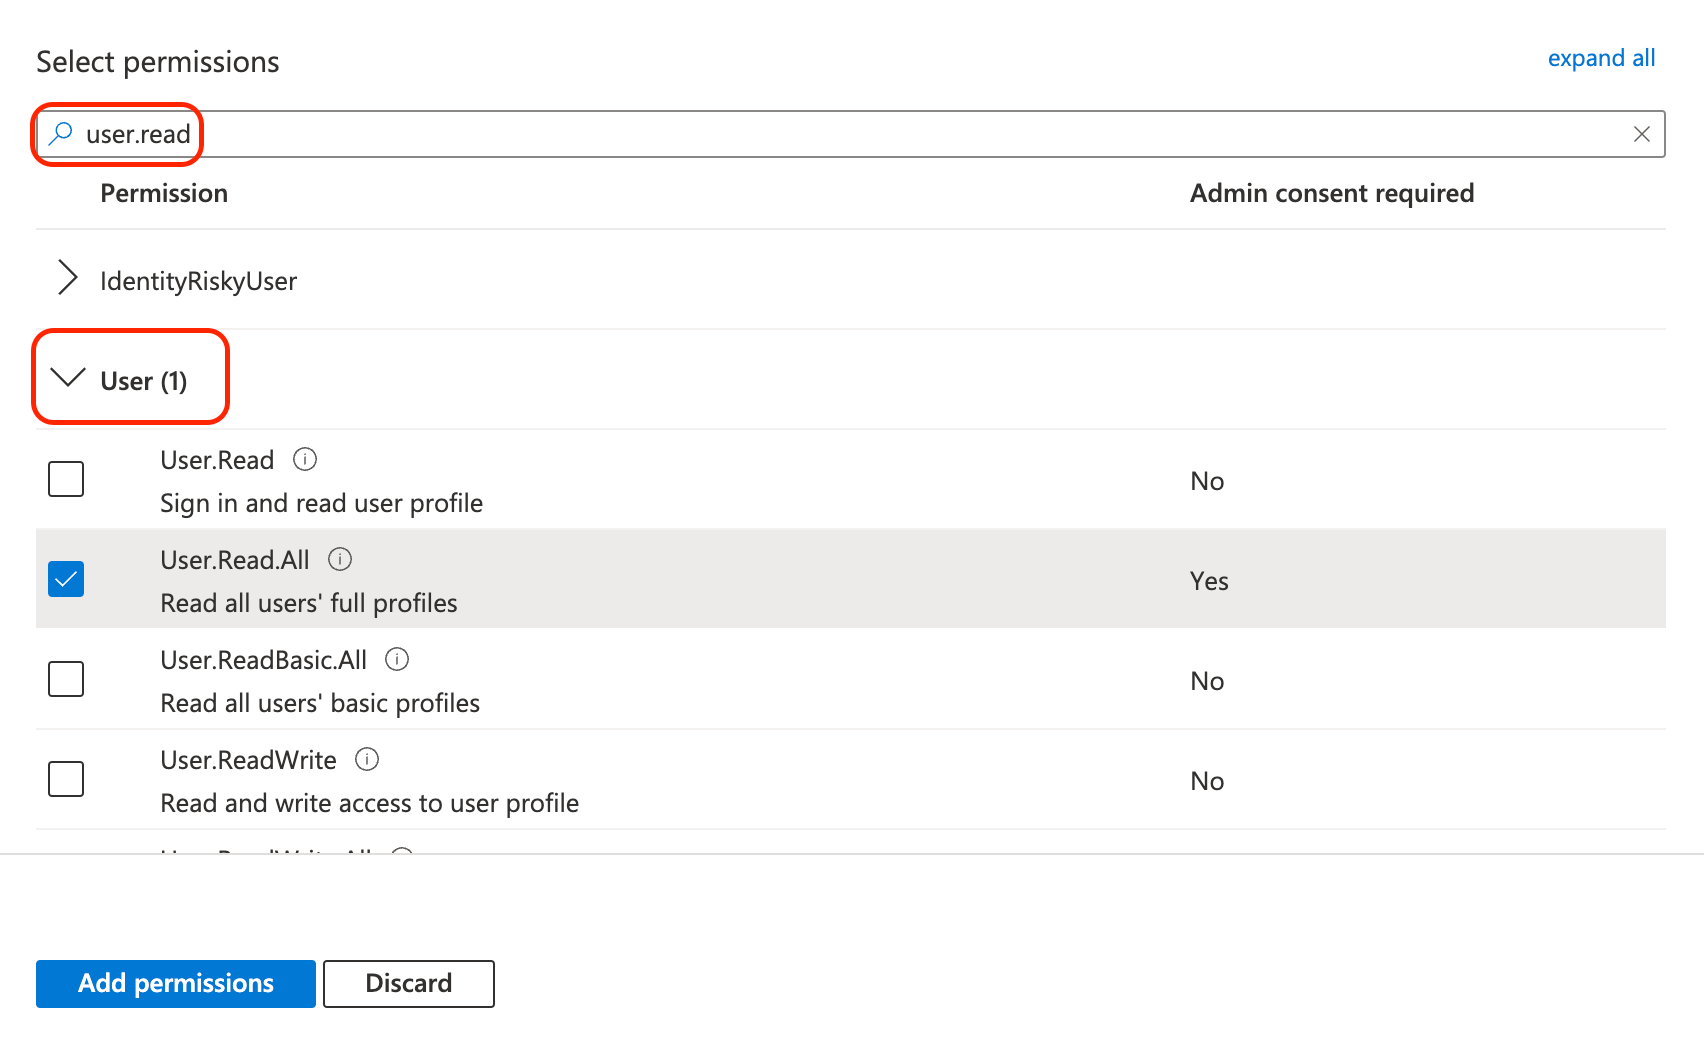
-
type
-
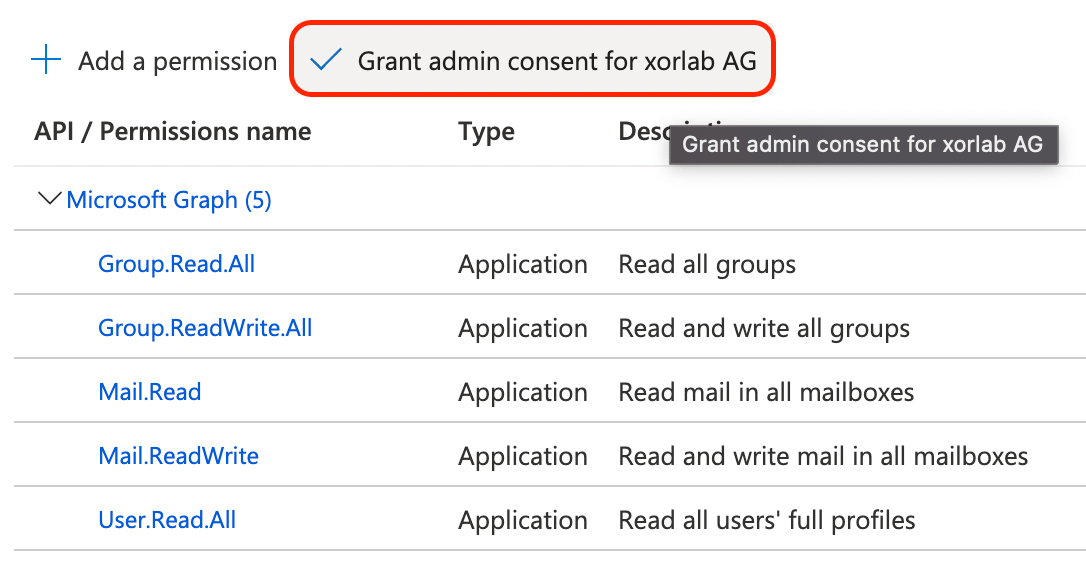
Click the Add permissions button. On the main API Permissions page, you should see five new permissions granted to the Microsoft Graph API for your app. Click the Grant admin consent for… button above the list to apply the permissions change.
Configuring xorlab
When all is set on the AAD side, xorlab needs to know the details of your app. Open Expert Editor in XCC, navigate toxcc/backend, and click to open the xcc.yml file. Here you paste all of the values we asked you to copy and keep: Tenant ID, Application (client) ID and the secret value.
At the end of the file, paste the following block and enter the appropriate values within quotes:
clientSecret property above in the xcc.yml file. Instead, save the value of the secret to a text file in /etc/xorlab/xcc/backend/m365_graph_api_client_secret.txt. Make sure that this file has the following permissions:
xcc.yml, please restart XCC as described in How to Activate the Configuration.