- Using BCC monitoring sends an additional copy of each email to xorlab, which can lead to hitting the external recipients rate limit (tenant ERRL) of Microsoft Exchange.
- You can monitor how close you are to the limit under: Reports → Mail flow → Outbound external recipients
Choose how to configure it
Both paths create the same connector and the same two mail flow rules. Pick one.Quick integration with PowerShell
Run one script that asks for your values. Mail flow rules need to be activated manually.
Manual integration in the Exchange Admin Center
The same configuration manually in the web interface. Use it if you prefer to see each setting before you apply it.
Quick integration with PowerShell
One script creates the connector and both mail flow rules. It asks for your values, shows a summary and changes nothing until you confirm. You need the Exchange Administrator role and theExchangeOnlineManagement module. Run it either in a PowerShell window on your own machine or in the Azure Cloud Shell.
Installing ExchangeOnlineManagement module locally
Installing ExchangeOnlineManagement module locally
Run these once, in a PowerShell window on your own machine. Everything installs for your user account only, so you do not need local administrator rights:
-
Download the script with the command on Script Downloads, which requires you to log in. Run that command in your PowerShell window, then come back here and start the script. If you are not signed in to Exchange Online yet, a sign-in window opens first:
If the connector or one of the rules already exists in your tenant, the script stops without changing anything.
-
Answer the prompts:
-
Check the summary and confirm with
y. The script then:- creates the
Microsoft365Toxorlabconnector - validates it with a test email to the monitoring address and summarizes the result
- creates the
IncomingBCCxorlabandOutgoingBCCxorlabmail flow rules, disabled
Validate-OutboundConnectordoes not record its result on the connector. - creates the
-
Enable both rules:
From then on, M365 sends a copy of every incoming and outgoing email to xorlab. It can take several minutes until the rules are active.
./xorlabExoSetup.ps1 -Mode Monitoring -Remove.
Test with one mailbox first
With thetest scope, each rule gets one extra condition on top of its organization-wide ones: IncomingBCCxorlab matches only email to the test mailbox, and OutgoingBCCxorlab only email from it. No copies are sent for any other email.
When you are done testing, remove that condition and the same rules apply to the whole organization. Either delete it in the Exchange Admin Center under Mail flow → Rules — The recipient → is this person on the incoming rule, The sender → is this person on the outgoing one — or run:
Manual integration in the Exchange Admin Center
Create mail flow rule
-
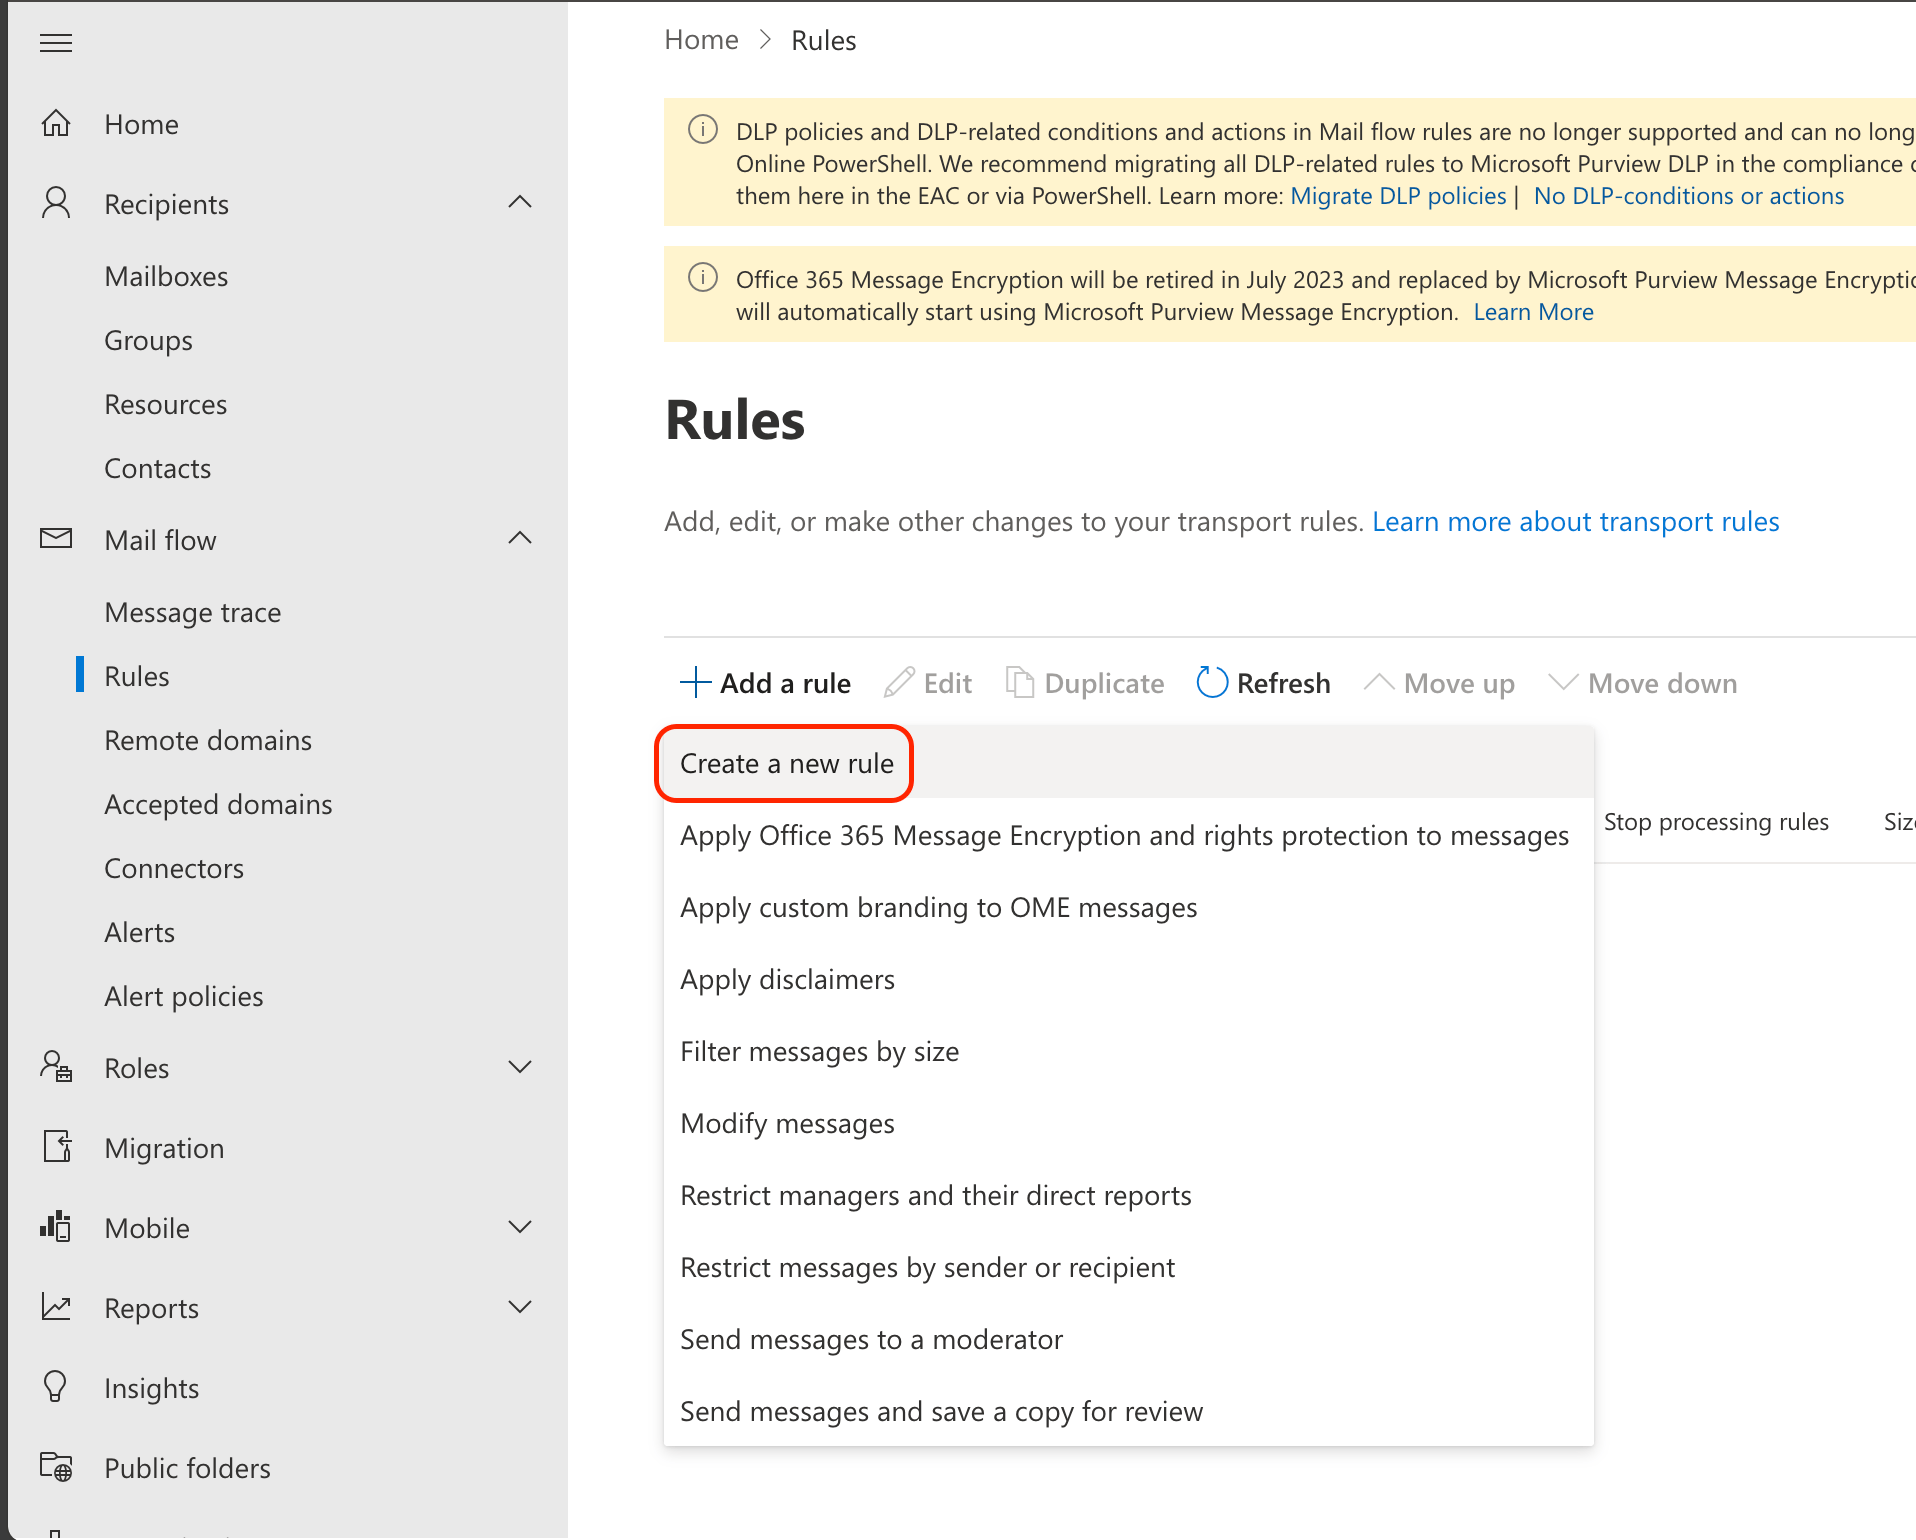
Go to Exchange Admin Center → Mail flow → Rules and create a new rule:
-
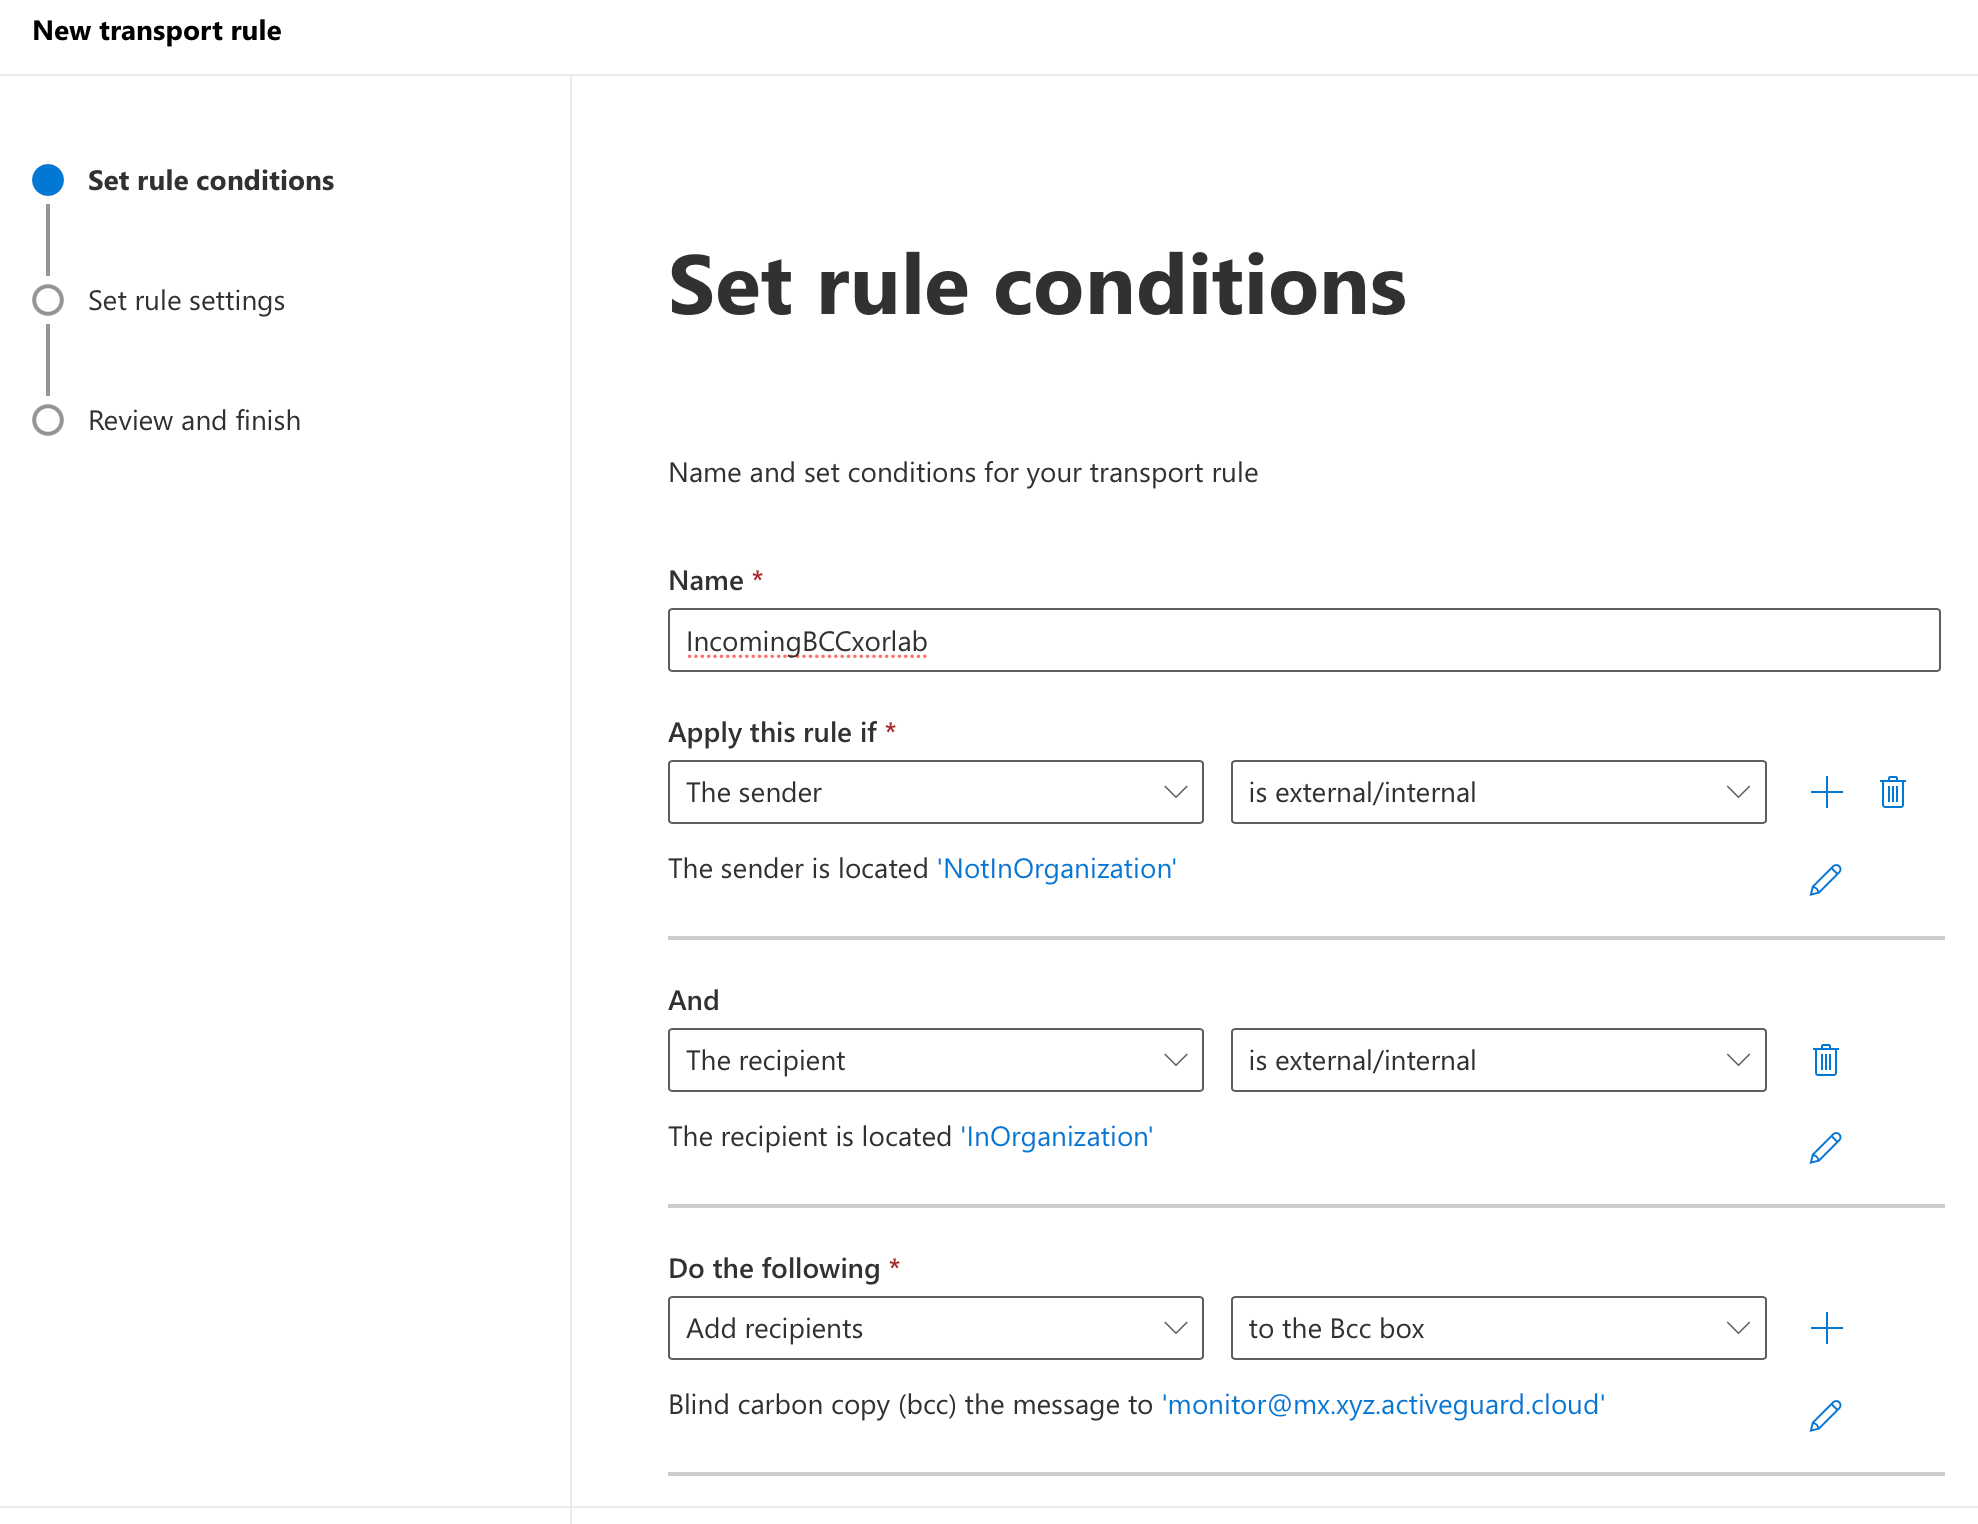
Configure the rule like this:
- Name:
IncomingBCCxorlab - Apply this rule if → The sender → is external/internal → Outside the organization
- Click the plus icon (
+) to add another condition - And → The recipient → is external/internal → Inside the organization
- Do the following → Add Recipients → to the Bcc box → enter
monitor@mx.xyz.activeguard.cloud, wherexyzis your customer ID - Click the plus icon (
+) to add another action - And → Modify the message properties → set a message header → set
x-xor-tenant-tokento your header value
- Name:
- Click through Next → Finish and leave all settings at their defaults.
-
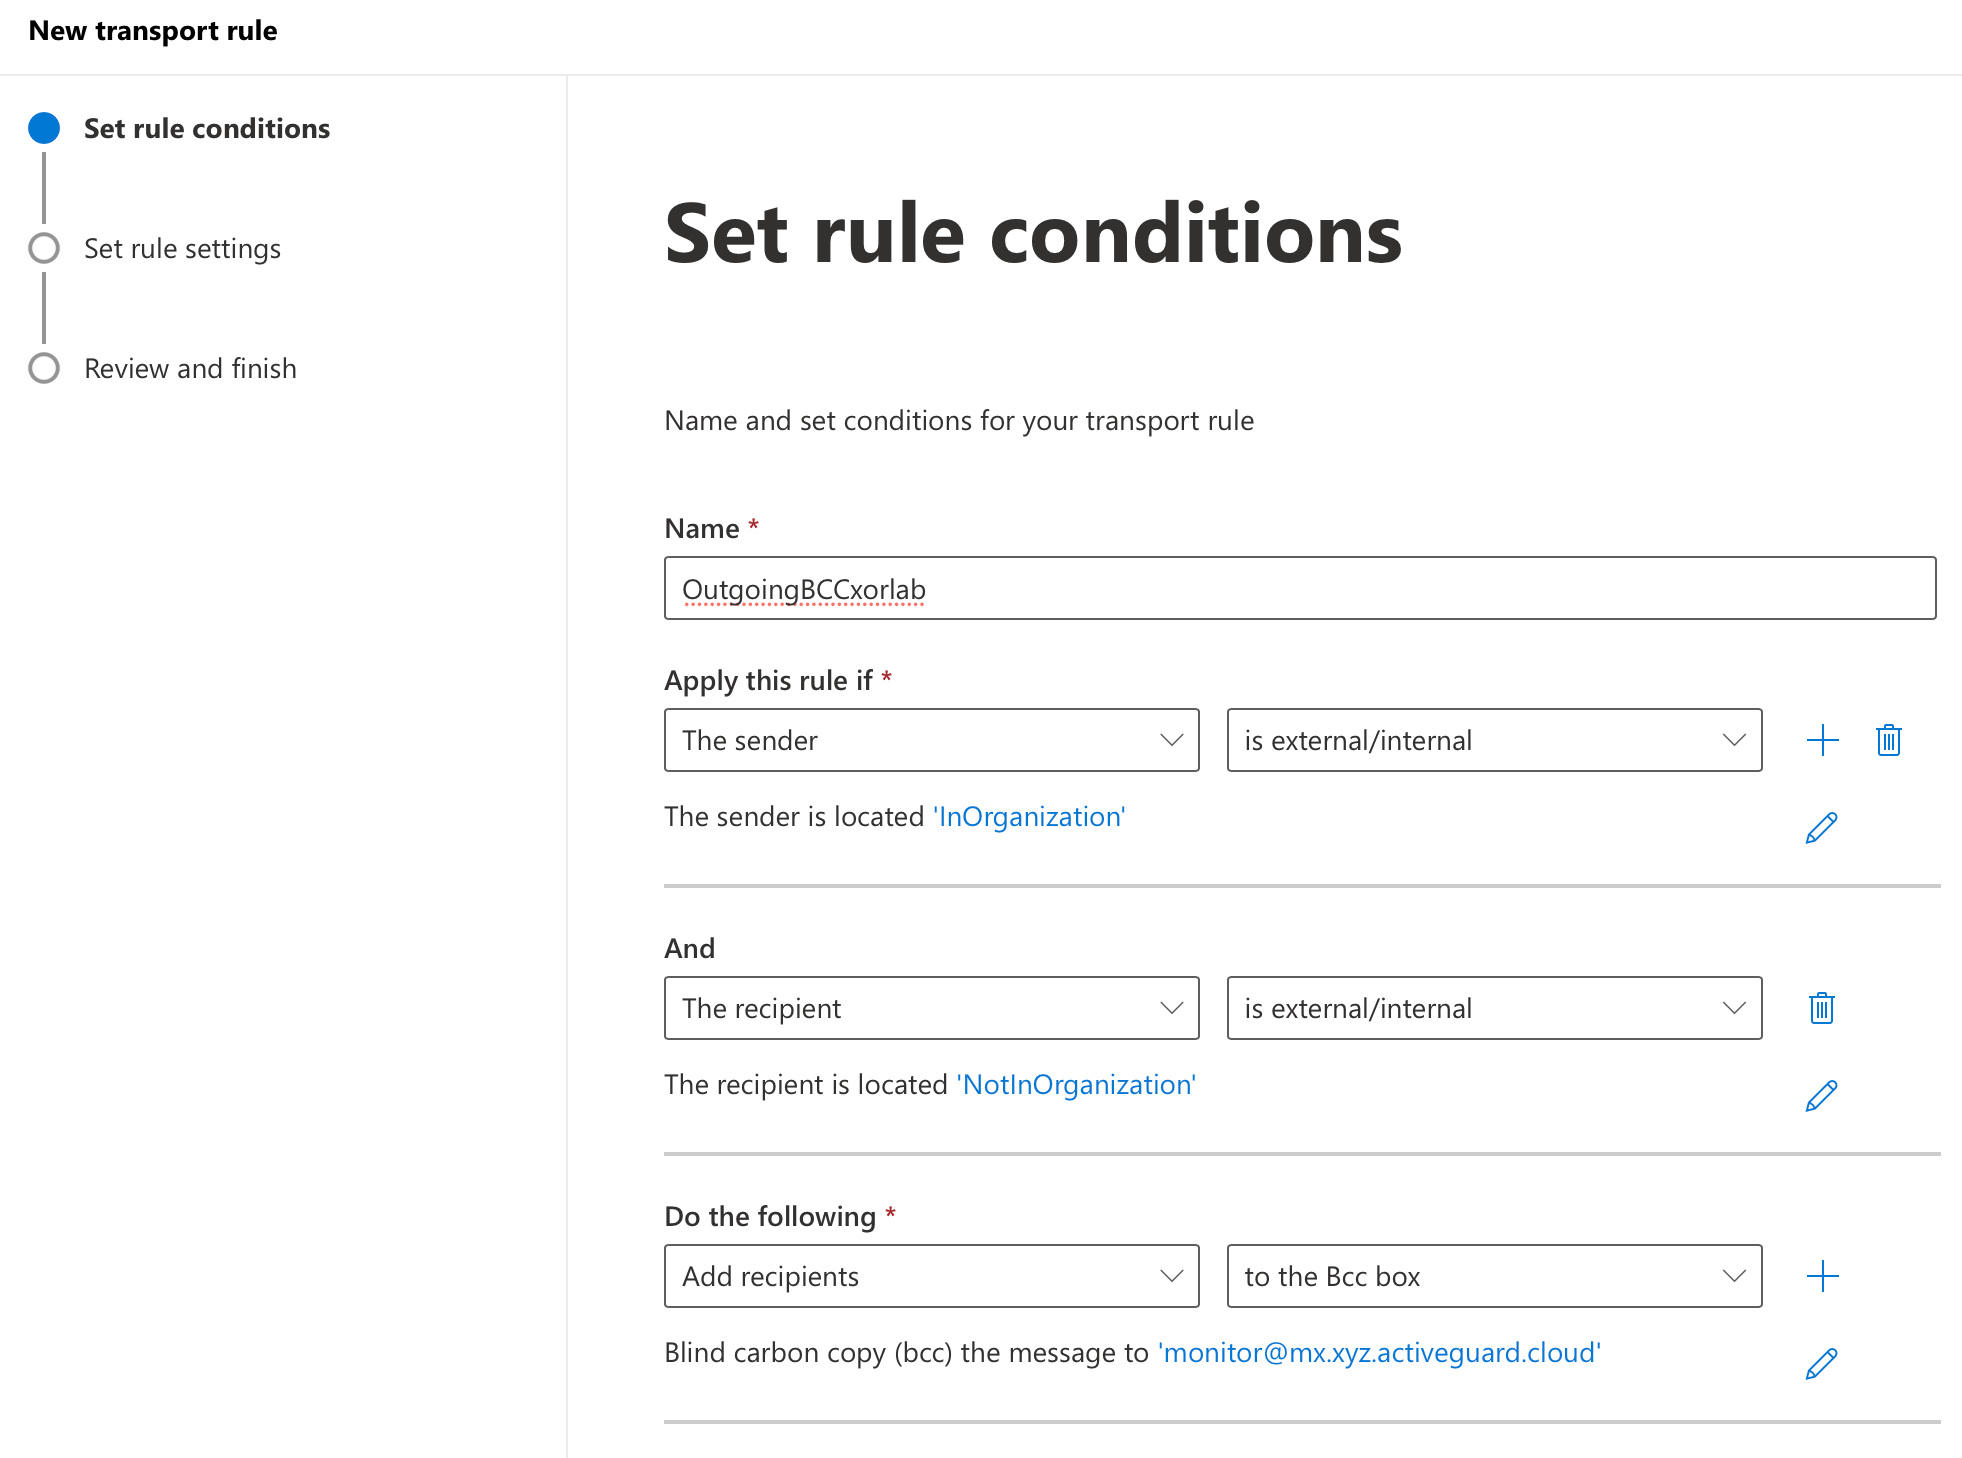
Repeat steps #2-3 to add another rule but this time set:
- Name:
OutgoingBCCxorlab - The sender → Inside the organization
- The recipient → Outside the organization
- Name:
- Enable both rules in the Rules page.
Create a connector
In addition to the mail flow rule above, we need to create a connector to make sure the emails are sent directly to xorlab.Additional information
Additional information
We recommend to always create a connector to ensure proper email delivery. However, you can omit the connector if the following two conditions are met:
- You do not have any other connectors that might interfere with the BCC emails sent to xorlab.
- You do not have a hybrid MS setup with an on-prem-only email delivery (Centralized Mail Transport).
-
Go to Exchange Admin Center → Connectors → add a connector:
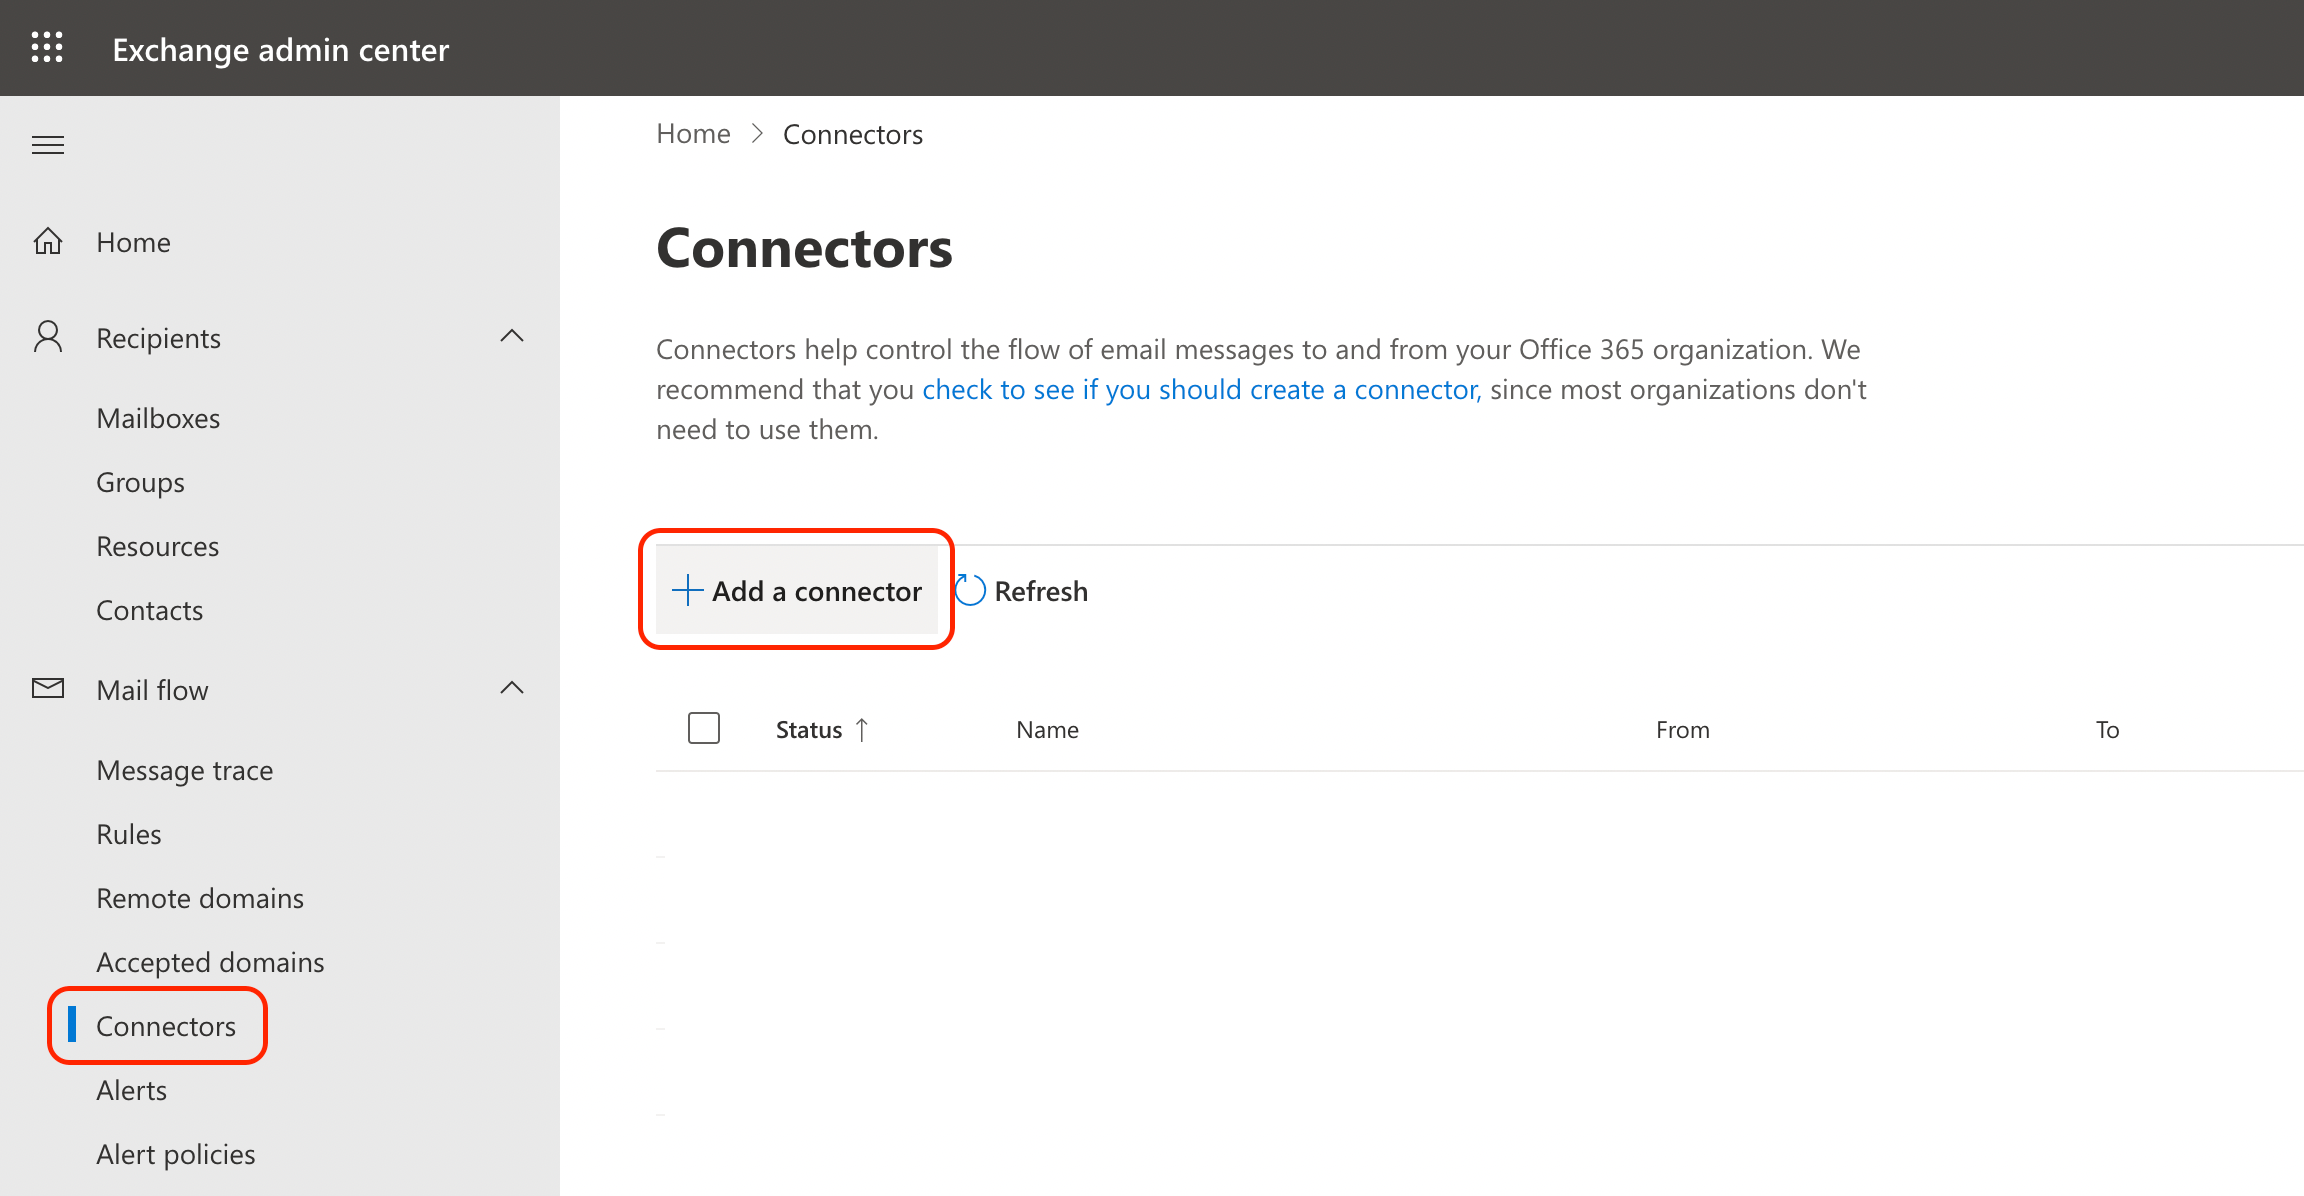
-
Connection from → Office 365, and Connection to → Your organization’s email server:
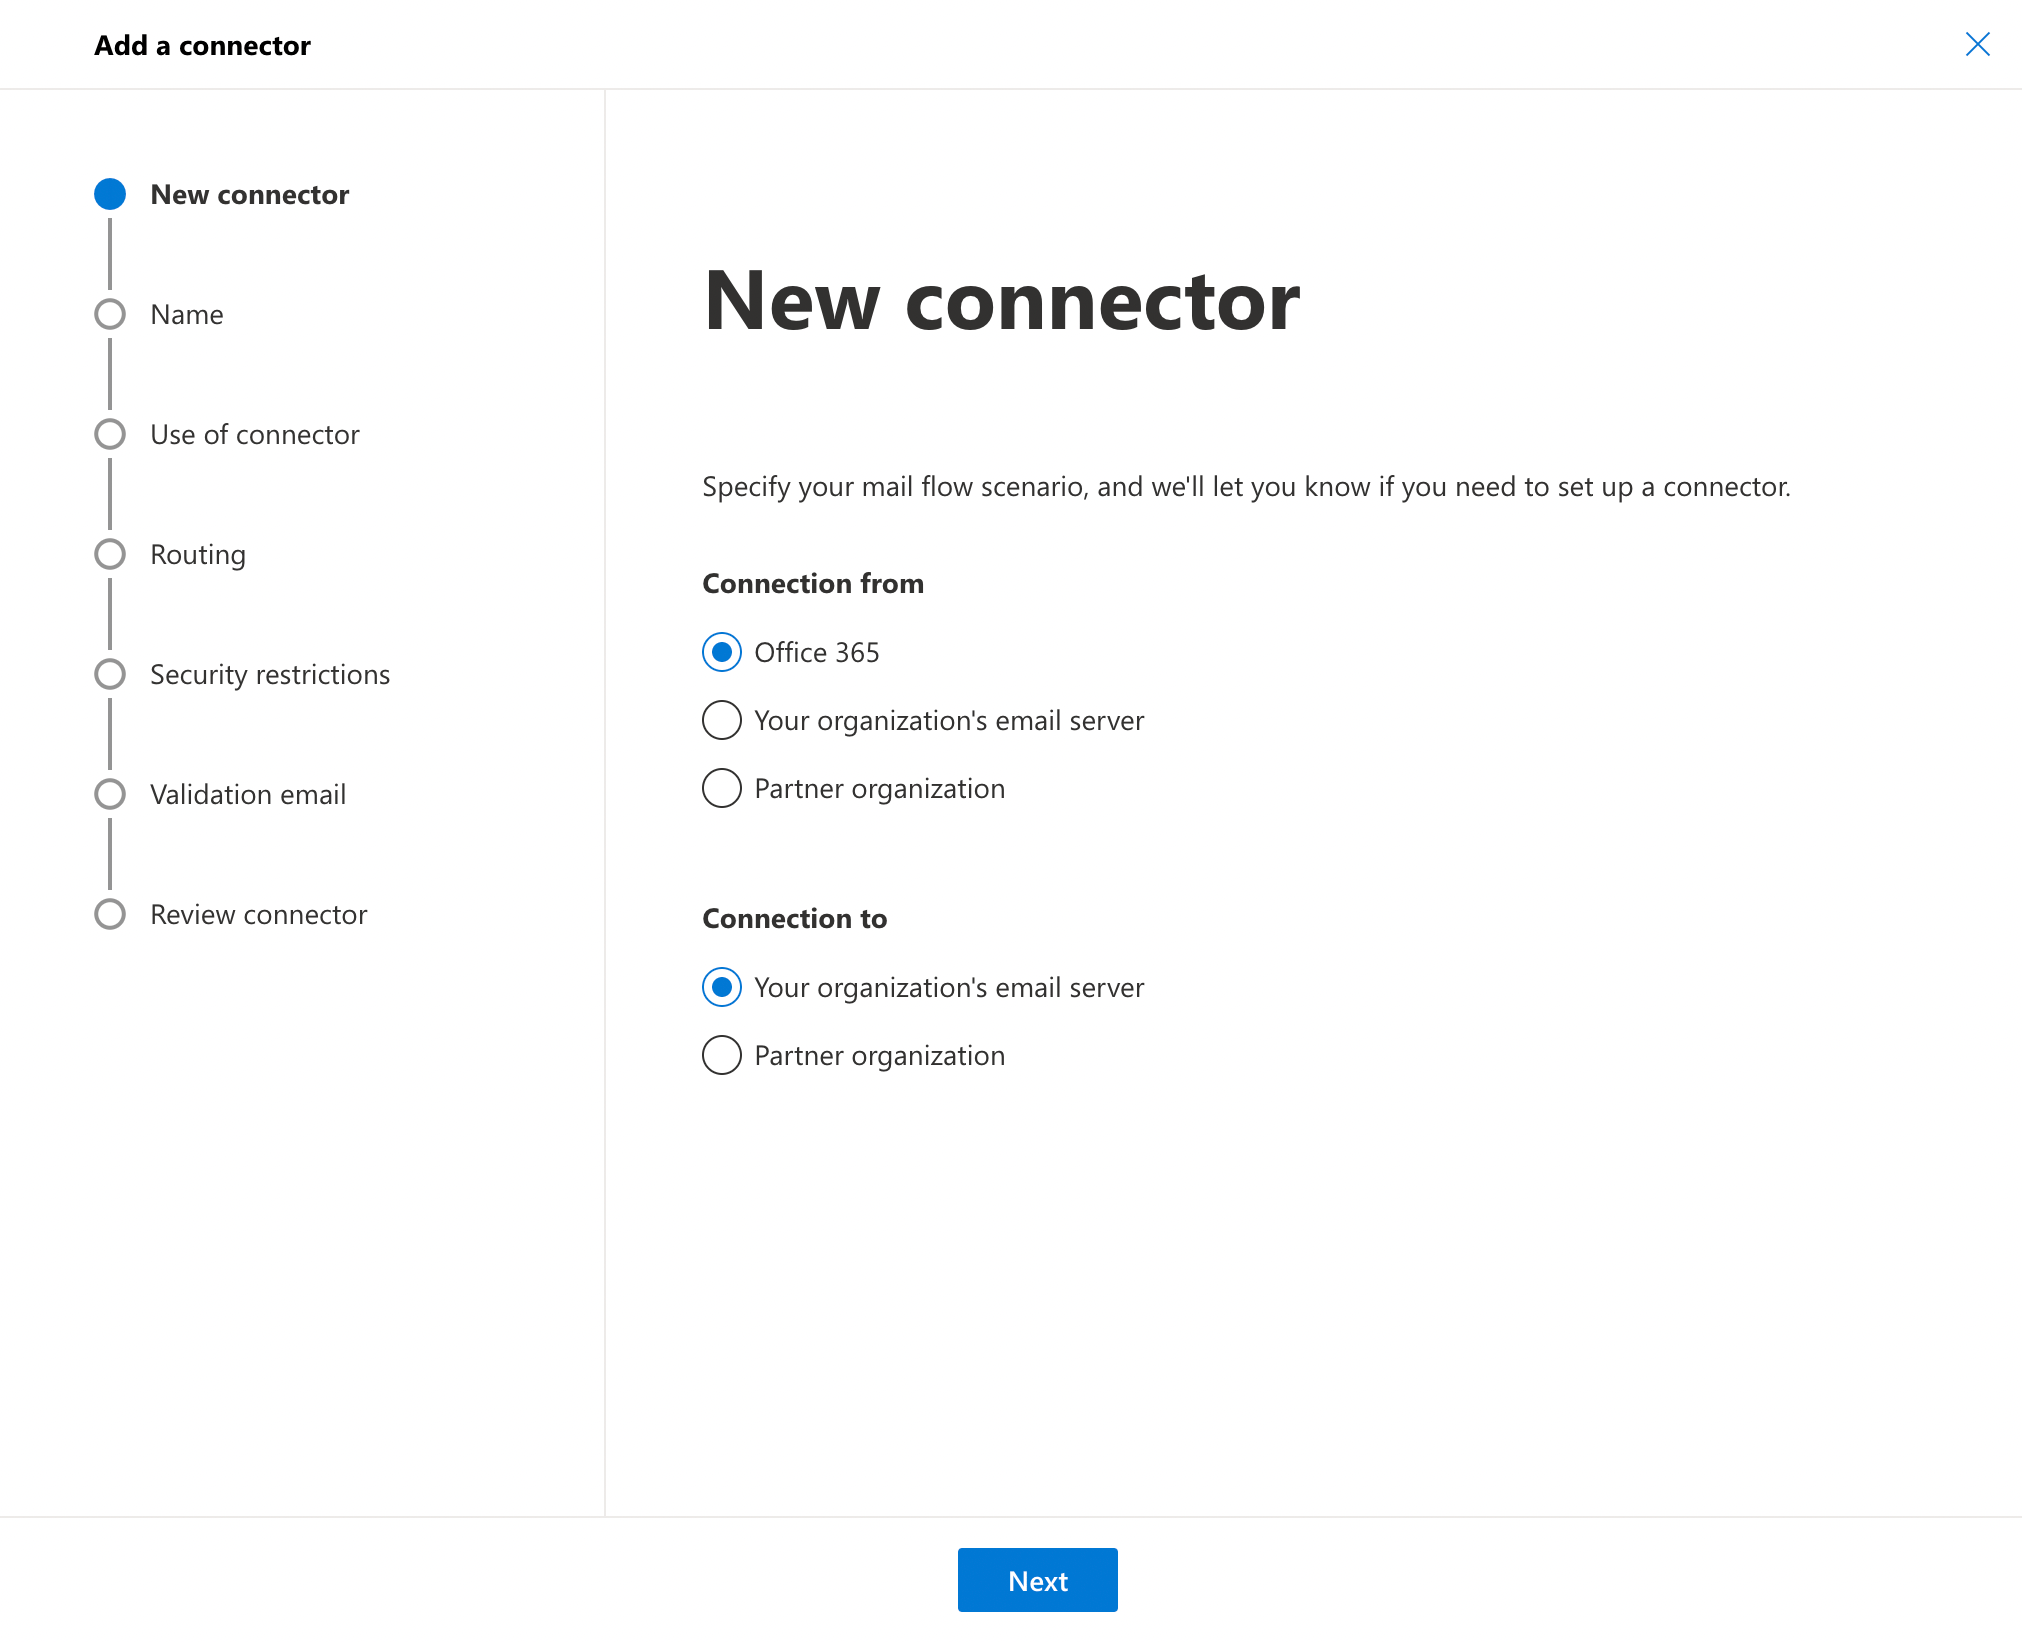
-
Set the name to
Microsoft365Toxorlaband enable Retain internal Exchange email headers: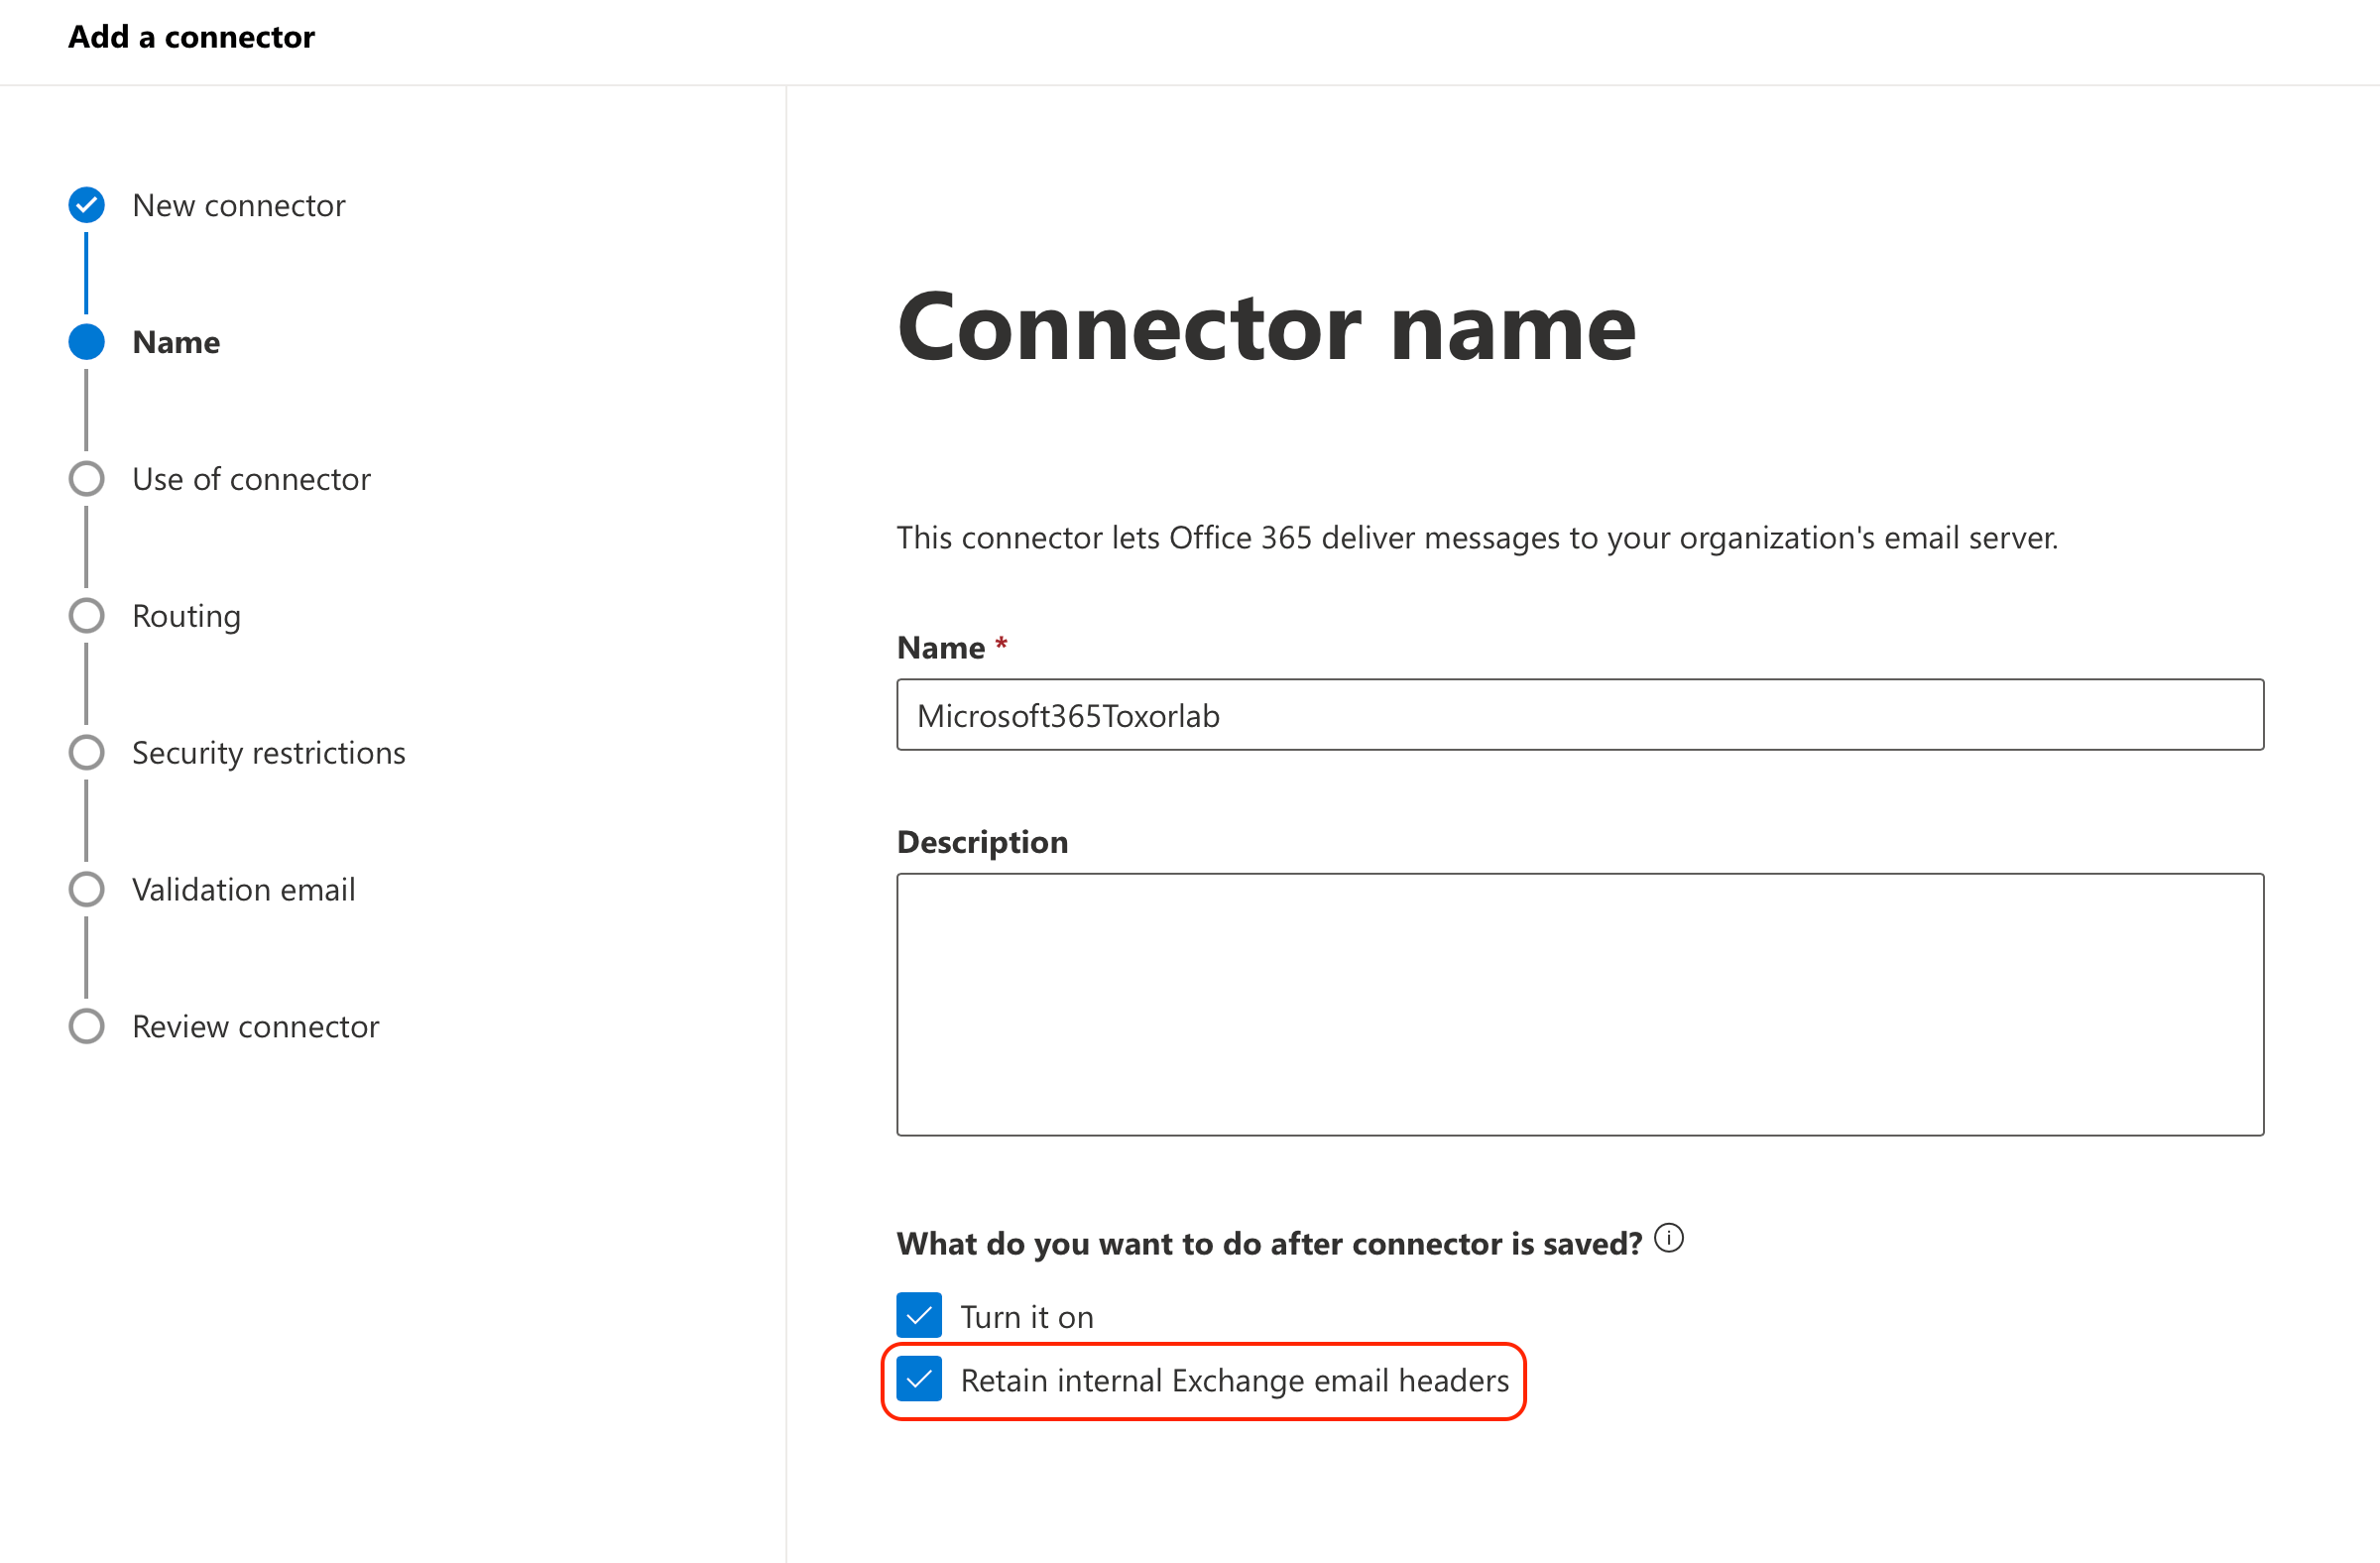
-
Choose the third option and enter
mx.xyz.activeguard.cloud, wherexyzis your customer ID. Click the plus (+) icon: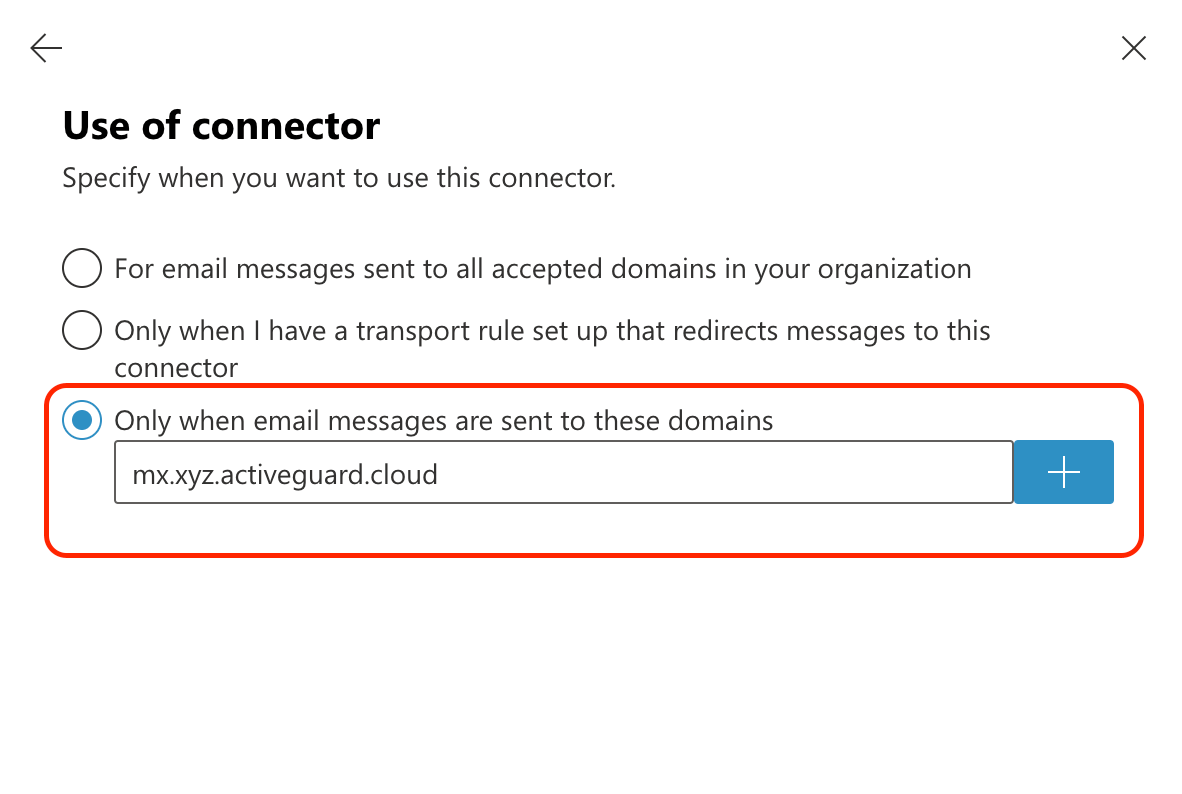
-
Add a new smart host with the value
mx.xyz.activeguard.cloud, wherexyzis your customer ID: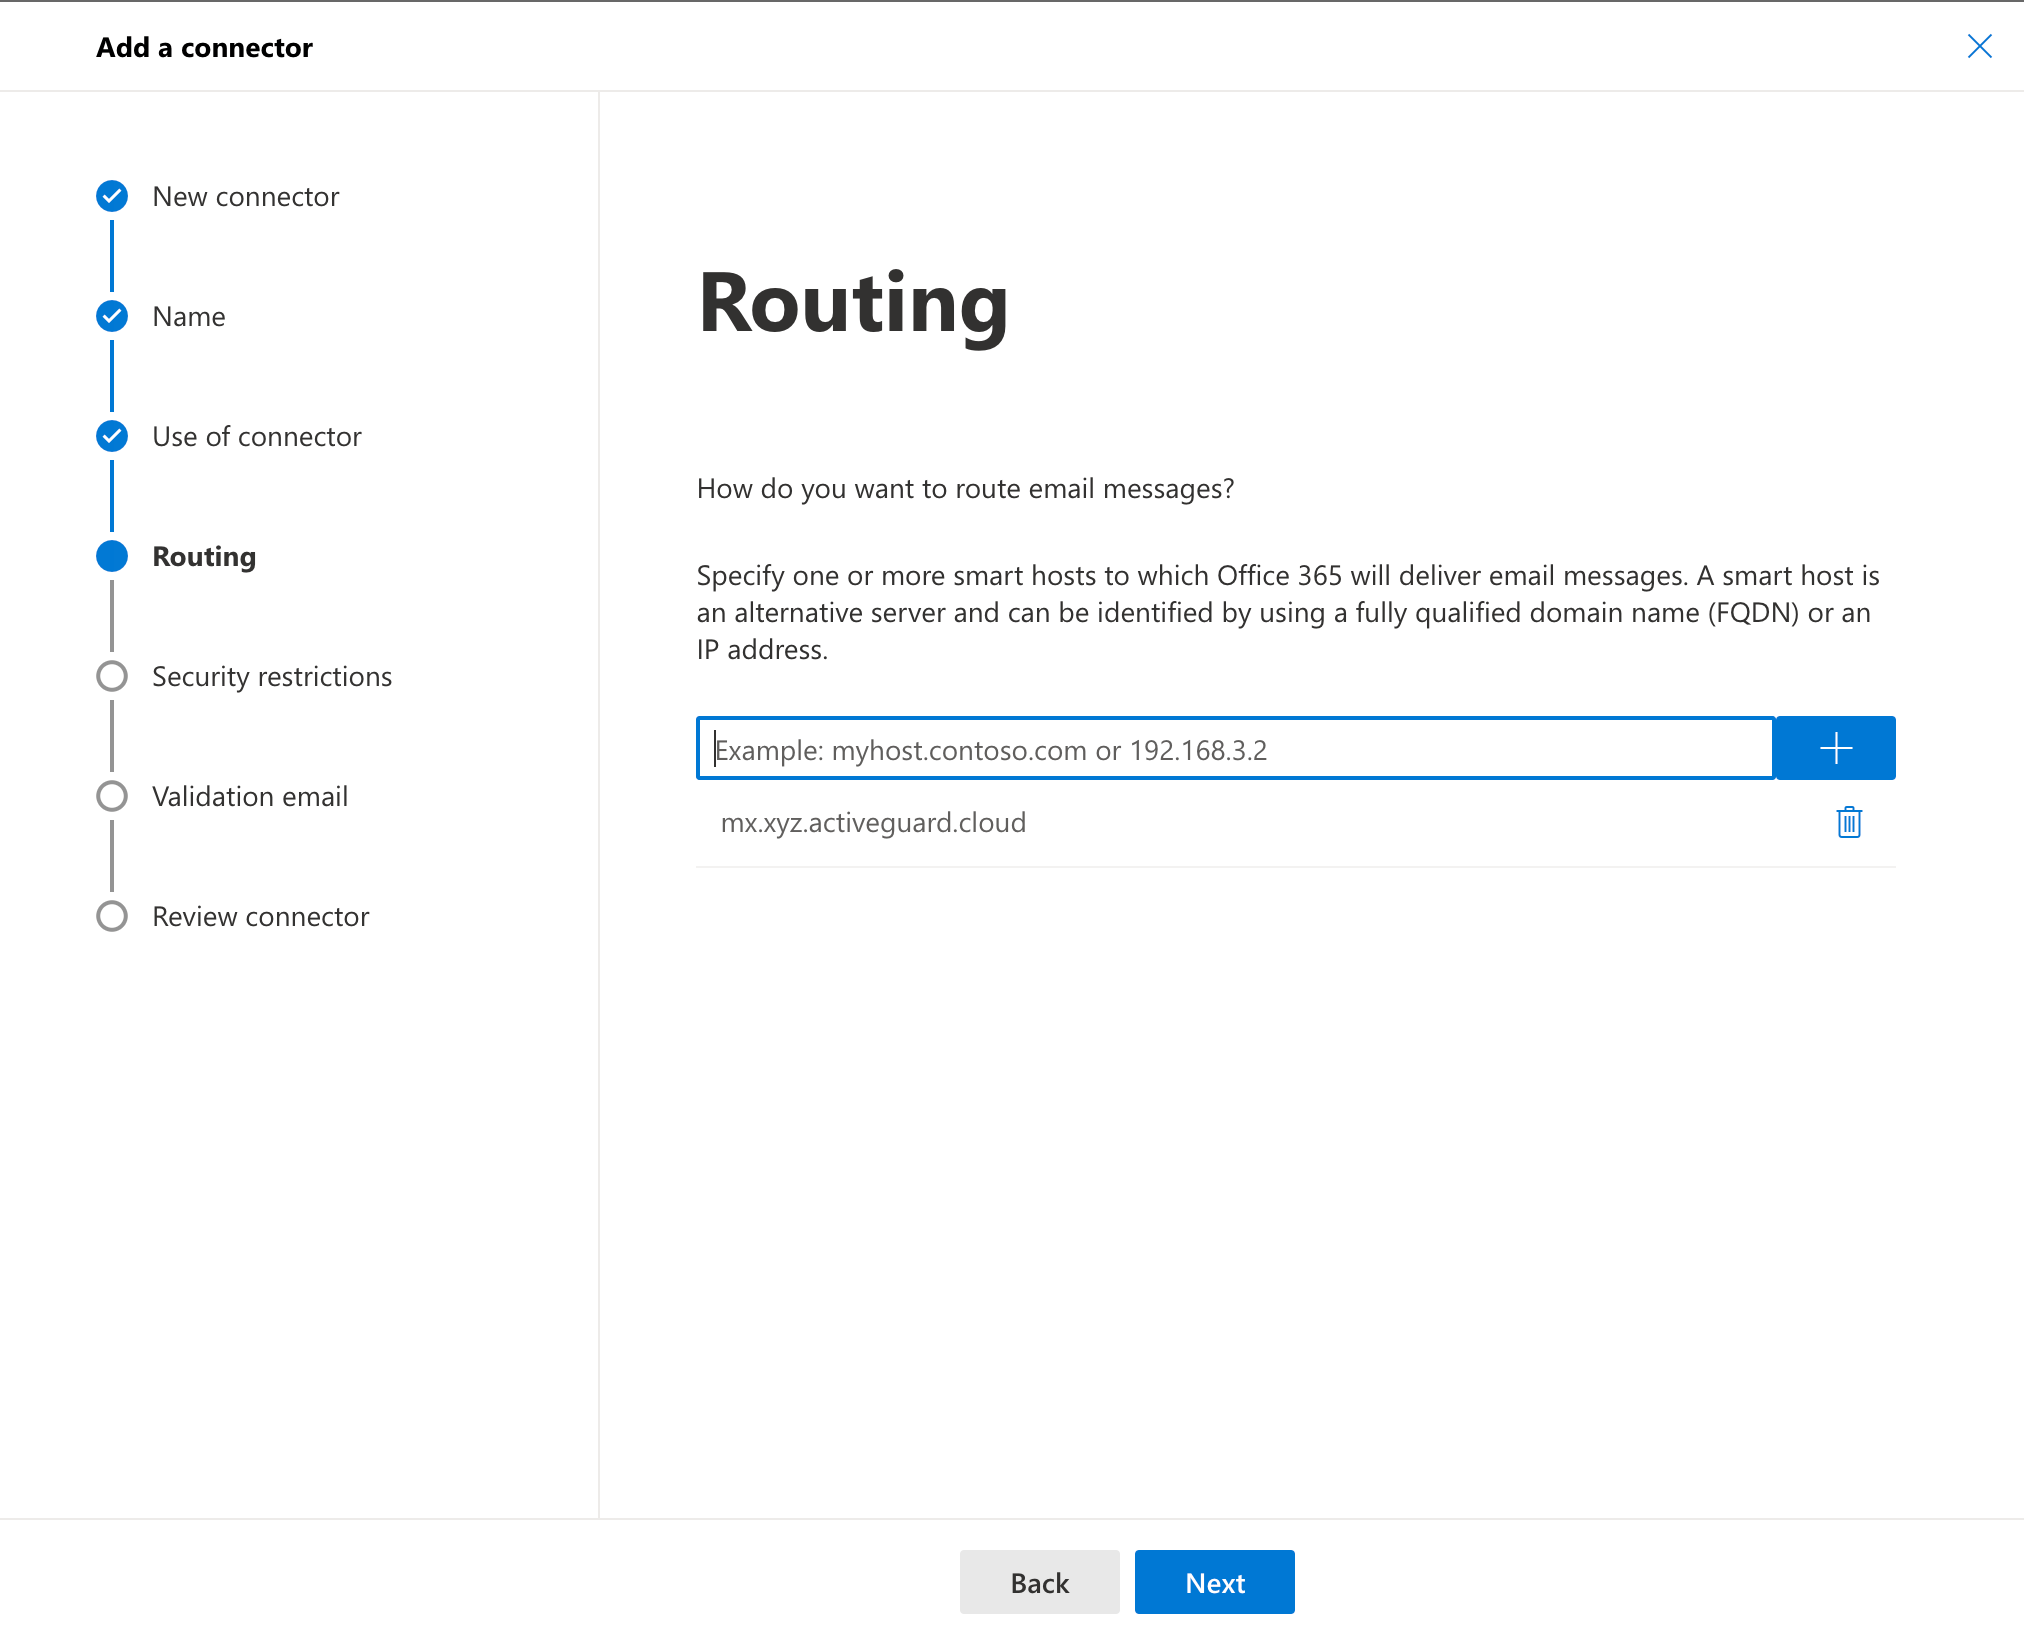
-
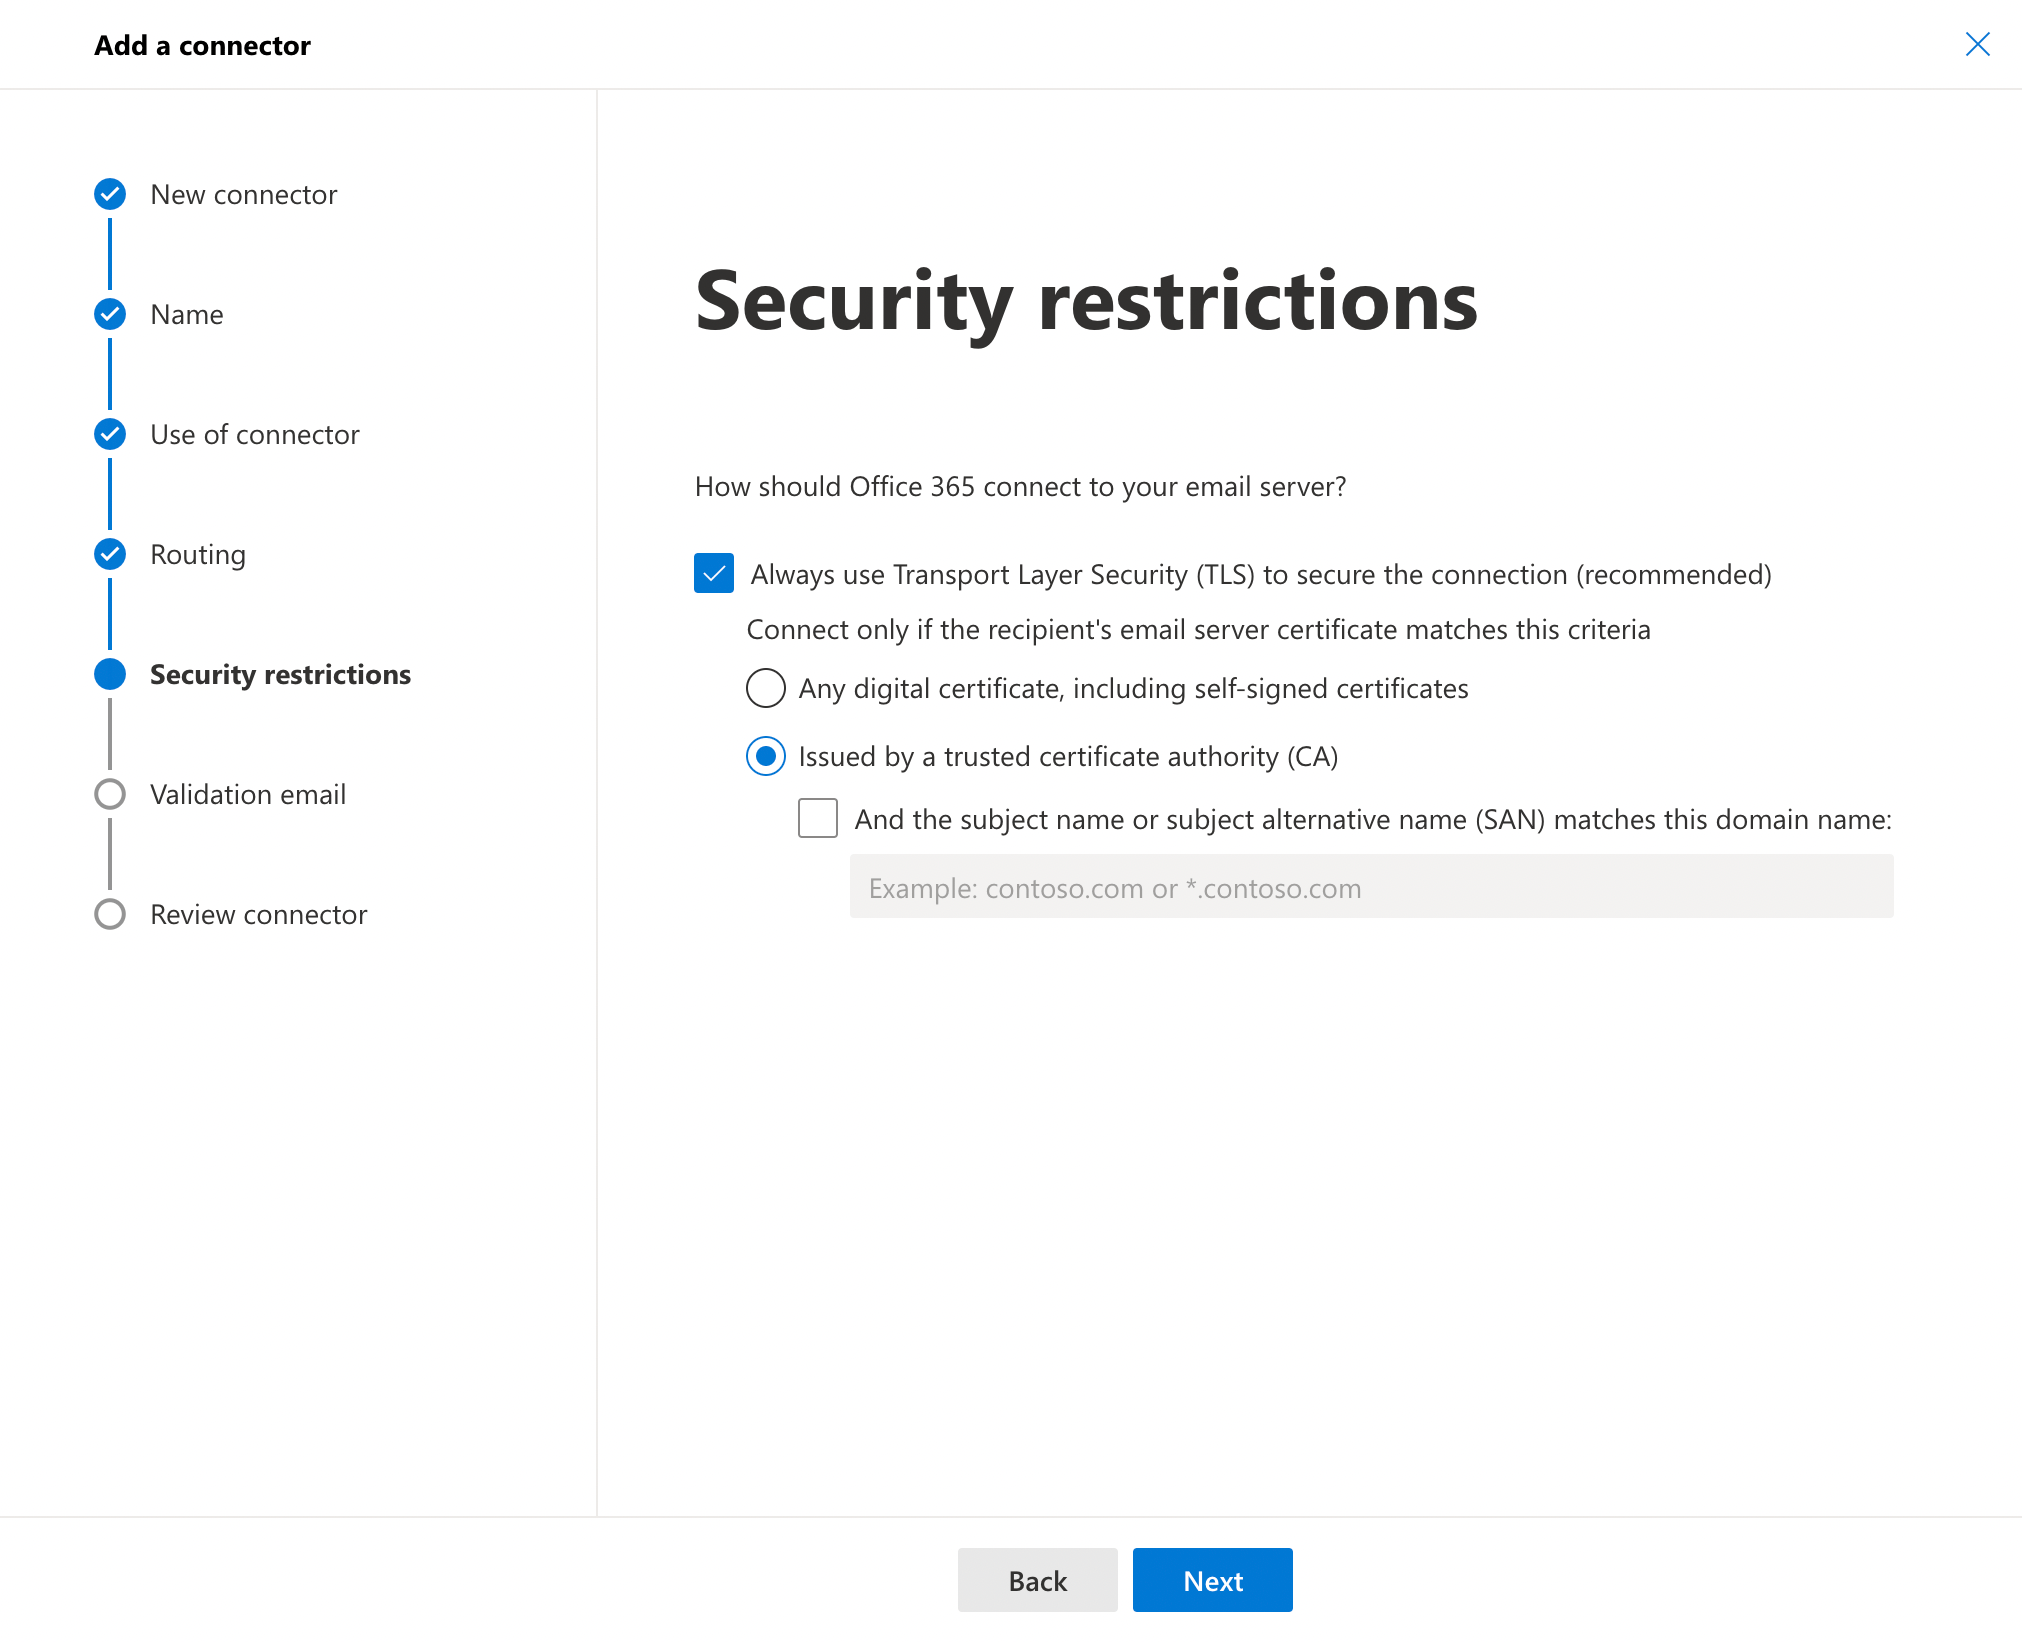
Activate Always use Transport Layer Security… and select Issued by a trusted certificate authority (CA):
-
Enter a company mailbox where a validation email should be sent to:
 Unsuccessful validationThe connector validation might fail at this point. If this happens, save the connector without validation, and then validate the connector again.
 - Review the connector and click Create when it’s OK.
Optional: Include internal emails
Per default, xorlab only processes incoming and outgoing emails. However, if you want to include also internal emails, do the following:- Remove one of the two mail flow rules from above
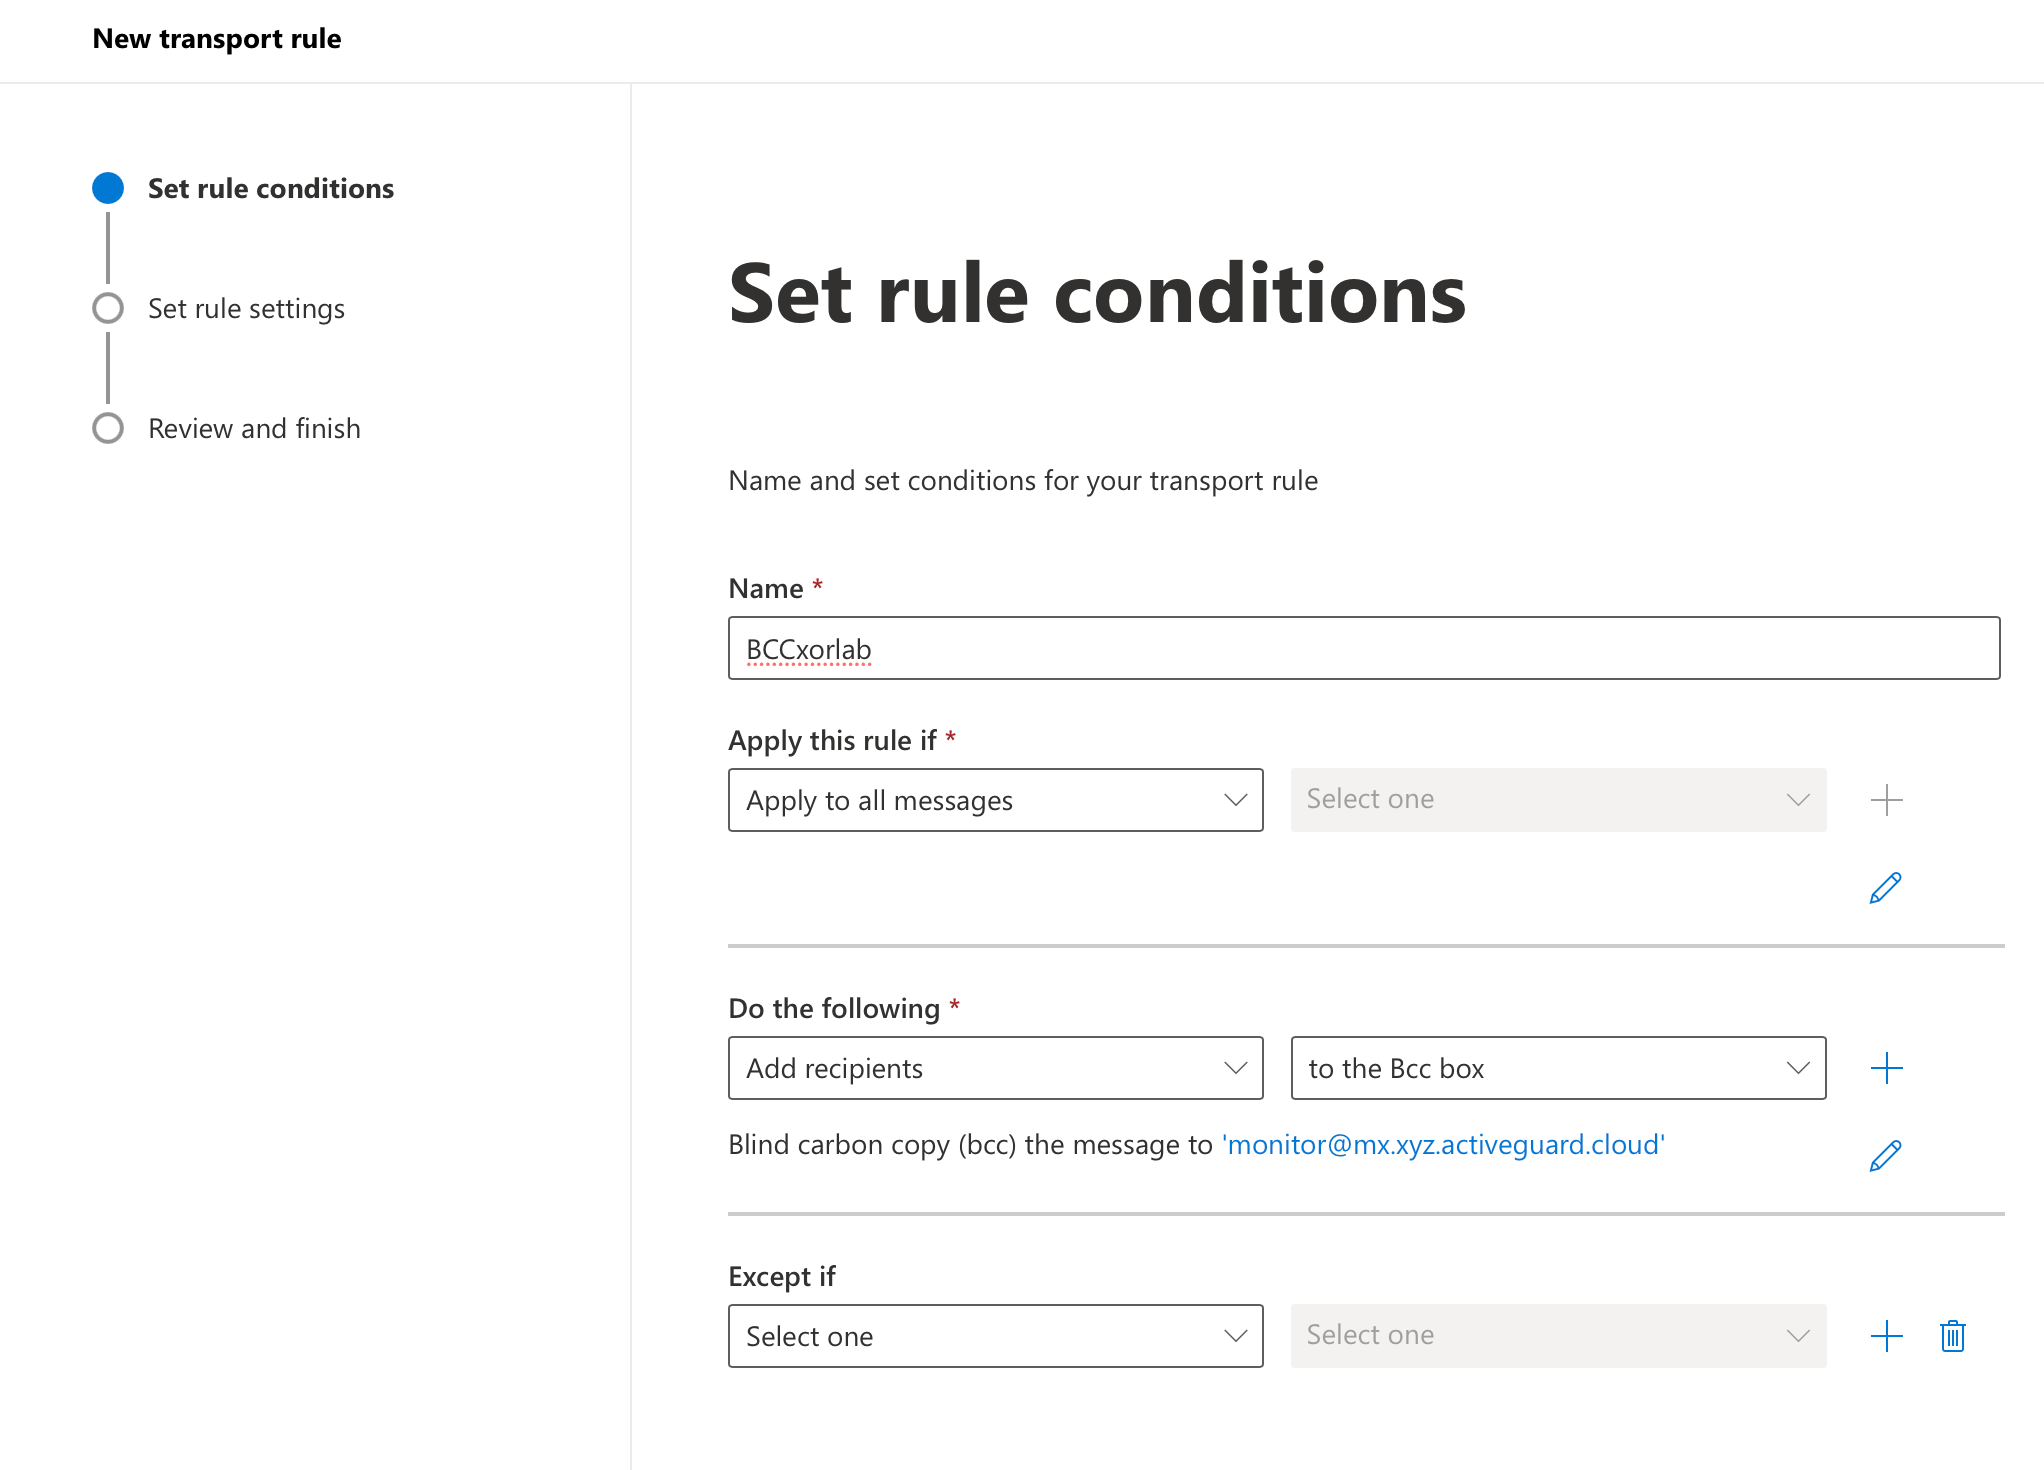
- Rename the existing one to
BCCxorlab - Change Apply this rule if to Apply to all messages and remove the And condition