

activeguard/core/rule_sets/90_local/ folder:
- Open Expert Editor.
-
In the folder view in the left pane, expand
activeguard, thencore,rule_sets, and finally90_local. You will see three folders:params,rules, andtemplates: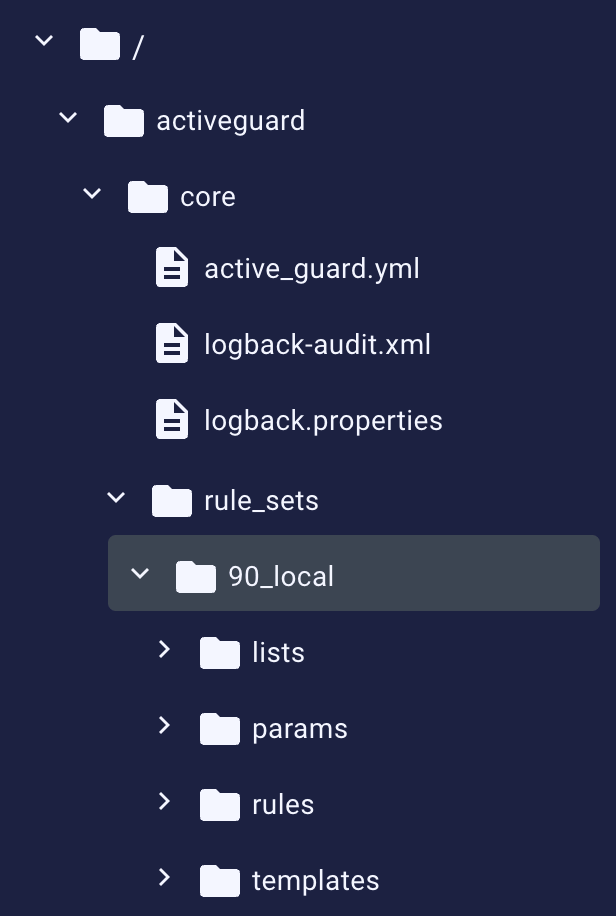
-
Use the context menu for the
rulesfolder to create a new file: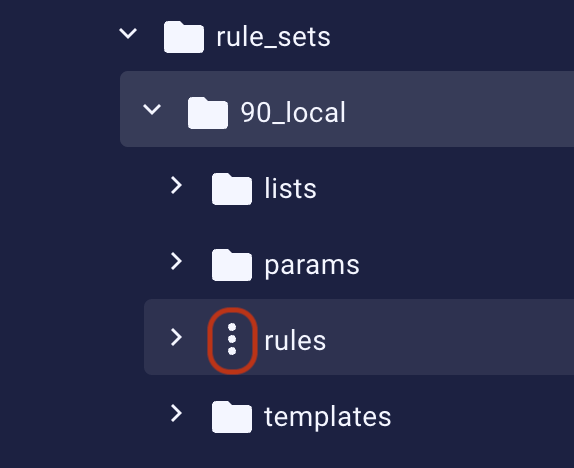
-
Enter
<rule_name>.xml—for example,CUSTOM_spam_keyword_match.xml—as the name for the file in the dialog box that appears, and click Create. The rule can also be put into arbitrary subfolders of therulesfolder. - Click the file you have just created in the left pane and paste the content of the custom rule we provided to you into the right pane.
-
Now, expand the
paramsfolder in the left pane and click thelocal.propertiesfile. In the right pane, add the state parameter to activate the rule. The parameter should consist of the name of the rule XML file you created in the step #4 with the_statesuffix and theACTIVEkeyword, e.g.,CUSTOM_spam_keyword_match_state=ACTIVE. Click Publish.
Custom rule with a reference to a new custom list
In case your custom rule references to a new custom list, you will also need to add this new custom list.Creating the
lists folderIf there is no lists folder inside 90_local, hover the mouse cursor over the folder icon next to 90_local. The icon will change to a vertical ellipsis (…) or a hamburger (see step #3 in the previous section). Click it to display the context menu, select New Folder, enter lists as the name of the folder in the dialog box that appears, and click Create.-
Use the context menu for the
listsfolder to create a new file inside of it (see step #5 in the previous section). -
Enter
<list_name>.list.info.json—for example,CUSTOM_spam_domains.list.info.json—as the name for the file in the dialog box that appears and click Create. -
Click the file you have just created in the left pane and add the following content to this file in the right pane (the values in the
key:valuespairs here are just examples):where-
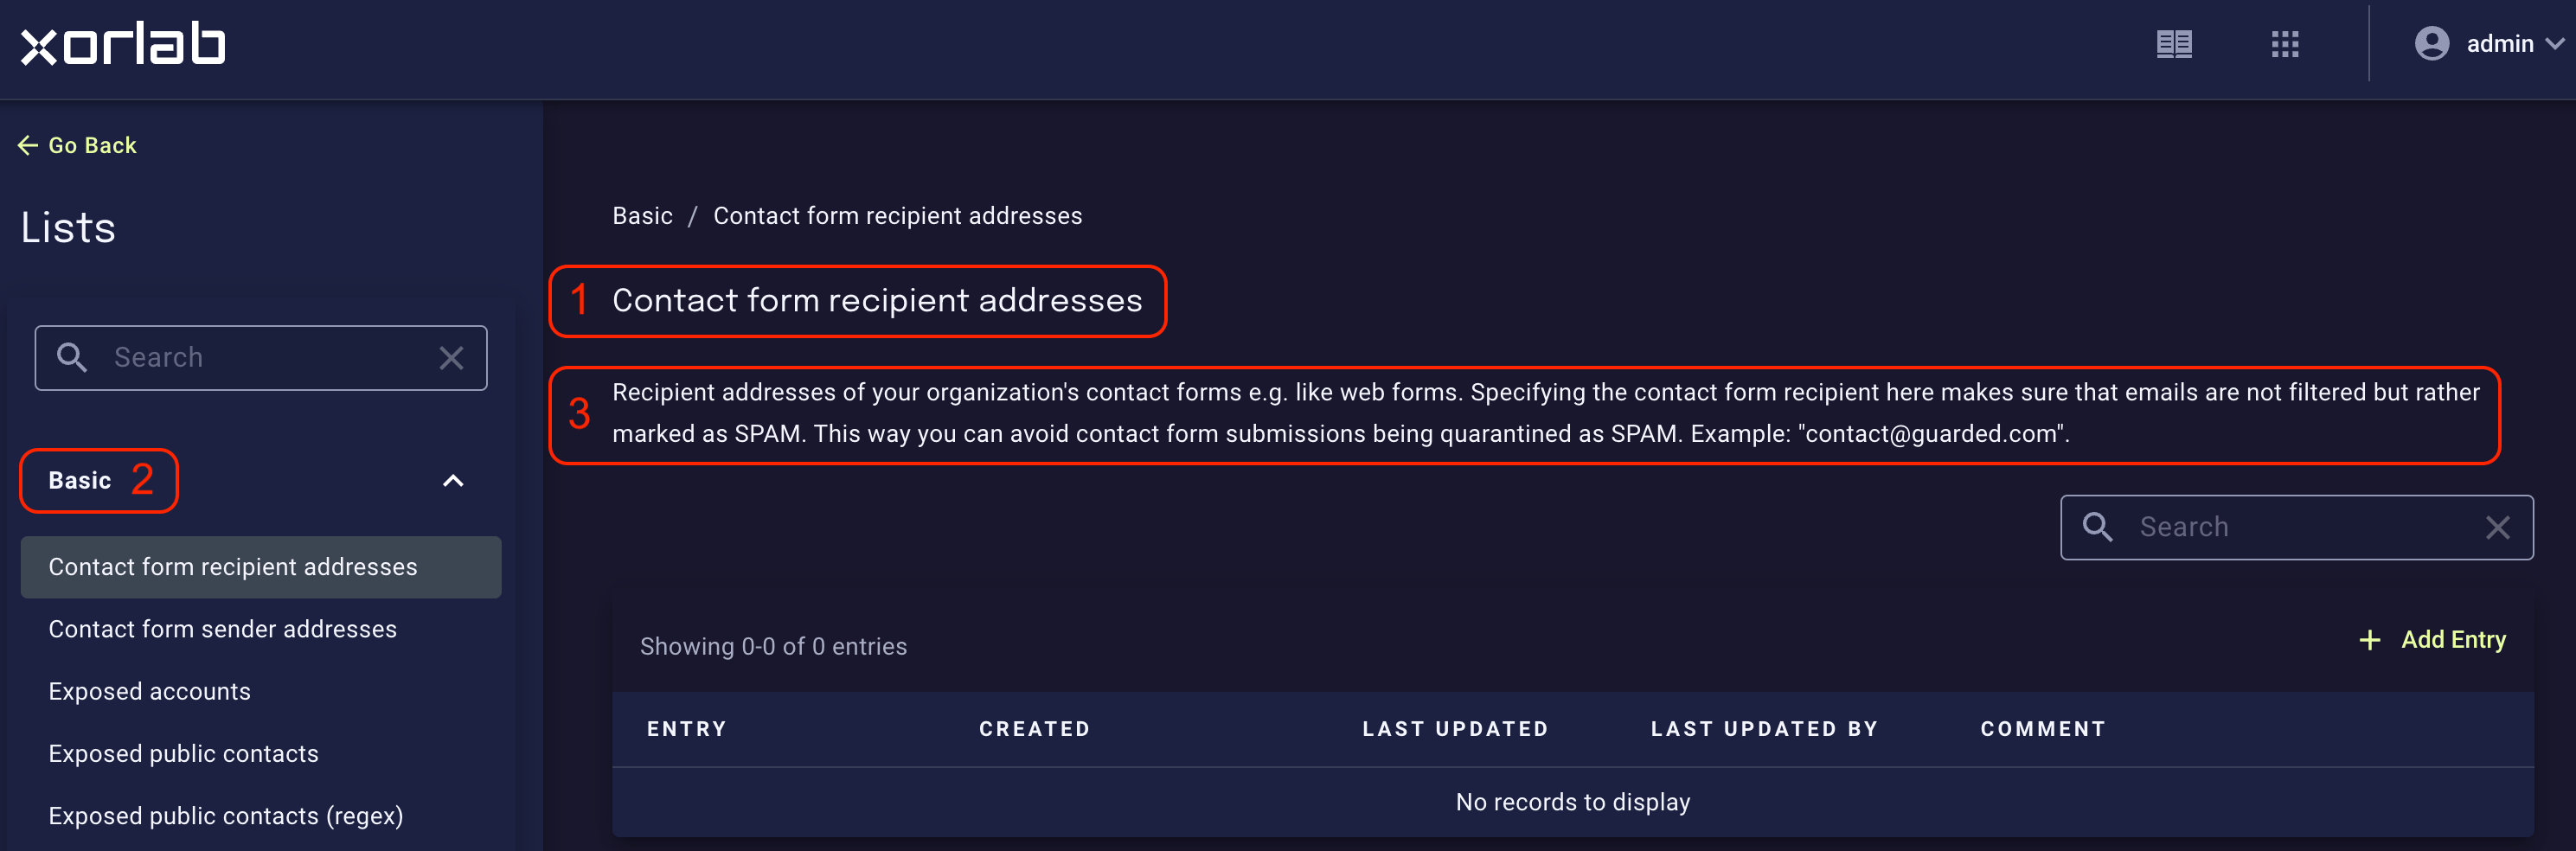
displayNameis the title/name of the list (no.1 on the screenshot below) -
categoryis the name of the category the list belongs to (existing or a new one; no.2 on the screenshot below) -
descriptionis the description of the list displayed in the right pane after selecting a list in the left pane of the Lists view (no.3 on the screenshot below).
-
- Click Publish to apply changes. Will be automatically active after one minute. The new list should be visible on the Lists page.
Adding a YARA rule
You can block emails using a YARA rule by adding it to a custom rule. This YARA-based rule consists of 3 main elements:- Condition that applies the rule to specified objects.
- Actual YARA rule.
- Decision which tags or quarantines the matched email.
activeguard/core/rule_sets/90_local/rules/examples folder, you will find an example empty rule:
-
Start with giving a
nameto your rule, e.g.,YARA_cve_2018_0802, activating the rule in thestateproperty, and selecting the email flow it should be applied to inapplyTo:The allowed values forapplyToare:ALL,INCOMING,OUTGOING,INTERNAL. Thepriorityvalues are within the range of 0-1000. We recommend setting the priority to at least above 20 to ensure the built-in tag rules still apply. Then, either set it between 300 and 400 to ensure the rule has precedence over the built-in quarantine rules, or set it above 700 to ensure that it does not have precedence over the built-in quarantine rules, i.e., is applied afterward. -
Write a condition that would match all Word and RTF attachments during the file scan:
-
Now, add the actual YARA rule and close the condition block:
-
It’s time to decide what to do when an attachment matches your YARA rule. The simplest approach is to tag the message (here we used the exploit name as a tag), and then create a campaign that will, for example, quarantine the emails with this tag:
-
Finish your custom rule by closing the condition:
Multiple YARA rules
It is possible to use multiple YARA rules in one custom rule. All you have to do is to put them in the<or>…</or> block, just like you did with the fileType selector: