

We will use
example.com as the example for an Microsoft 365 domain and we will assume that xorlab runs under xorlab.example.com.For a cloud deployment, we will use mx.xyz.activeguard.cloud in the examples.Configuration
-
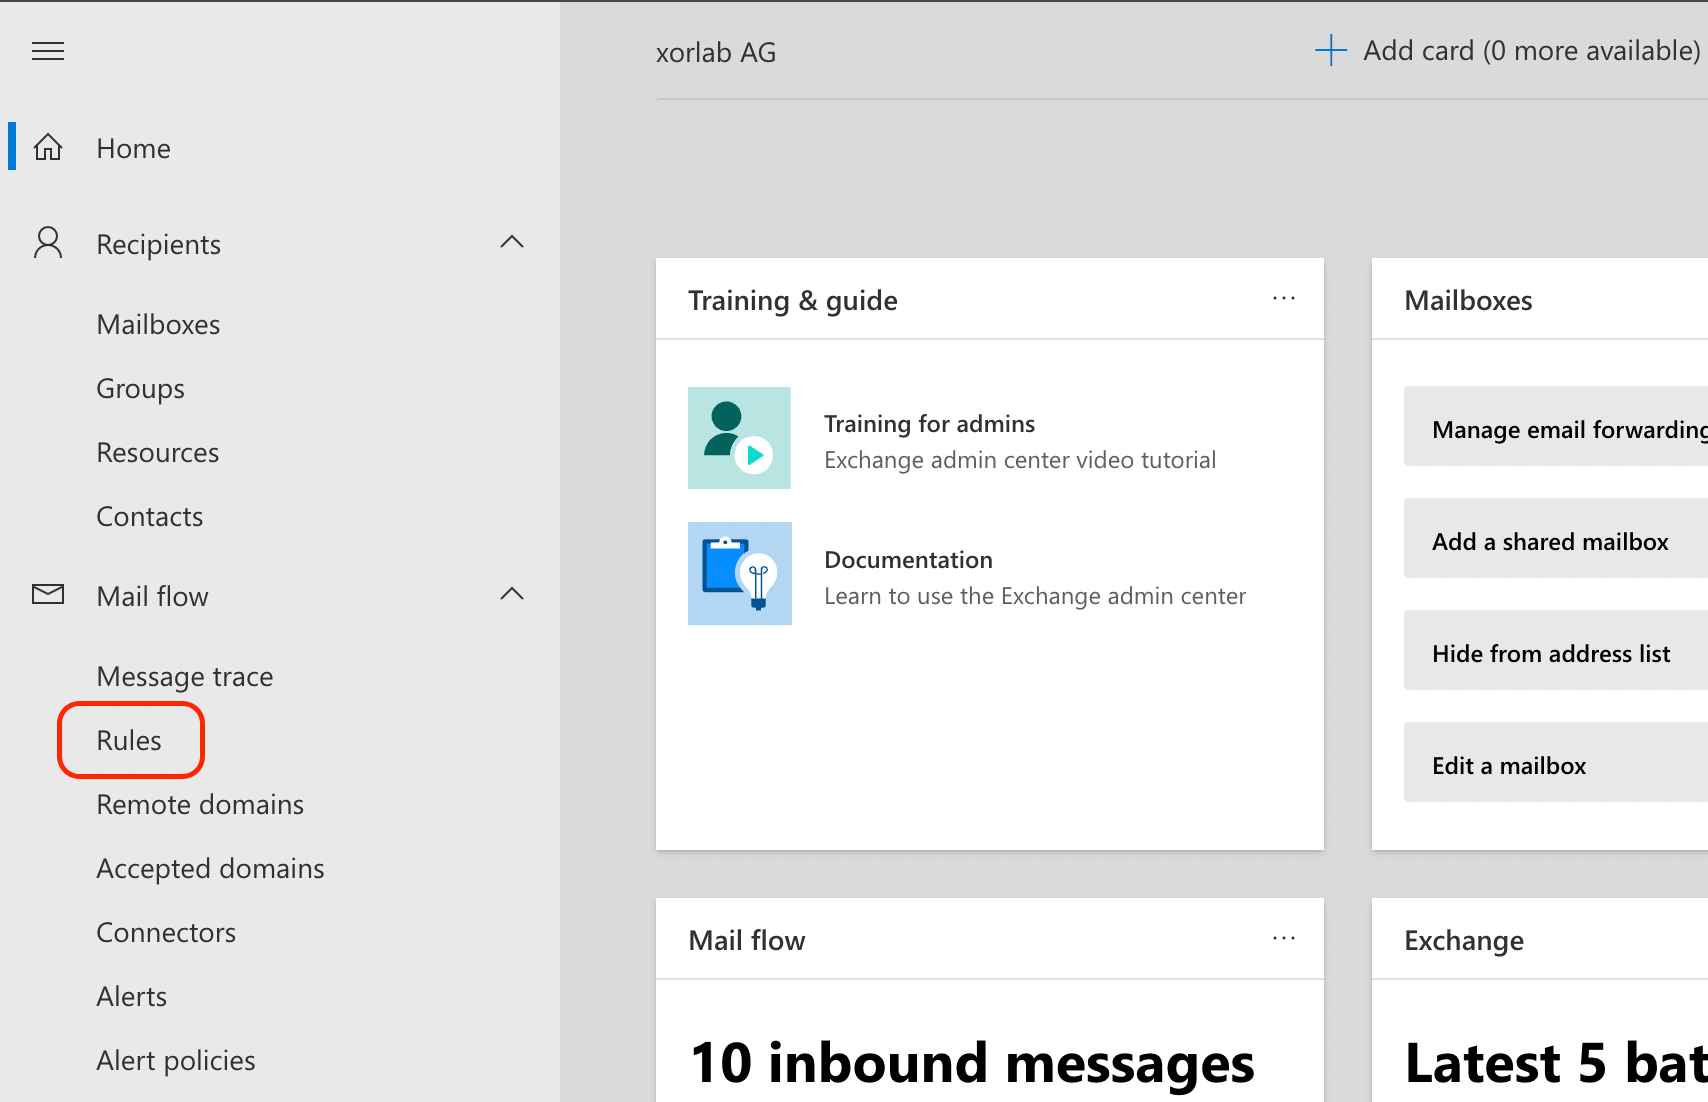
Go to the Exchange Admin Center, in its left pane click Mail flow and, in the expanded list of items, click Rules:
-
On the Rules screen that appears, click the plus (
+) icon and select Create a new rule… from the drop-down list.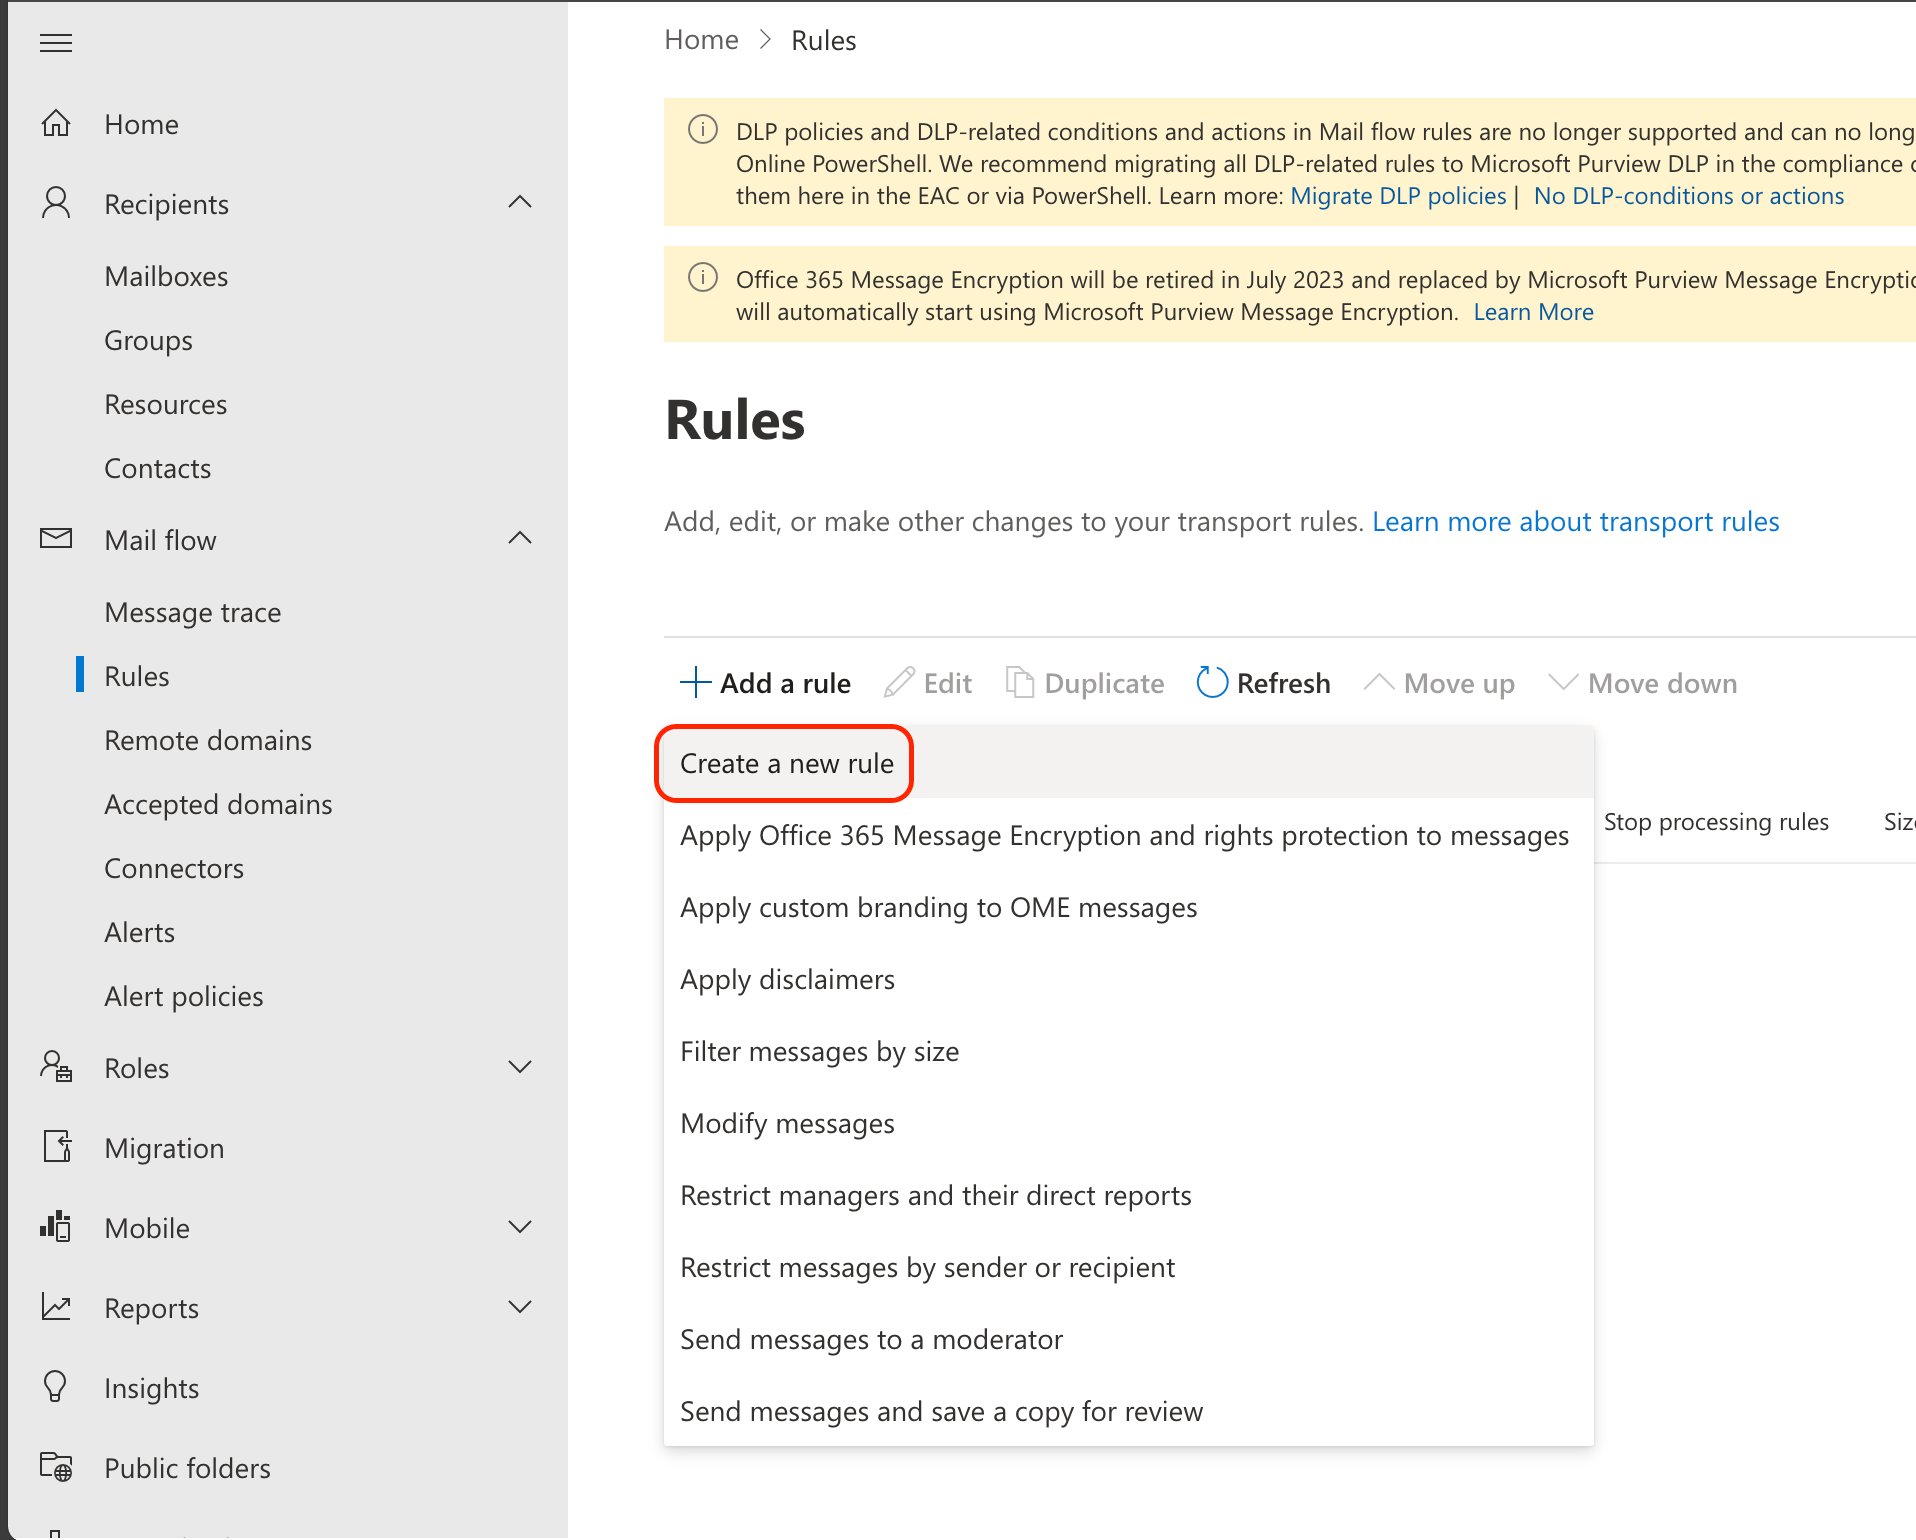
-
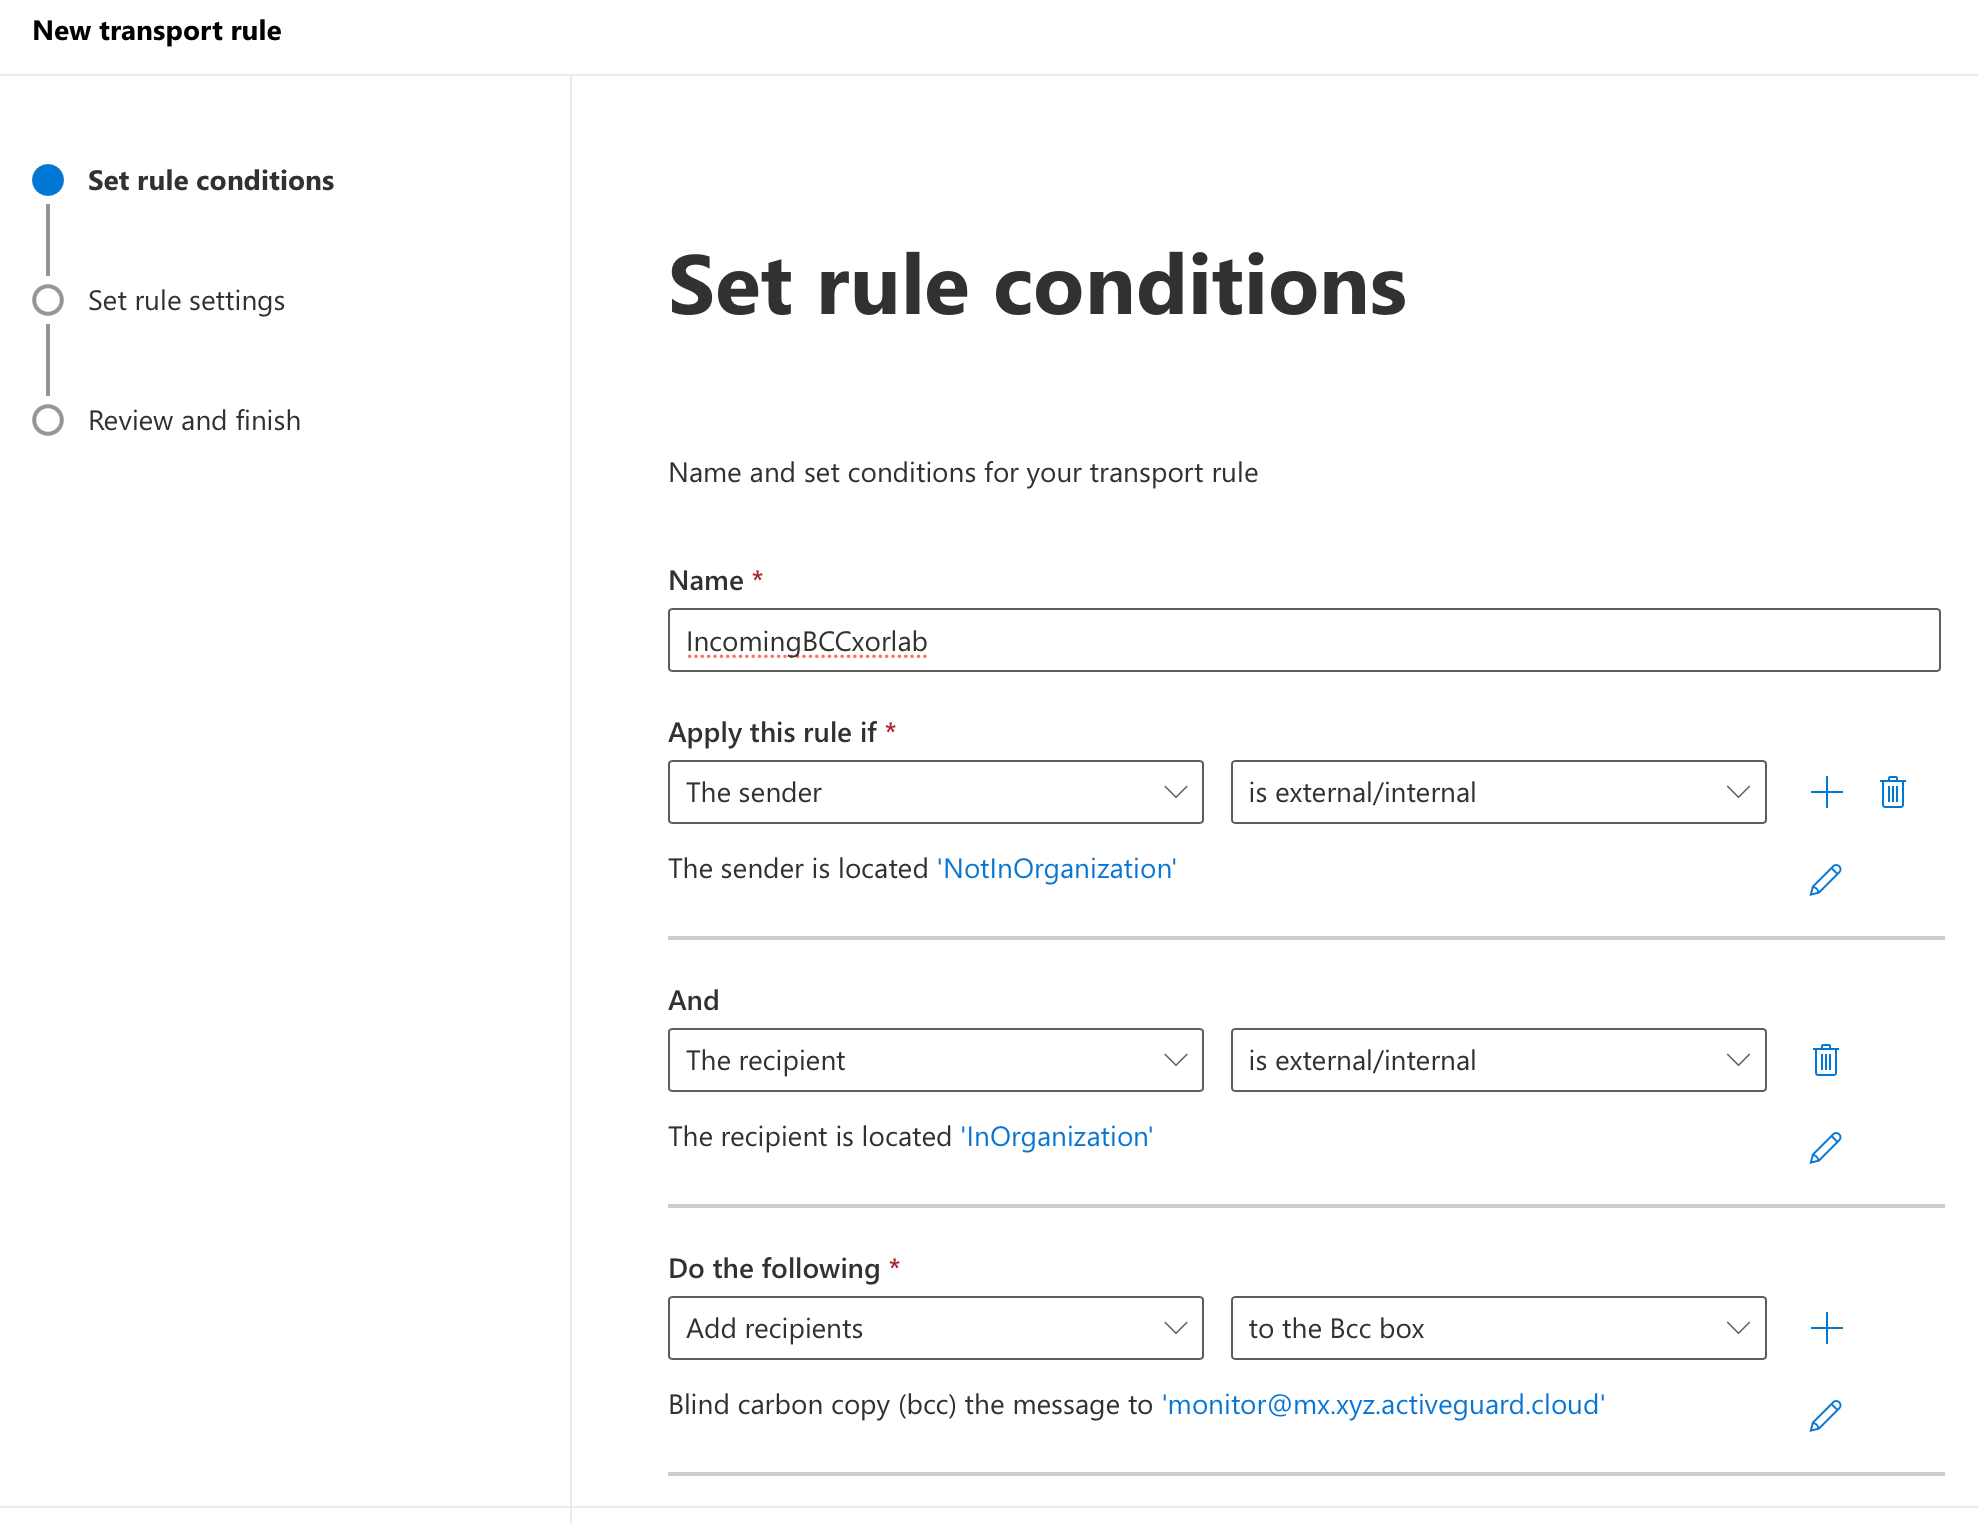
A new pane opens with input fields for setting new rule conditions. Create a rule for incoming emails with the following settings:
- Enter
IncomingBCCxorlabin the field under Name. - Click the drop-down list under Apply this rule if to expand it and choose The sender, then click the Select one drop-down list on the right to expand it and select is external/internal, and finally choose Outside the organization from the select sender location list.
- Click the plus icon (
+) at the end of condition lists for Apply this rule if to add another condition. Click the drop-down list under the new And condition to expand it and choose The recipient, then click the Select one drop-down list on the right to expand it and select is external/internal, and finally choose Inside the organization from the select recipient location list. - Click the drop-down list under Do the following to expand it, select Add Recipients, then click the Select one drop-down list on the right to expand it and select to the Bcc box, and finally select the xorlab Security Platform monitoring mailbox address from the list of recipients or enter it manually, e.g.,
monitor@xorlab.example.comormonitor@mx.xyz.activeguard.cloud, wherexyzis your customer ID for your xorlab instances.
- Enter
- Click Next.
- On the next Set rule settings page, leave all settings at their defaults. Click Next.
- Review the settings for your rule on the last page and if they are OK, click Finish, then Done when the transport rule is created.
-
Repeat steps #2-6 to add another rule—this time, for outgoing emails: name it
OutgoingBCCxorlab, set the sender to be from inside the organization and the recipient from outside the organization. See the screenshot below: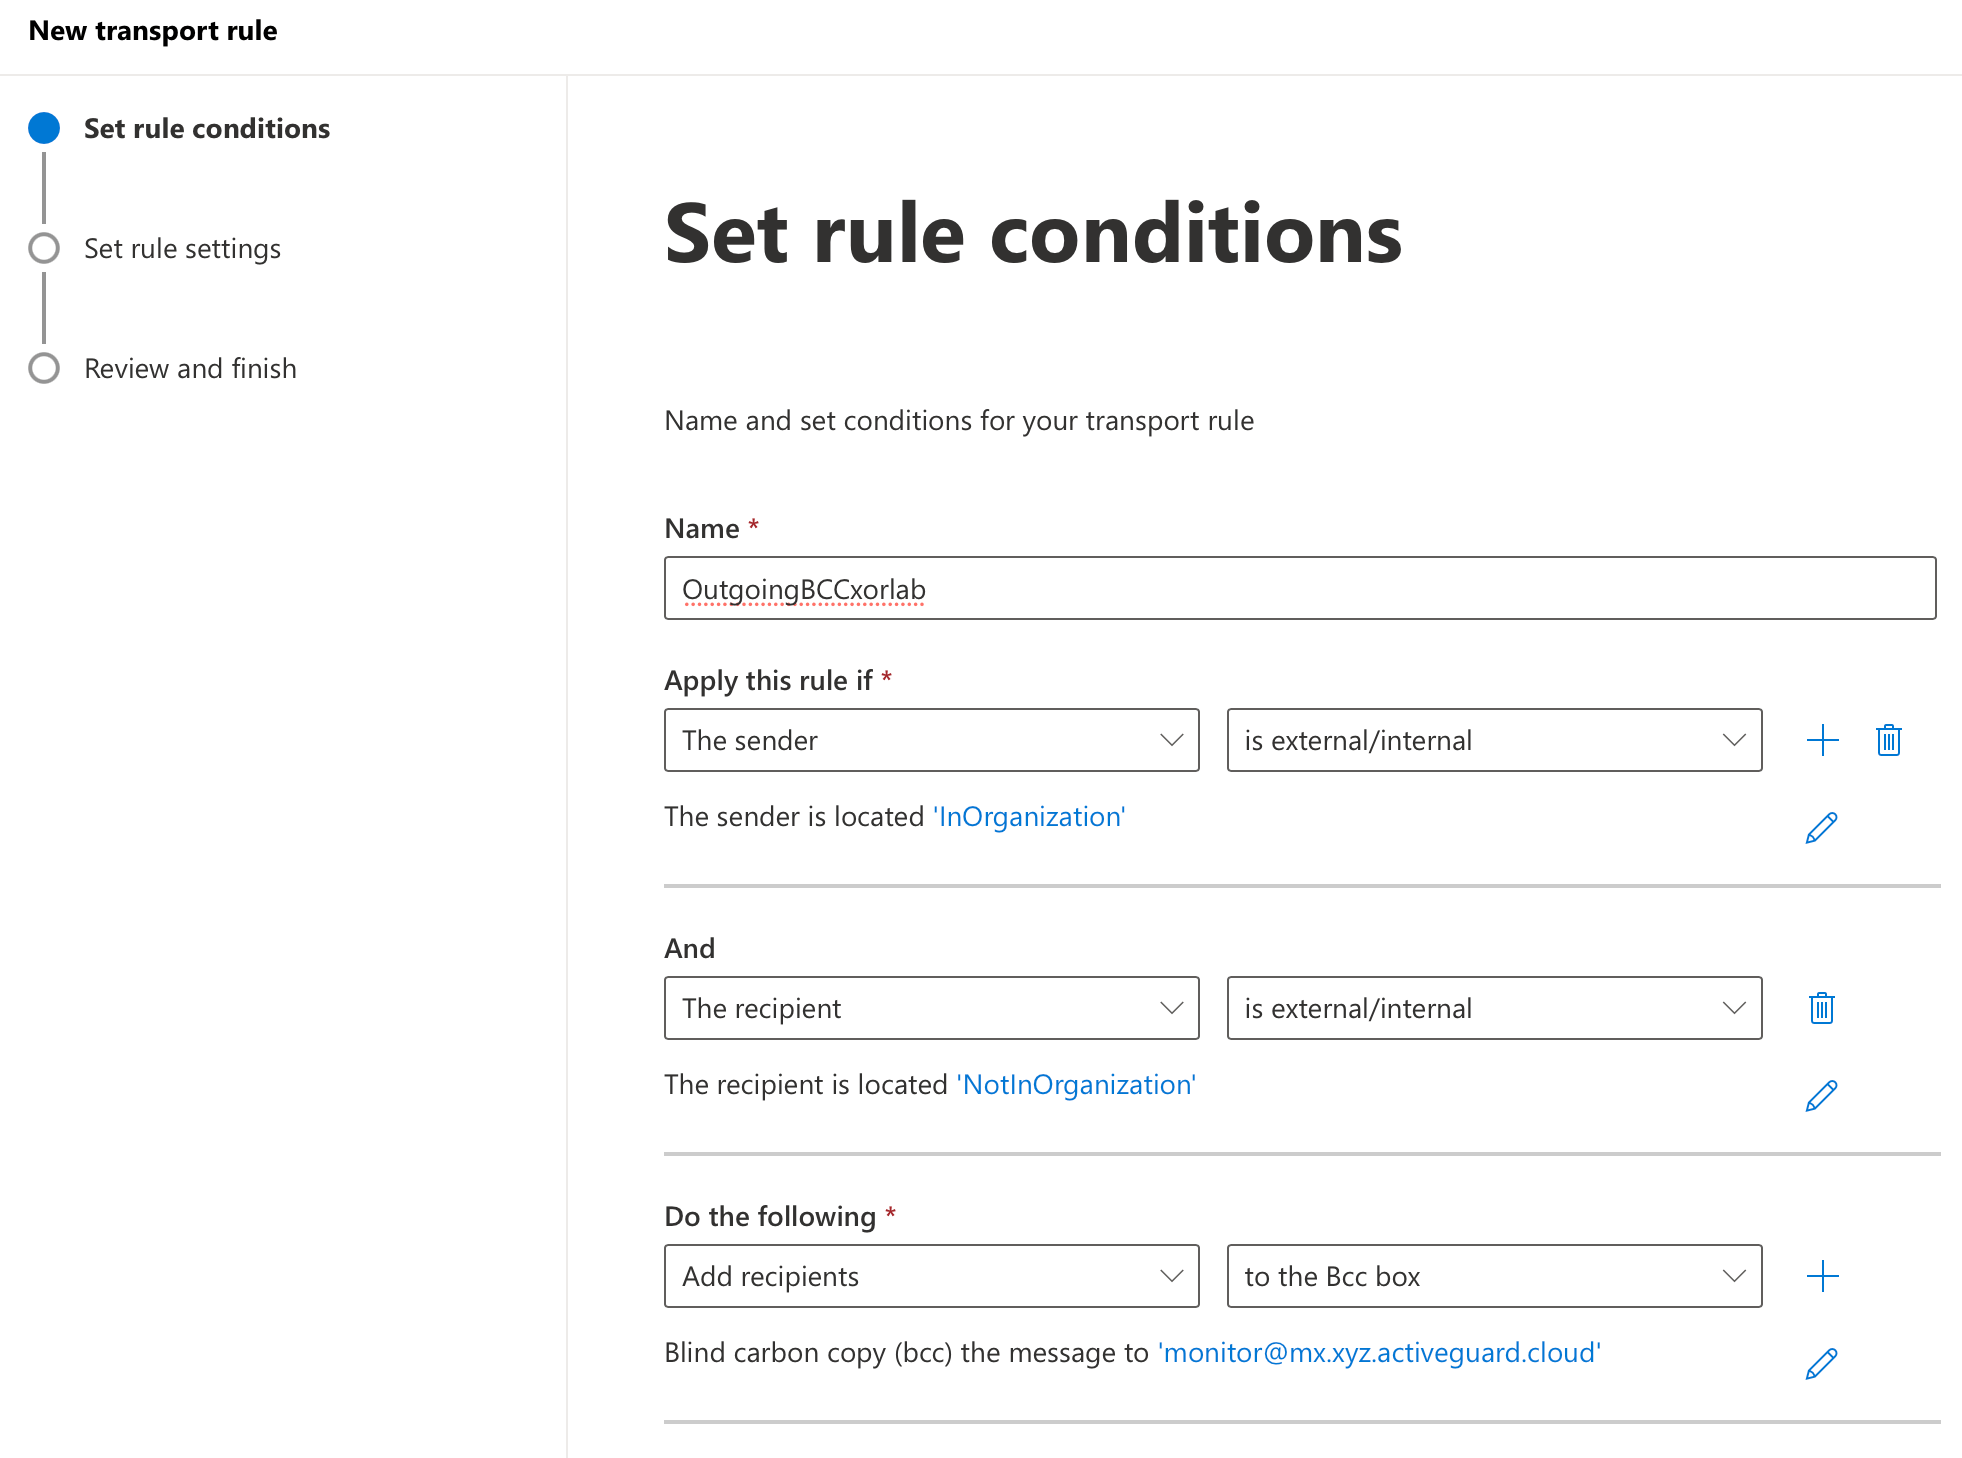
Including internal emails
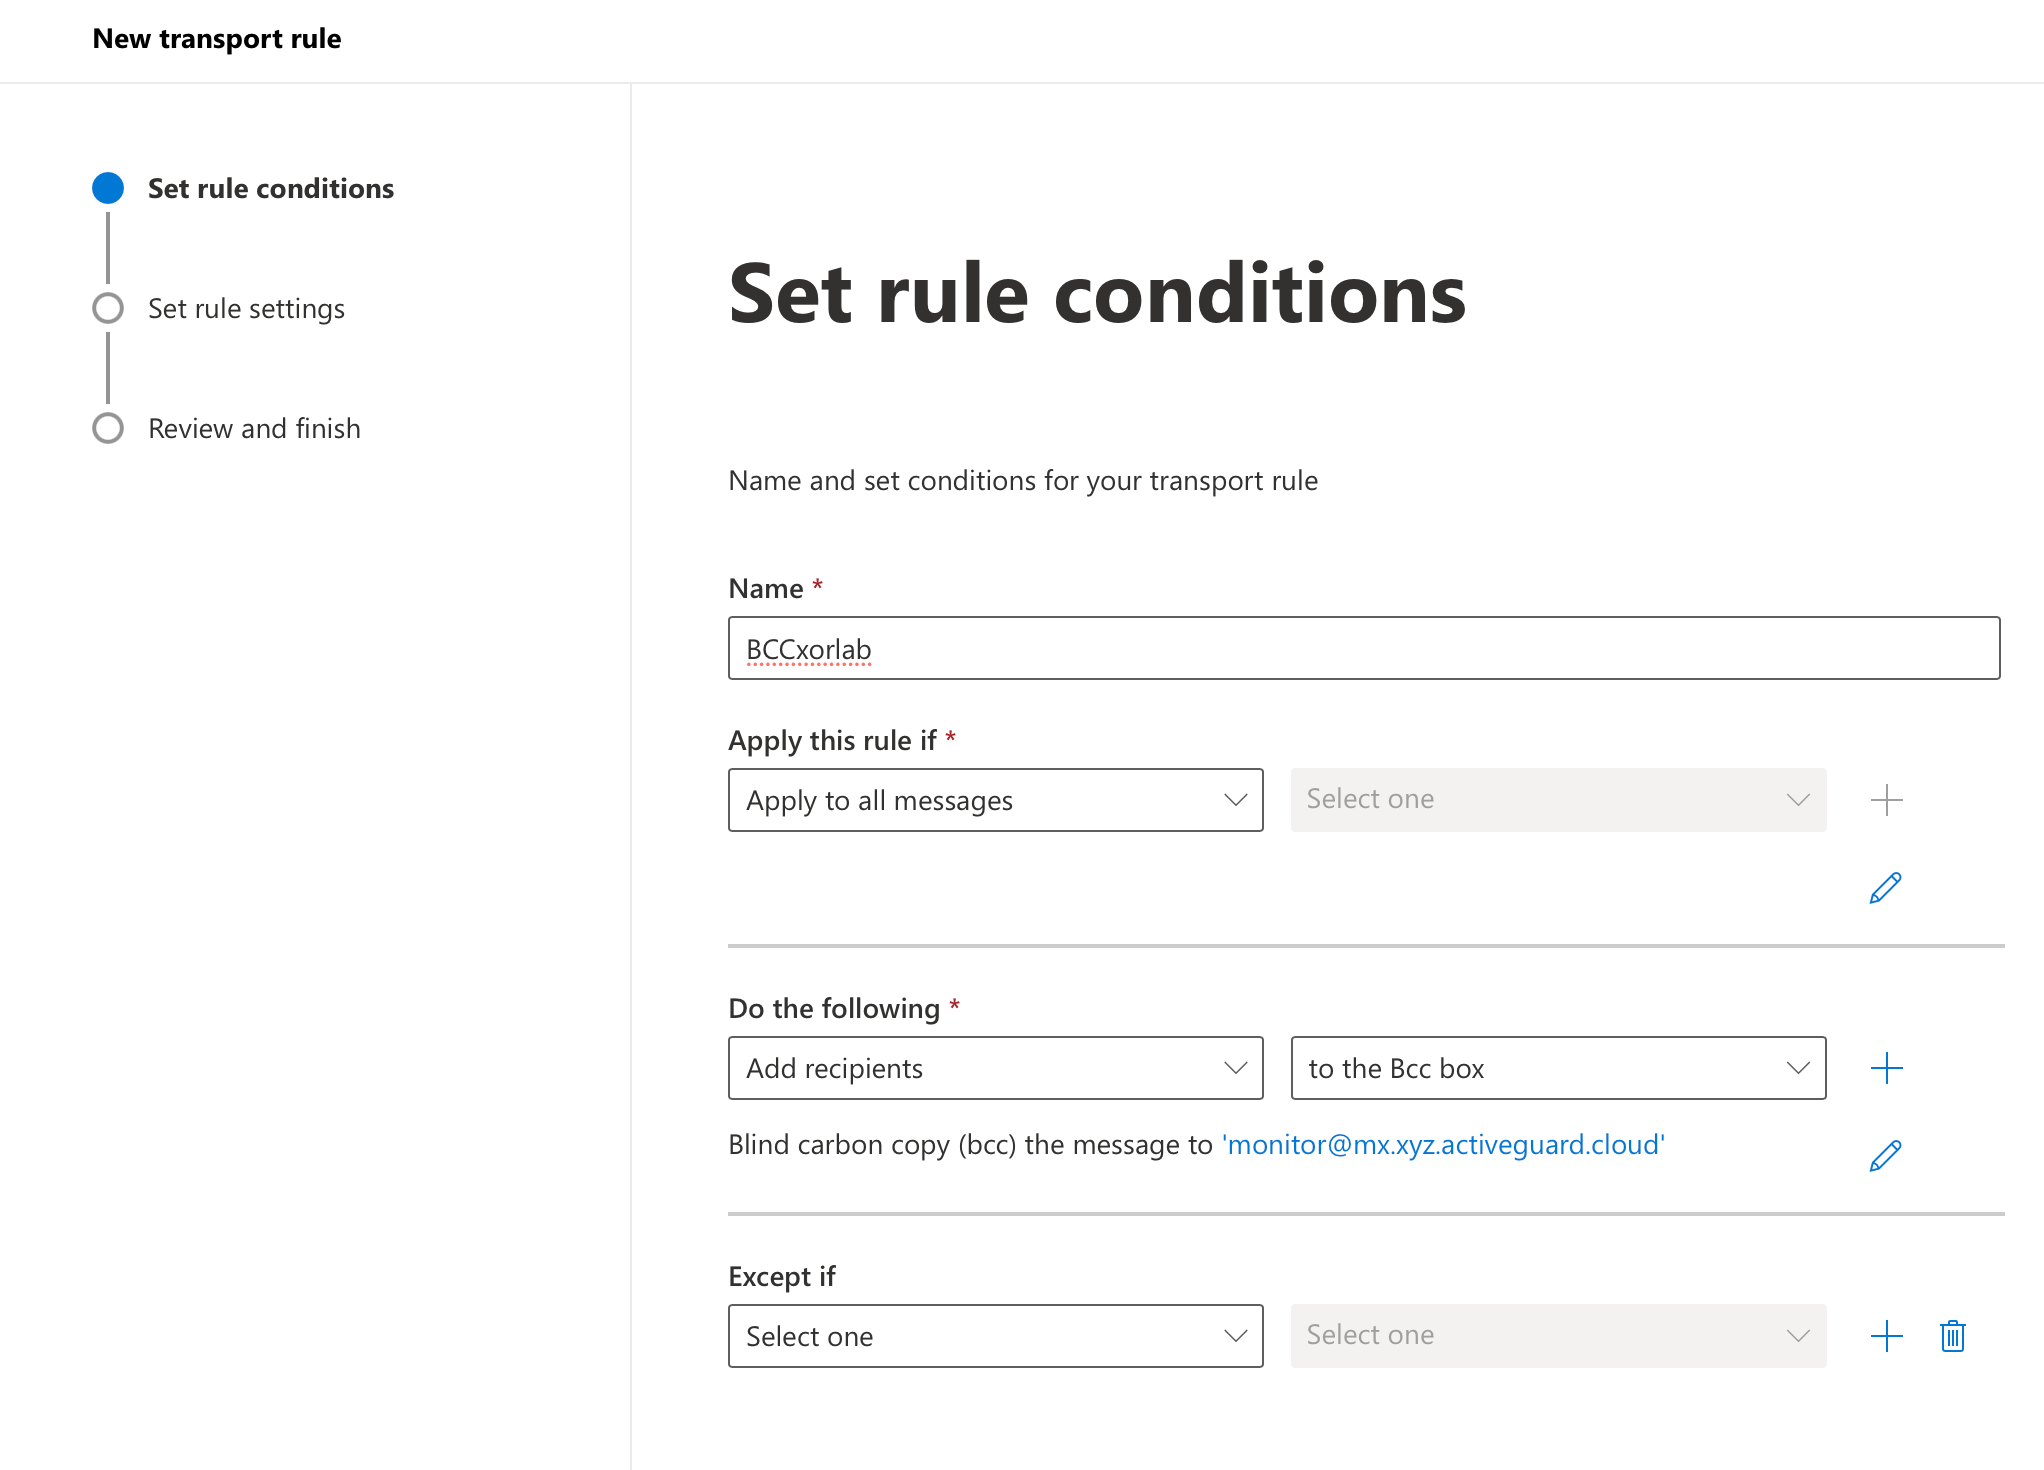
The above configuration monitors only the cross-border communication (incoming to and outgoing from your organization). If you want to include also internal email communication, follow steps #1-6 above, but in step #3 create just one rule for all messages by setting these properties:- Name:
BCCxorlab - Apply this rule if → Apply to all messages
- Do the following… → BCC the message to… → select the xorlab monitoring mailbox address from the list of recipients or enter it manually, e.g.,
monitor@xorlab.example.comormonitor@mx.xyz.activeguard.cloud, wherexyzis your customer ID for your xorlab instances.
Monitoring mode using a connector
In addition to the integration above, it is possible to force BCC emails to xorlab through an additional connector instead of using a transport rule. This can be required in the following cases:- You already have an existing connector that interferes with the BCC emails sent to xorlab.
- You have a hybrid MS setup with an on-prem-only email delivery (Centralized Mail Transport) and you would like to send the BCC emails directly with M365 to xorlab.
-
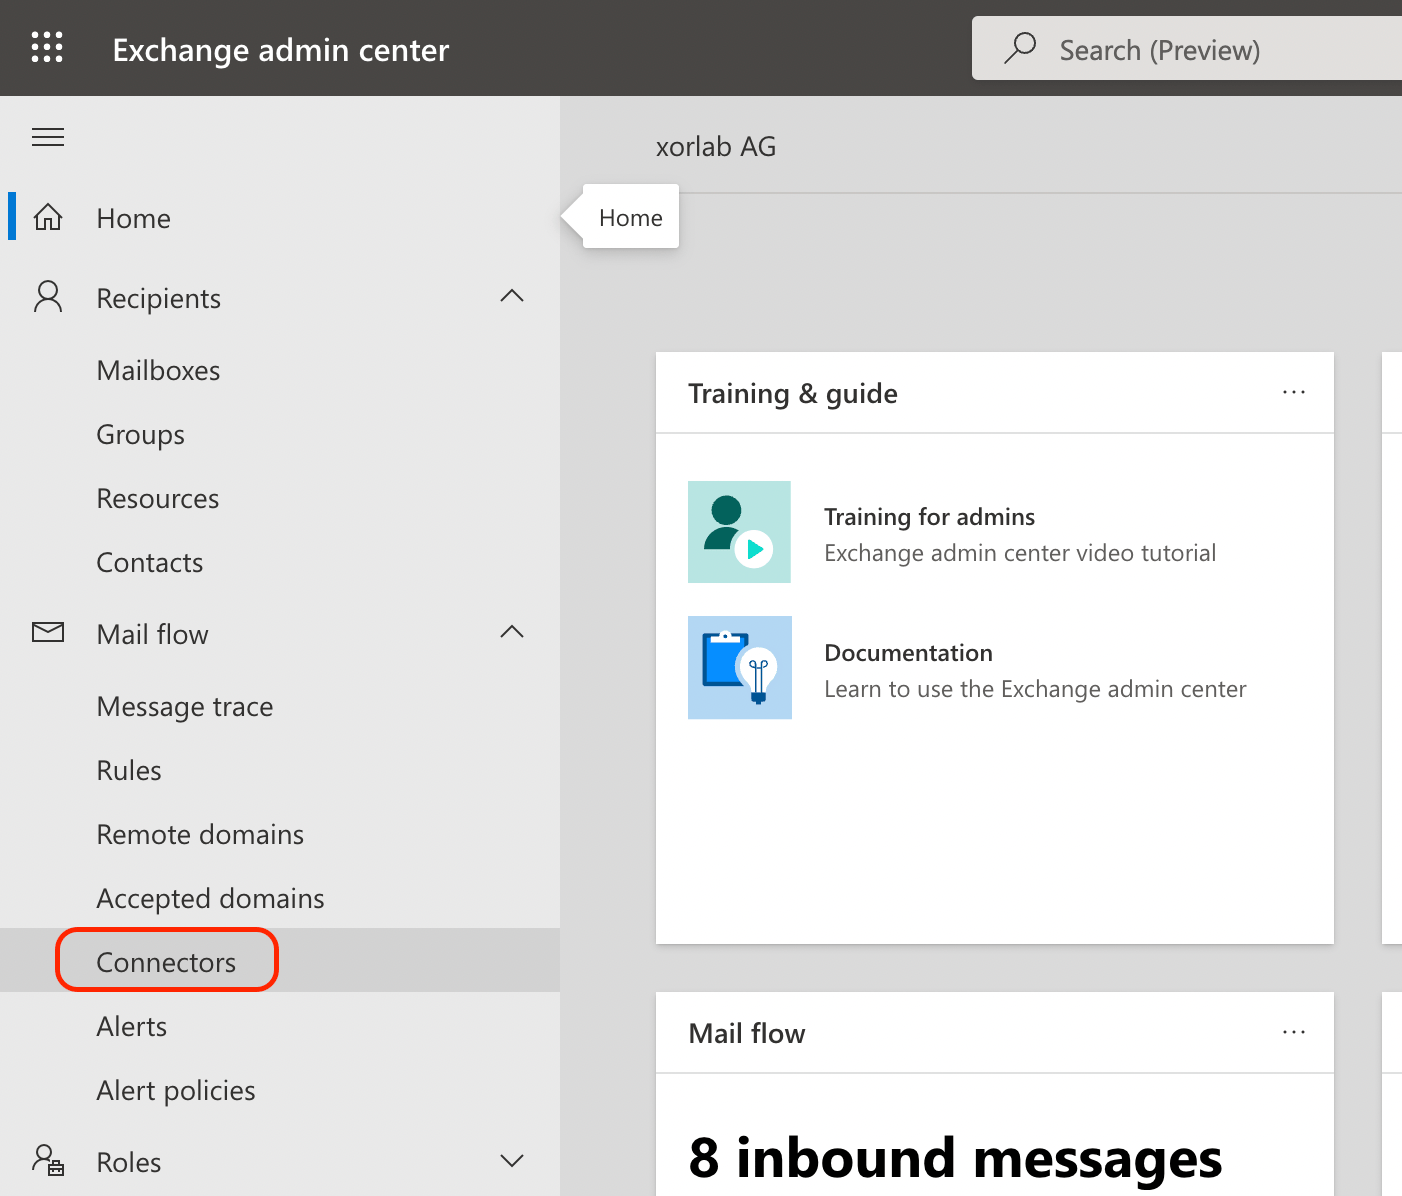
On the Home screen of the Exchange admin center click Mail flow in the left pane and in the expanded list of items click Connectors:
-
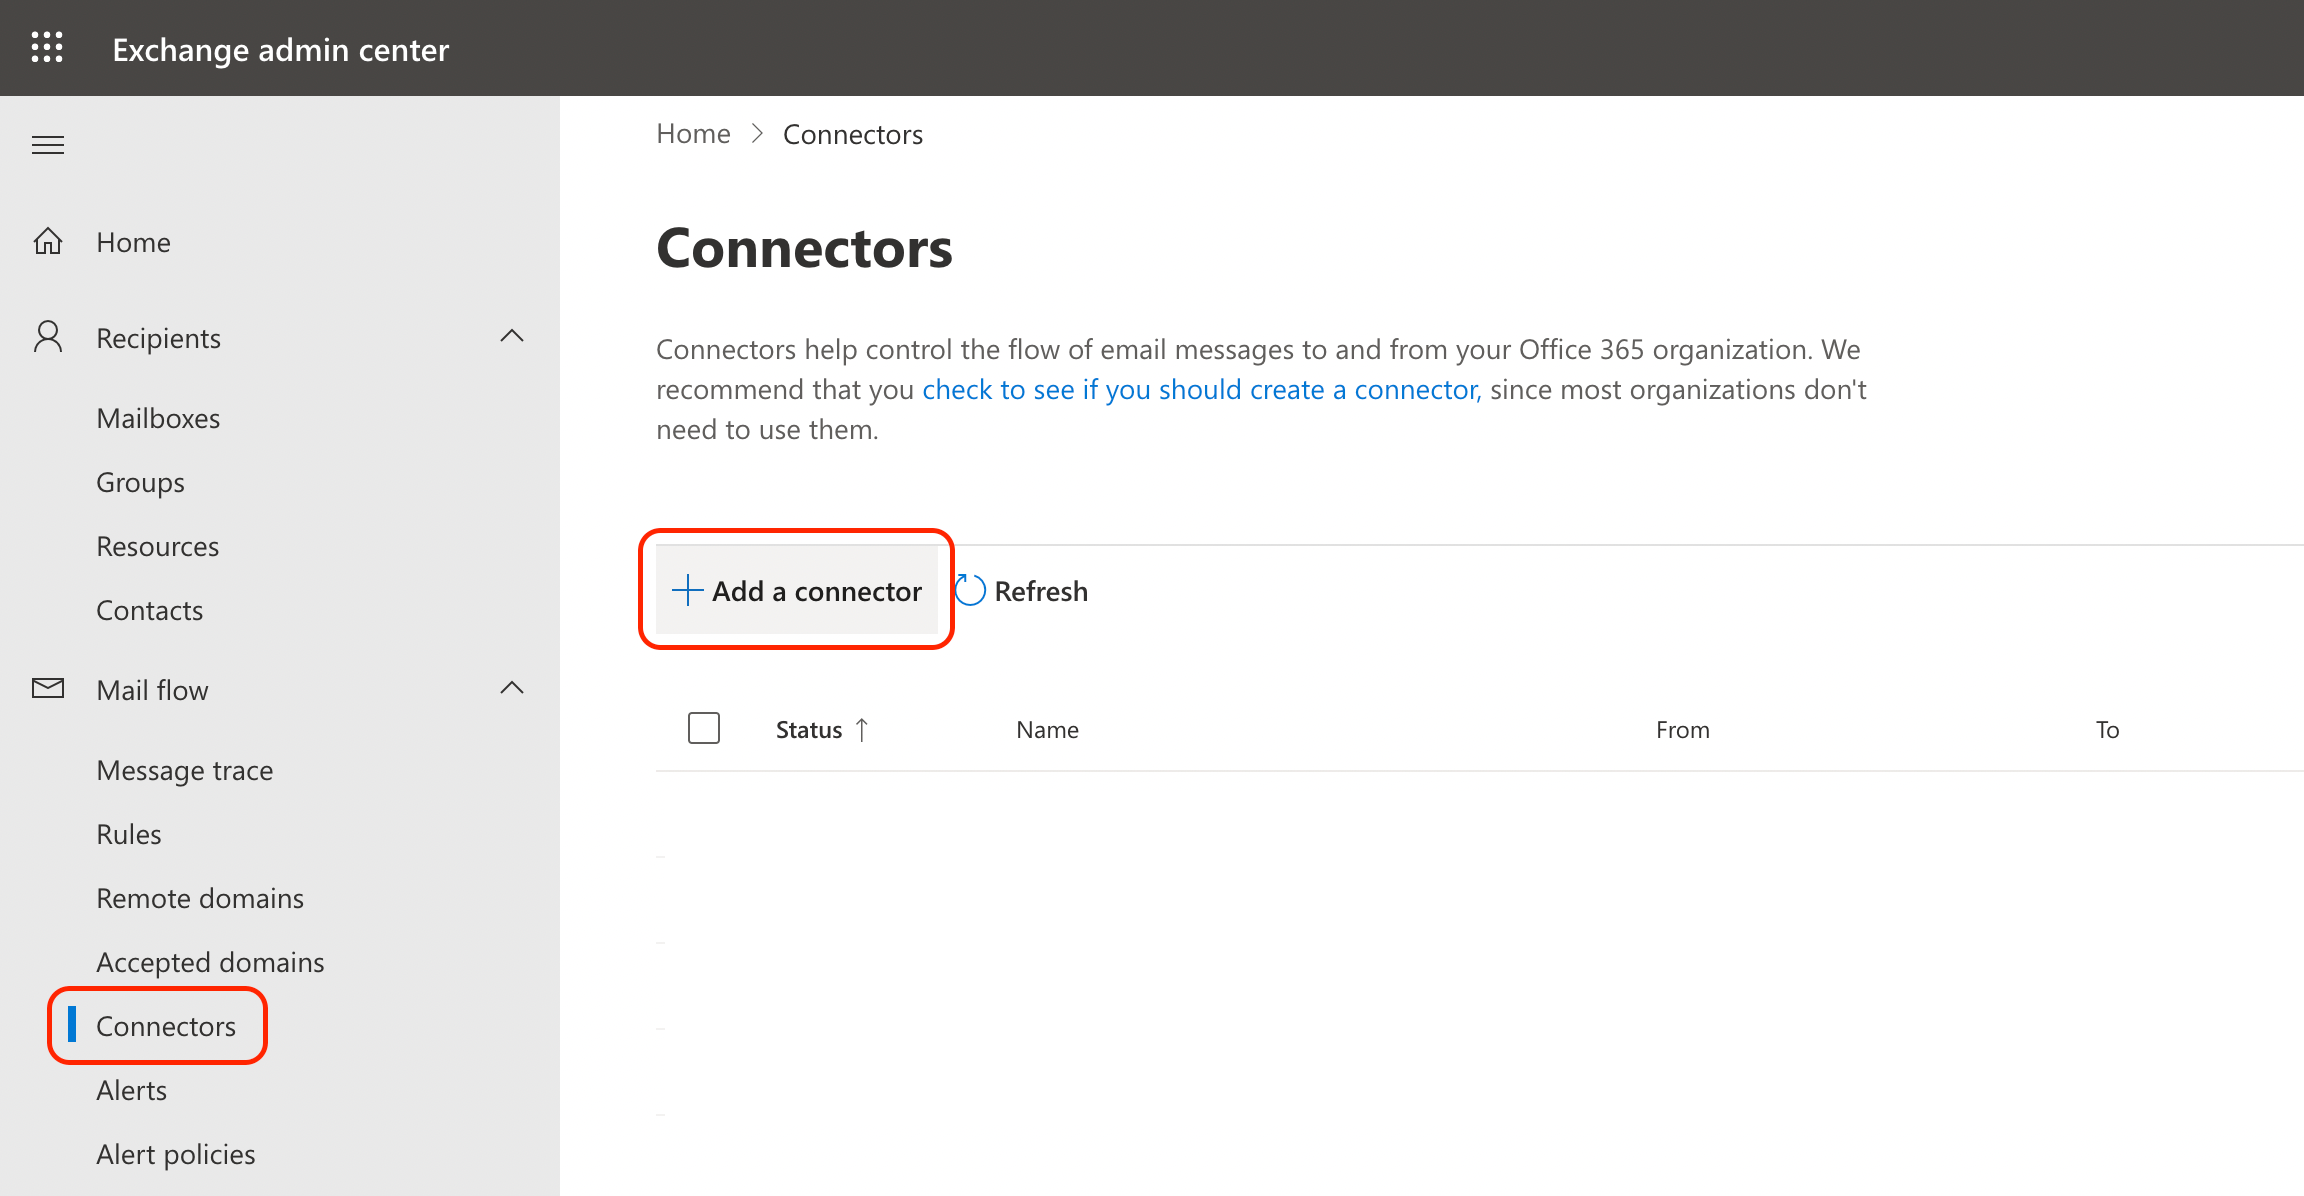
On the Connectors page, click Add a connector.
-
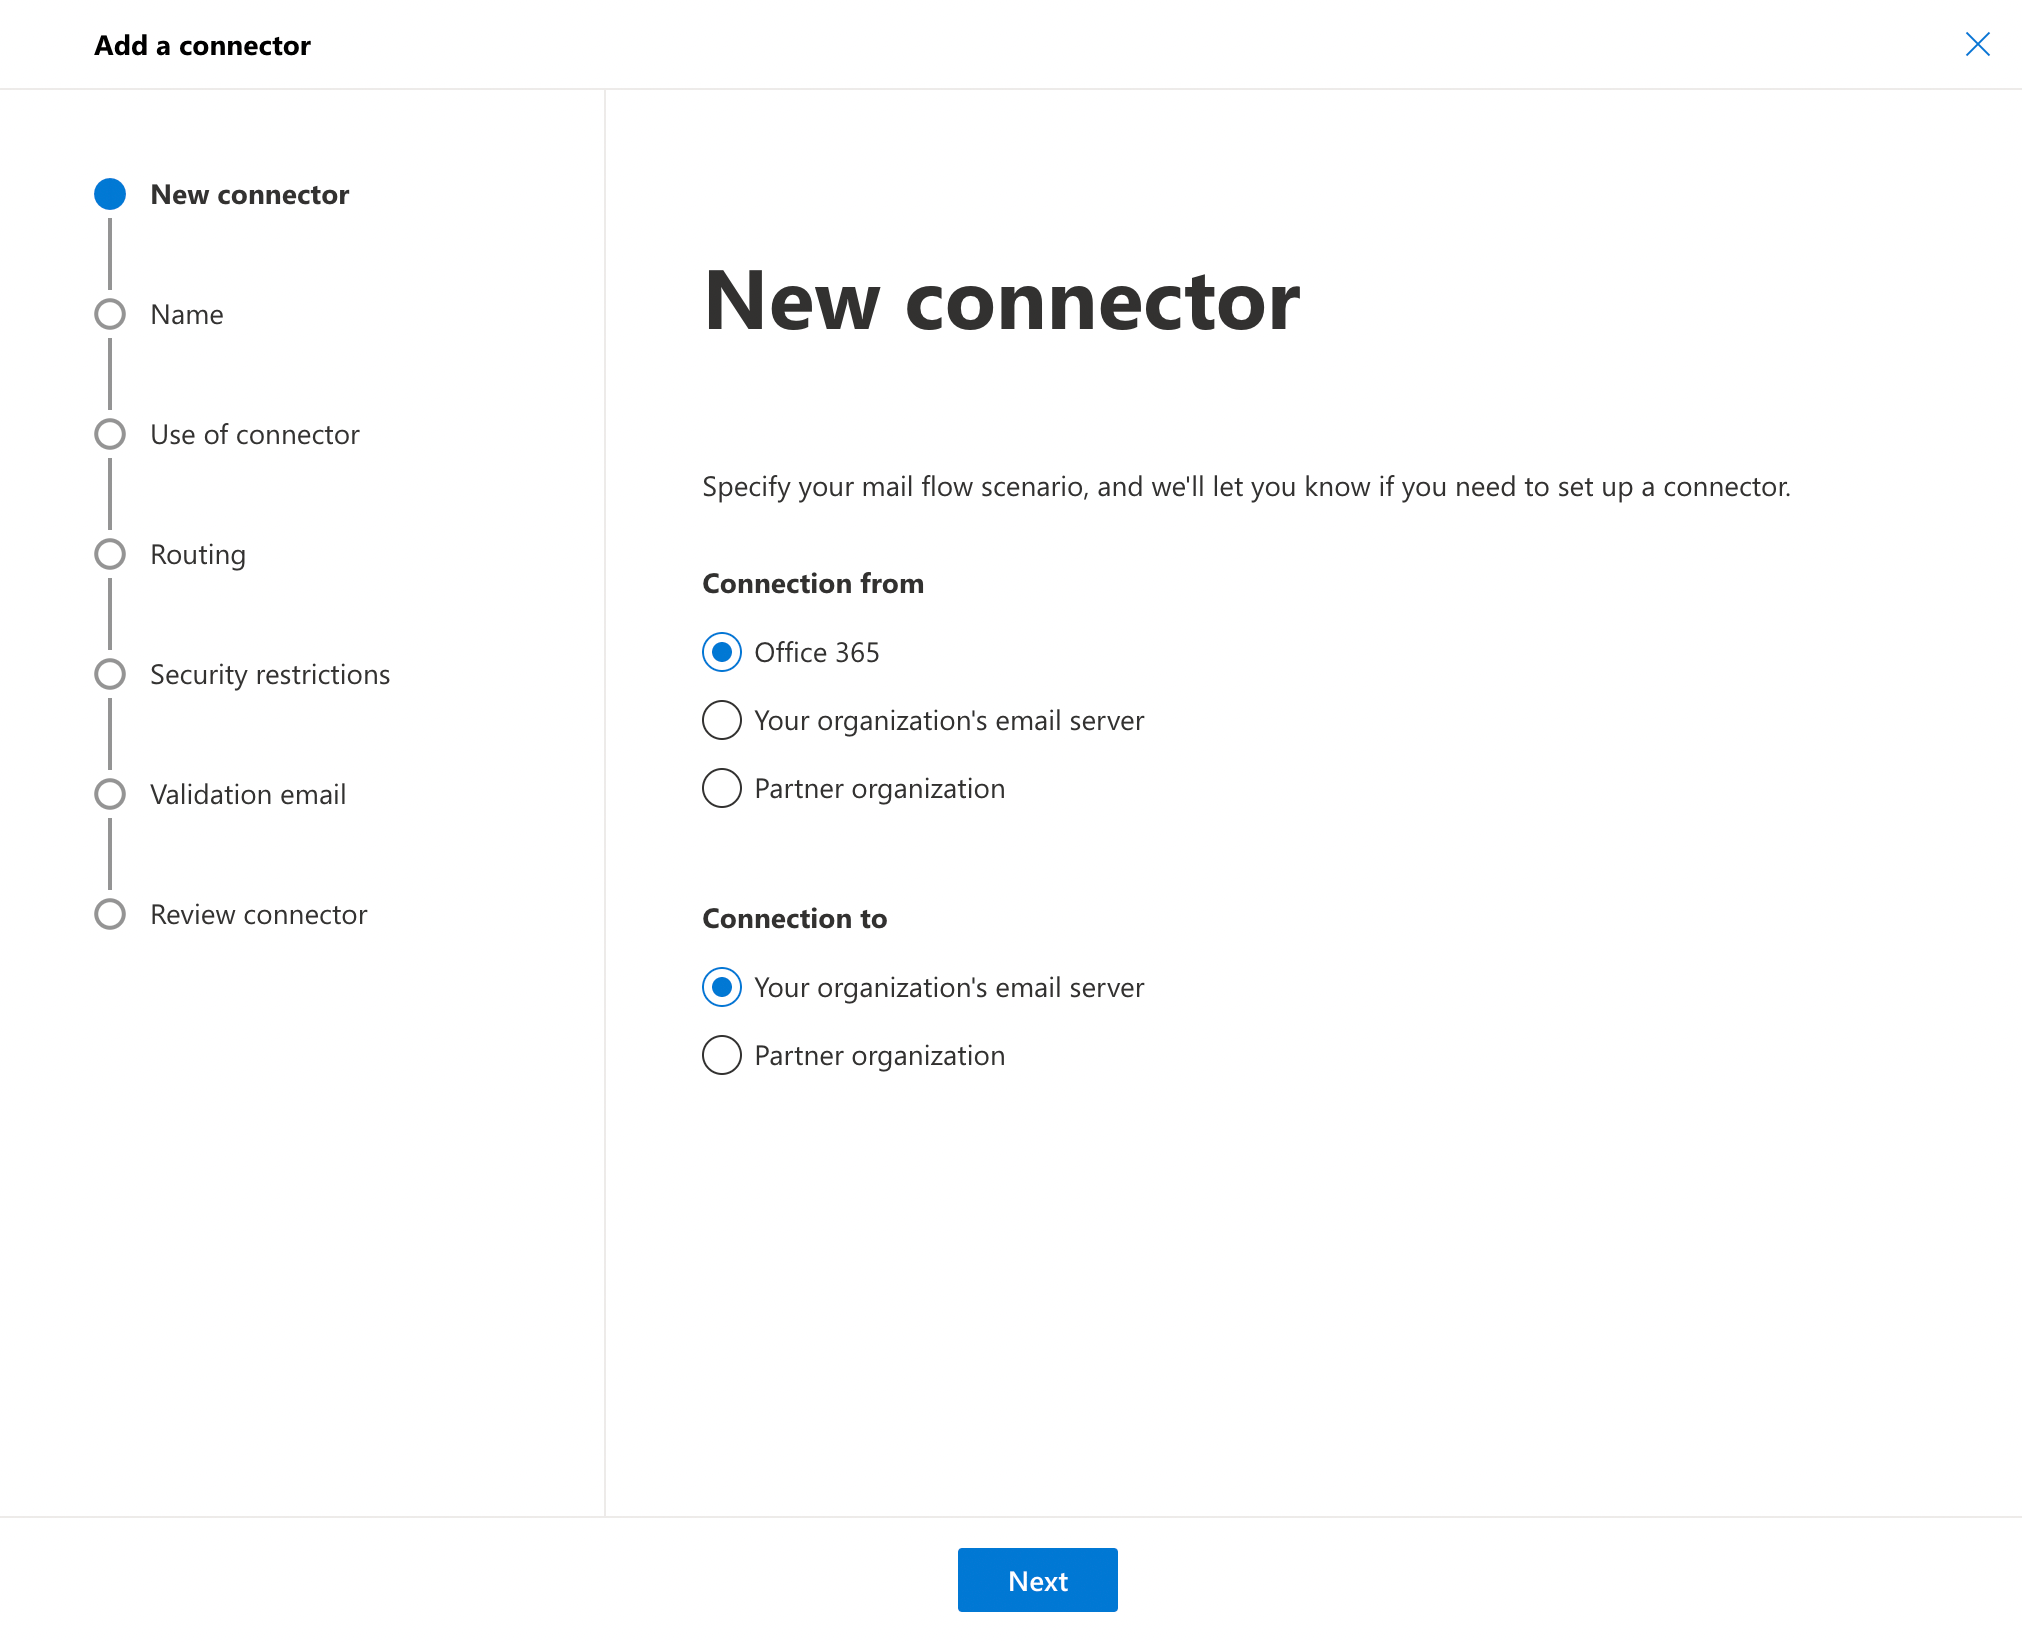
Select Office 365 under Connection from and Your organization’s email server under Connection to and click Next:
-
Set the name of the connector to
Microsoft365Toxorlabon the Connector name screen and click Next: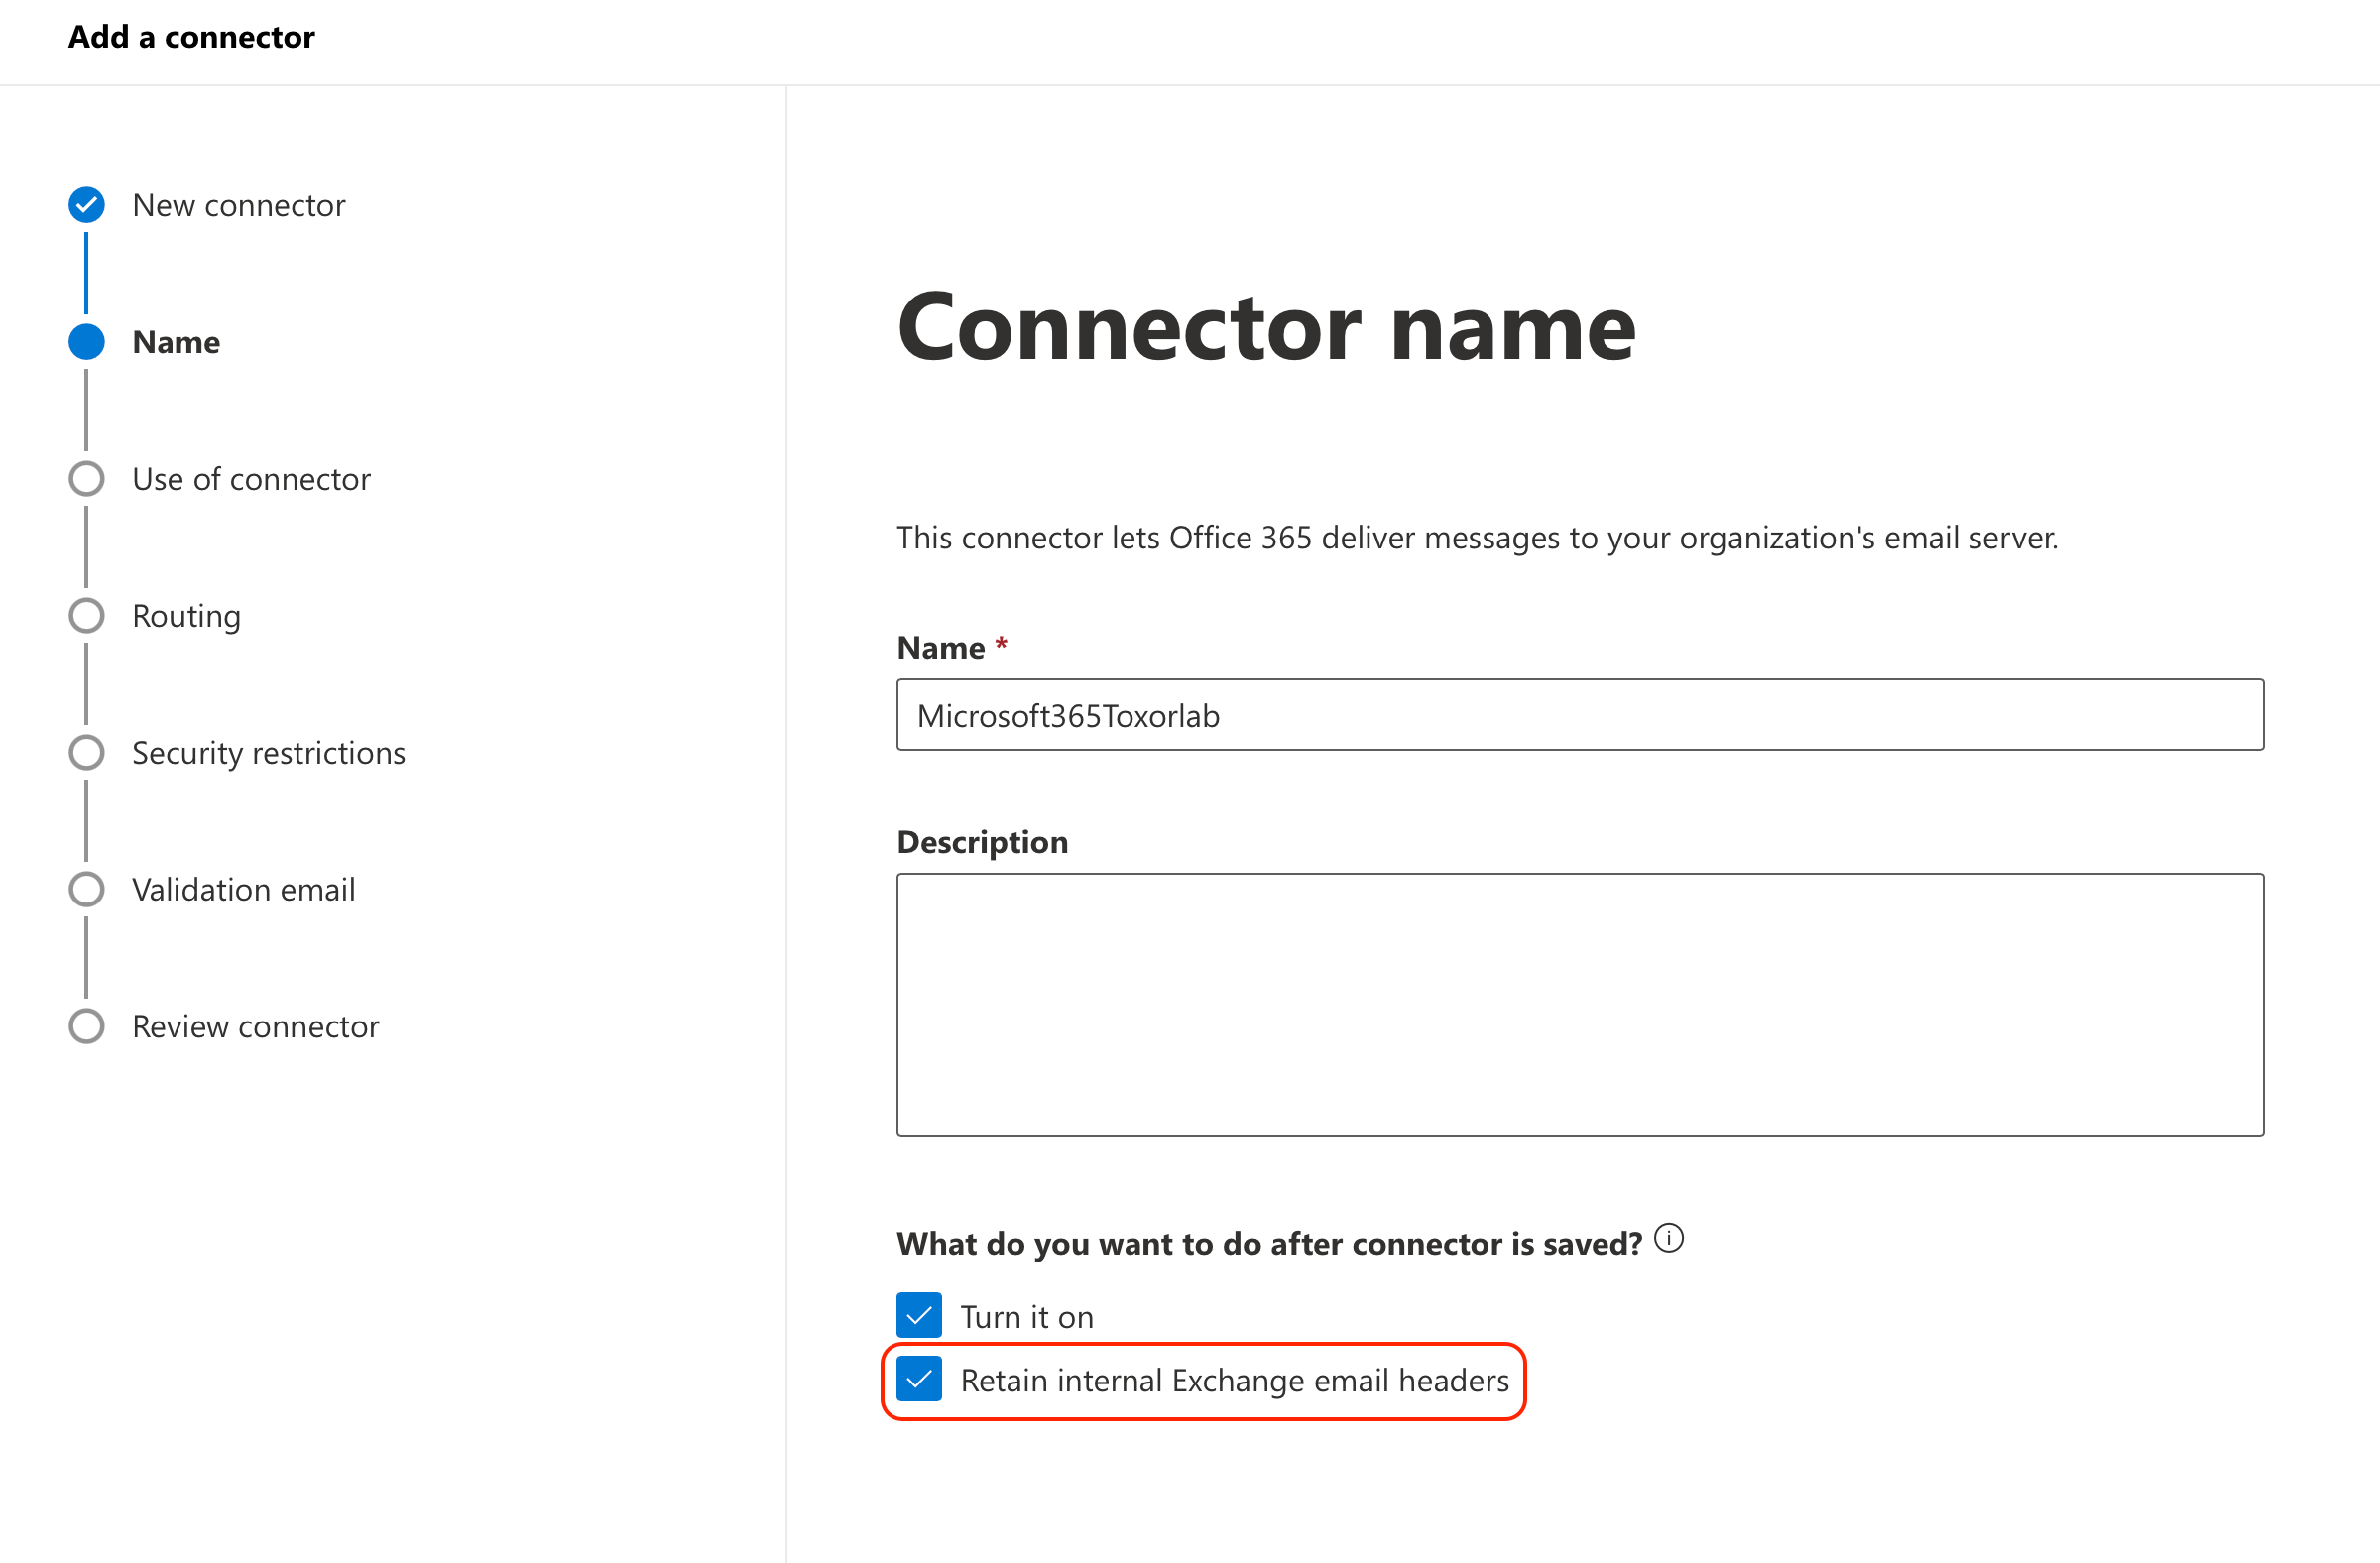
-
On the Use of connector page, choose the third option Only when email messages are sent to these domains and enter your xorlab domain as specified in the
templateDomainproperty (see step #7 in Basic settings), e.g.,mx.xyz.activeguard.cloud: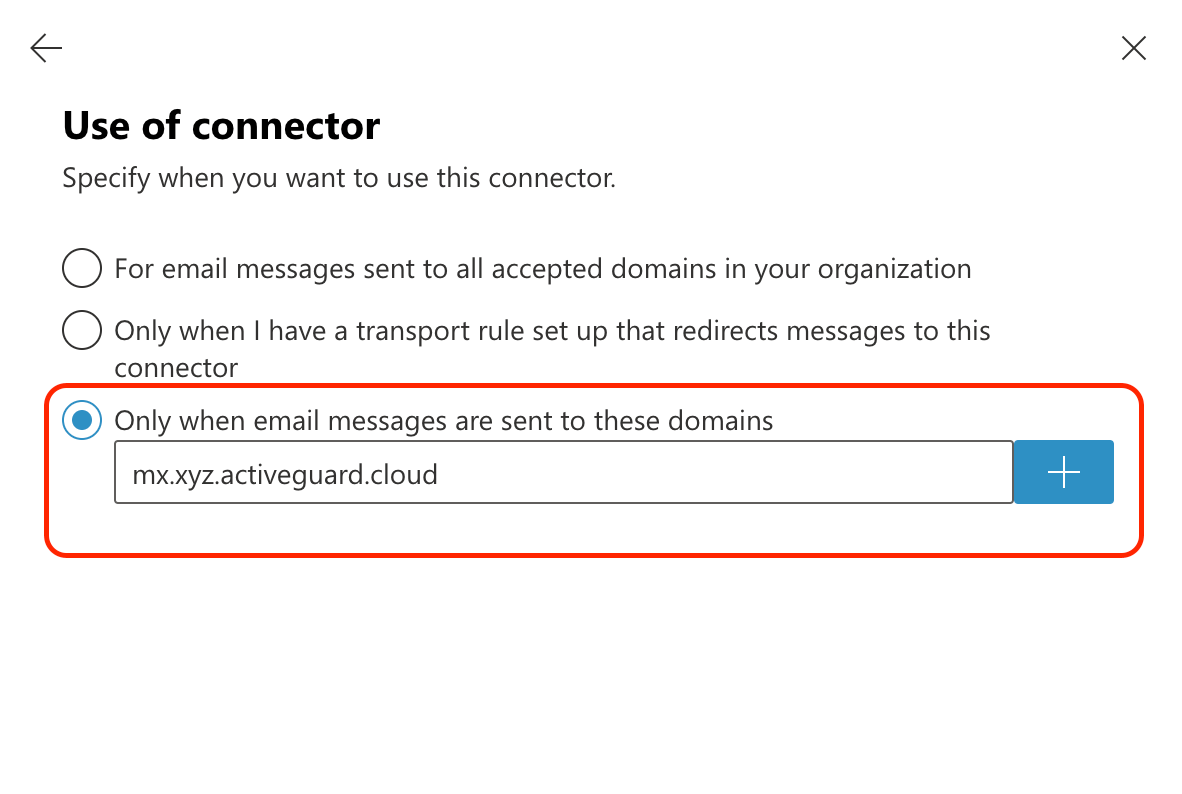
-
Click the plus (
+) icon to add your domain and click Next. -
Add a new smart host with the domain that resolves to the xorlab MTAs on the Routing screen by entering them and clicking the plus (
+) button. If your customer ID for your xorlab instances isxyzyou should addmx.xyz.activeguard.cloud. When you’re done, click Next: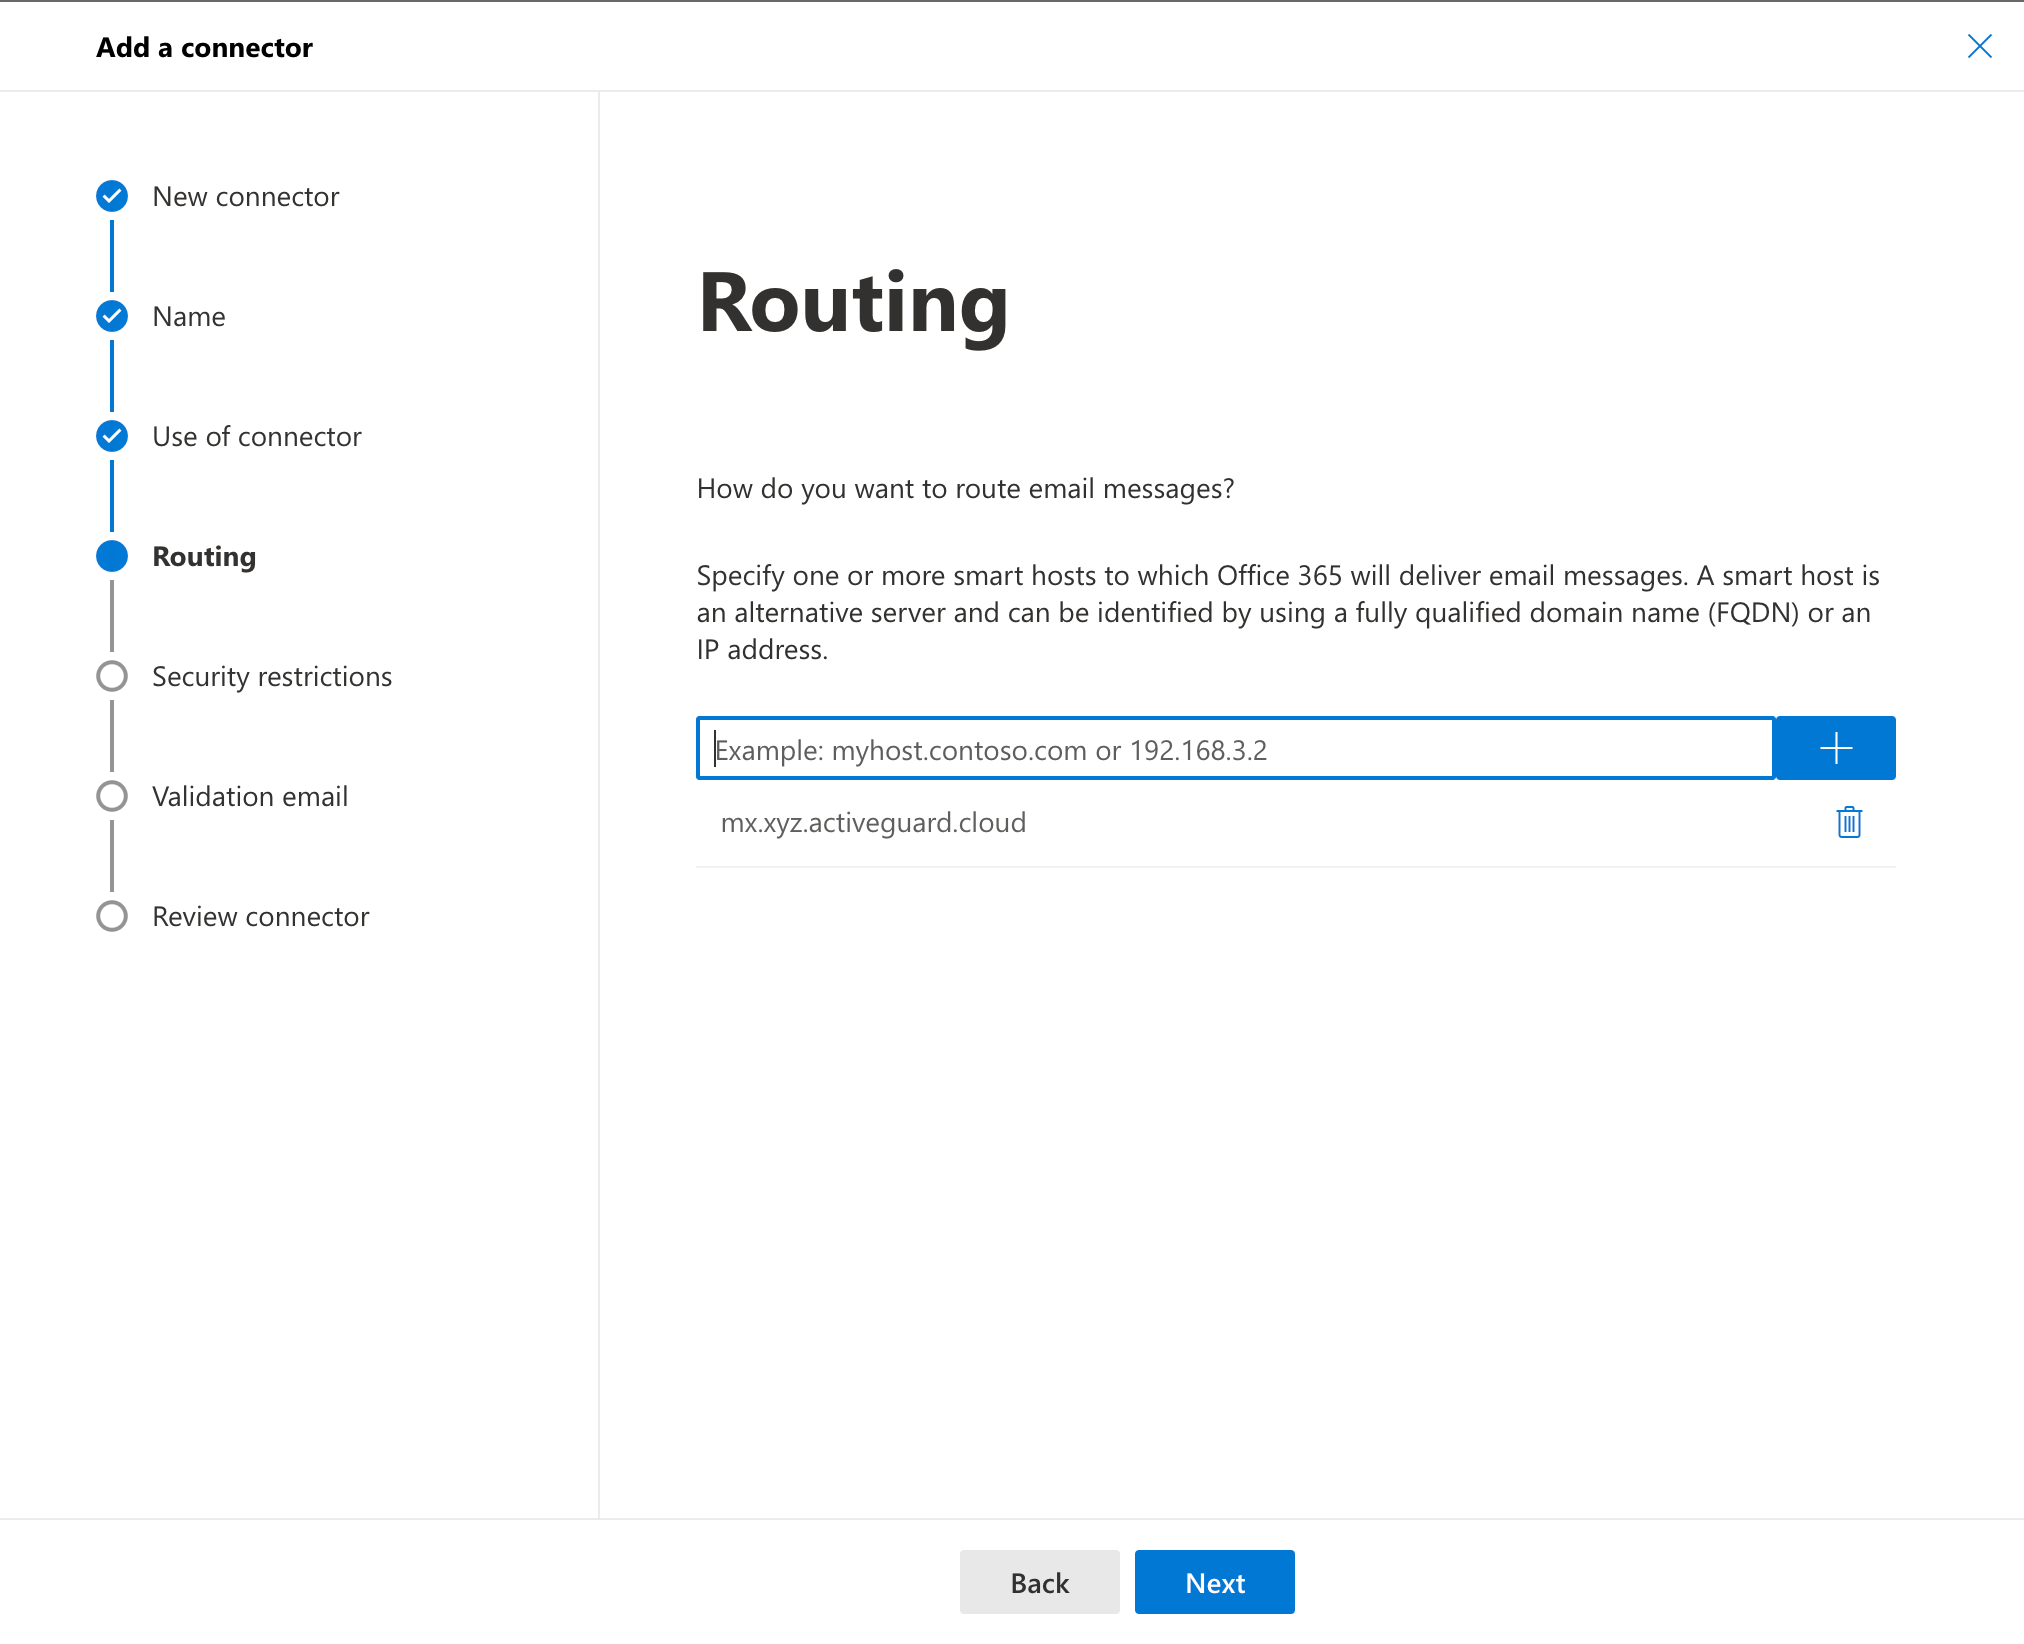
-
On the Security restrictions page activate the Always use Transport Layer Security… option and select Issued by a trusted certificate authority (CA). Click Next:
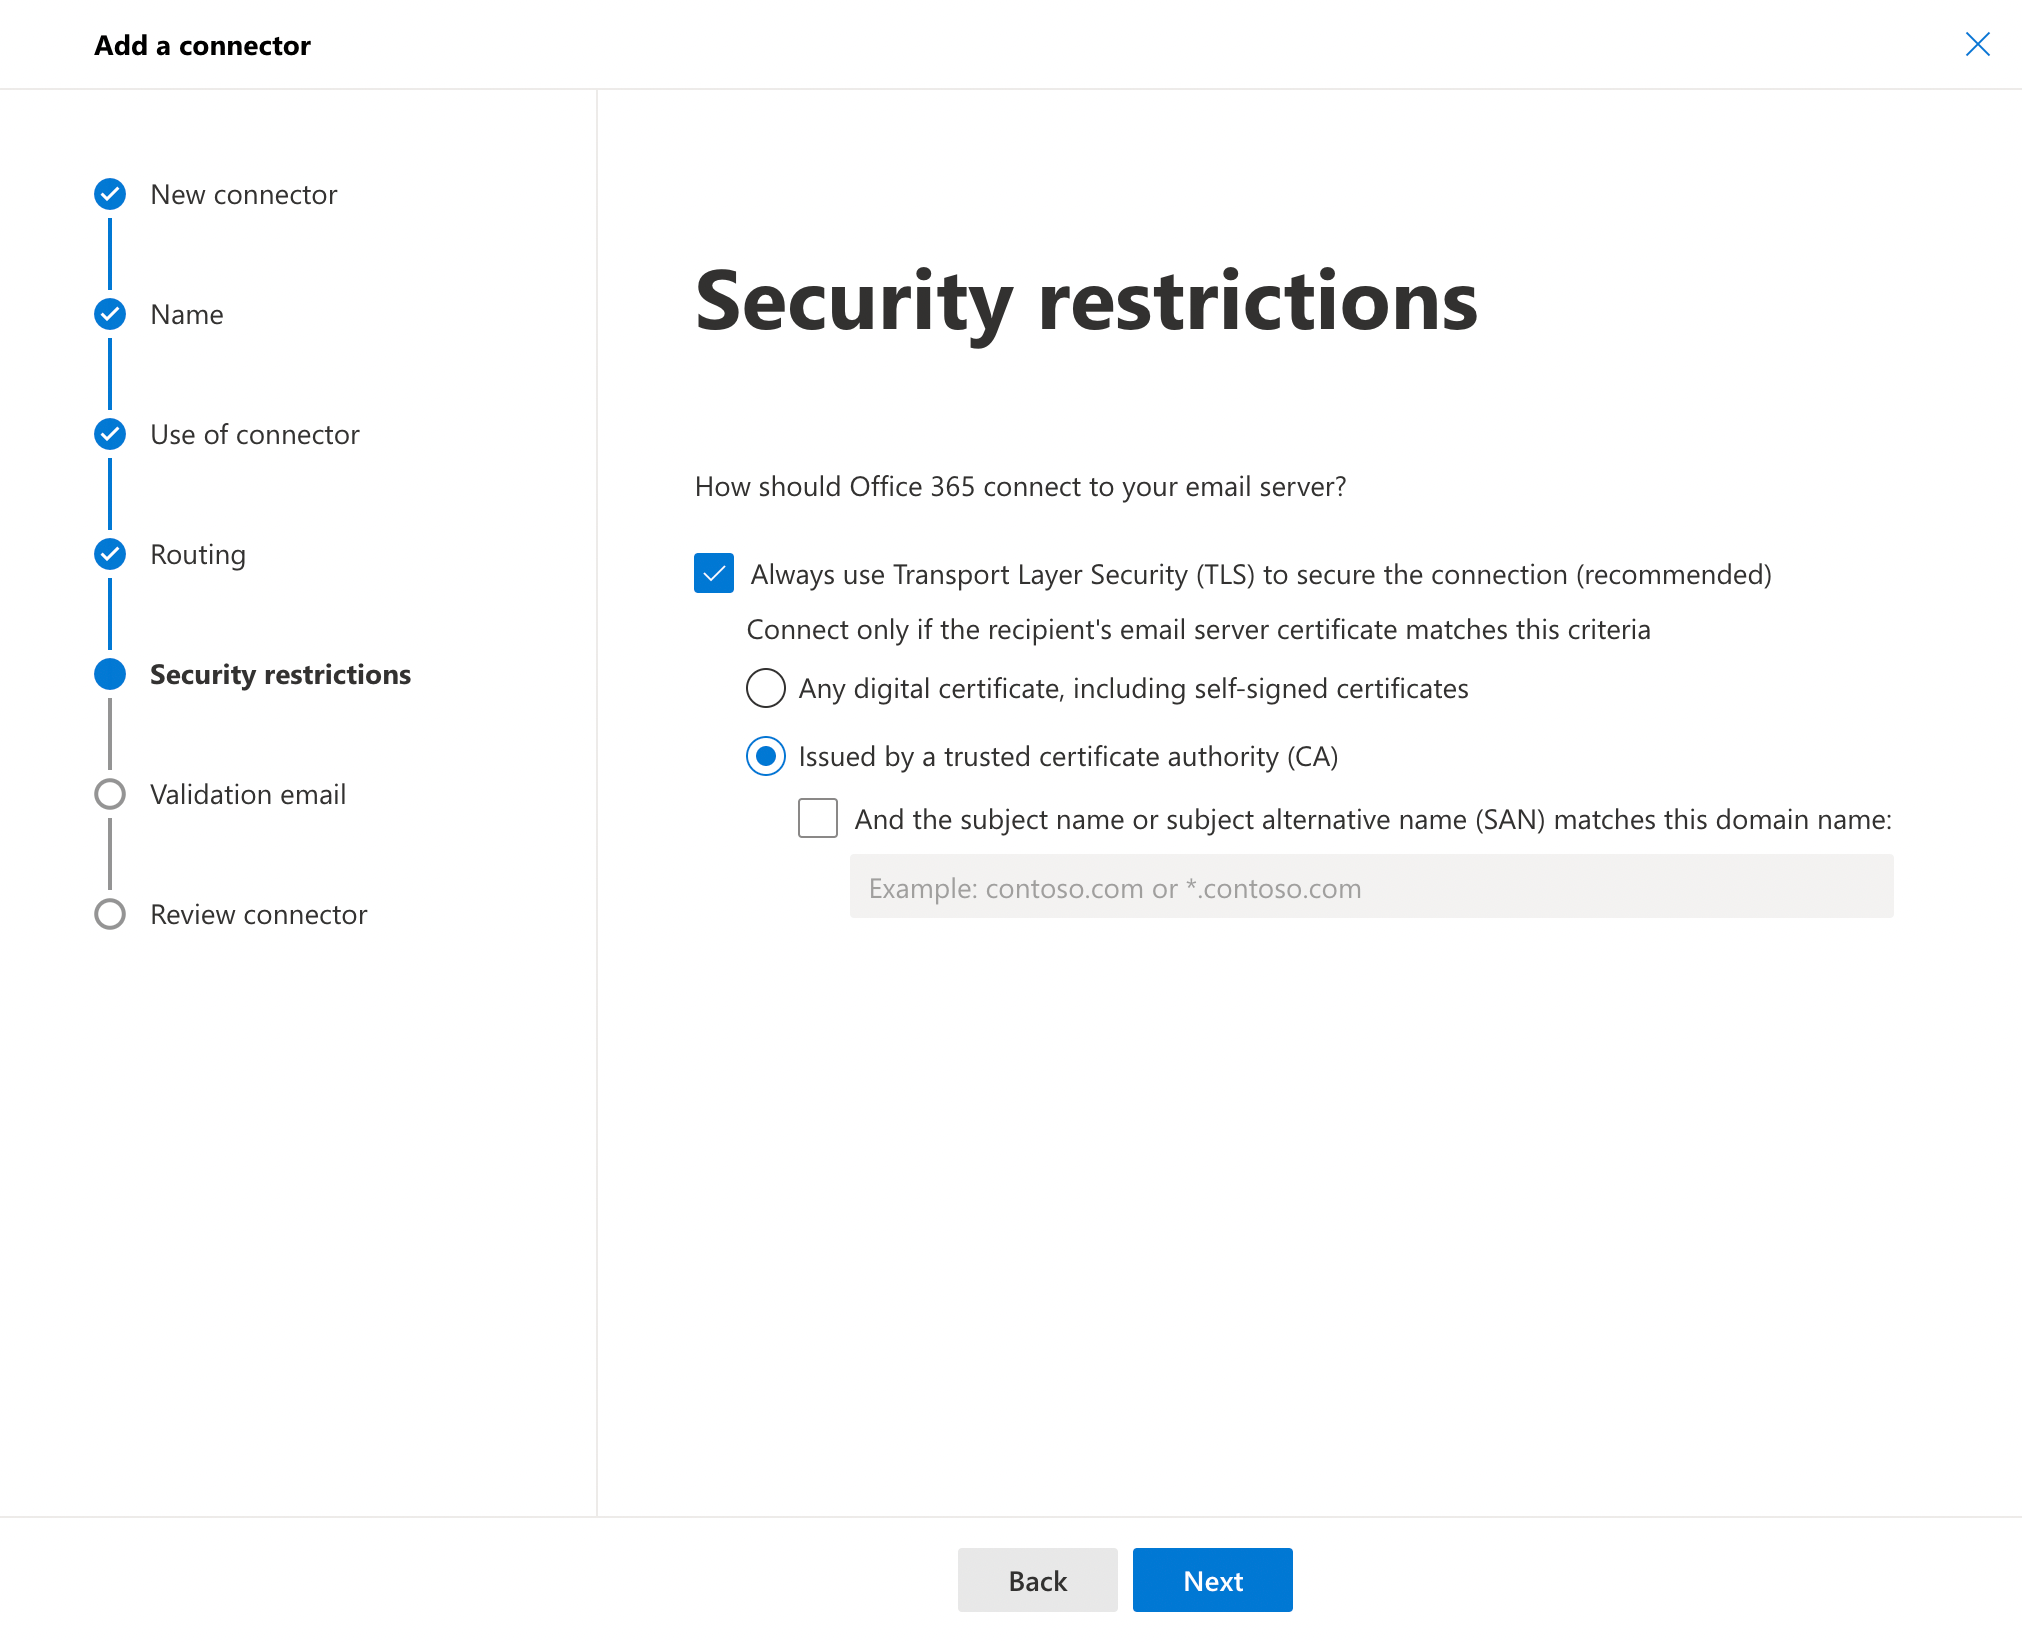
-
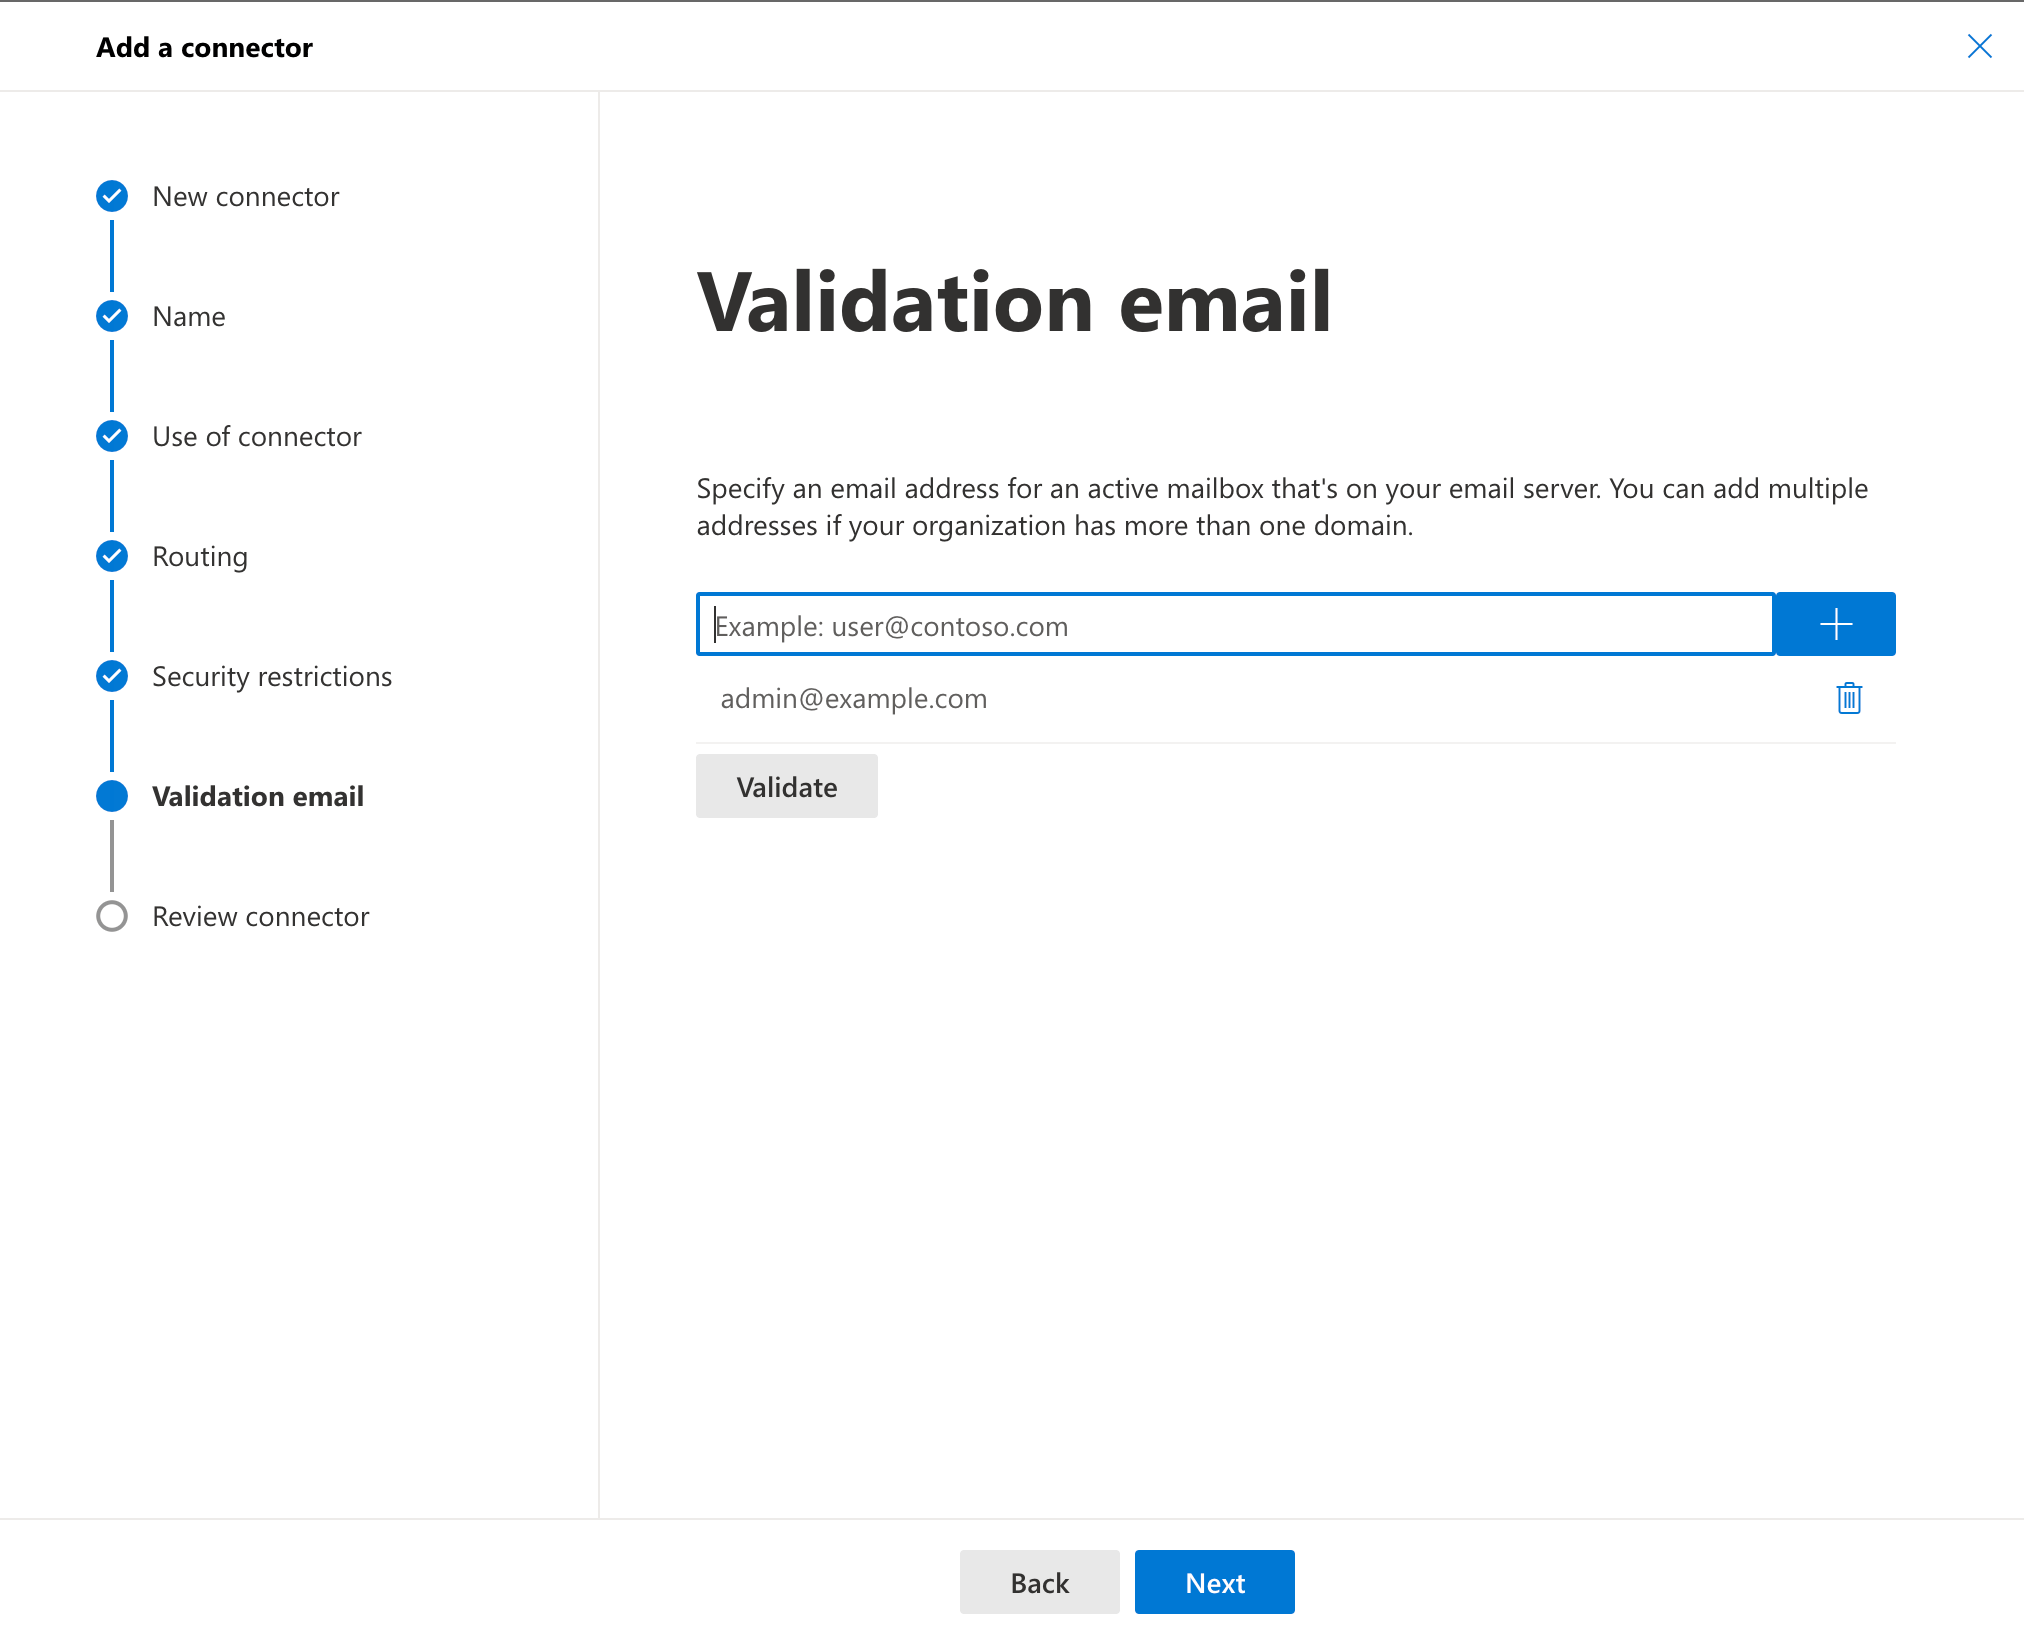
Enter an email address in your connected mailbox where a validation email should be sent on the Validation email screen, click Validate and, after validation, click Next:
- Review the connector and click Create when it’s OK.